In order to synchronize your inventory database with your ad server, you need to connect your ADvendio.com system with your ad server and transfer the ad server's ad spec IDs to your system.
This lesson shows you how to create a new ad server login and how to establish a connection from your ADvendio.com system to your ad server. In this stage, a connection means the unidirectional export of ad server IDs to your ADvendio.com system. None of the information stored in your ad server will be altered, extended or deleted. Any communication between ADvendio.com and your ad server can be ended by deactivating the ad server login. To do so, open an ad server login, click edit and untick the Active box.
For detailed information on the ad servers supported by ADvendio.com, please see our homepagethis section of t the wiki: http://www.advendio.com/tour/integrated-ad-server/Anchor
Create New Ad Server Login
To create a new ad server login, follow these steps:
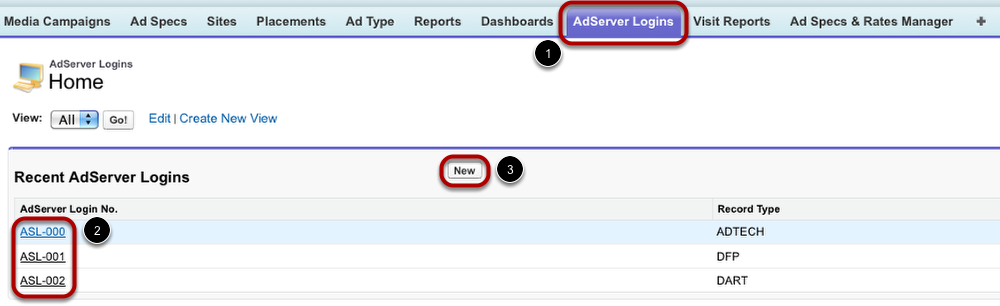
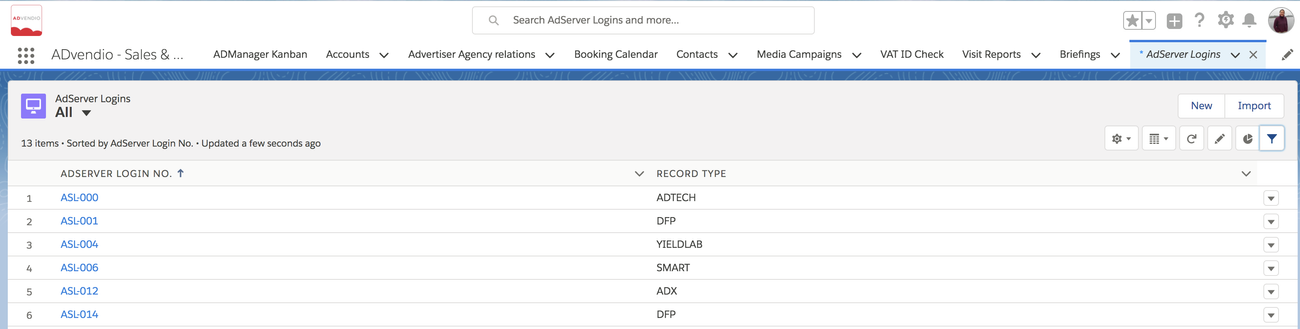
- Go to the Ad Server Logins tabthe App Launcher and search for AdServer Logins.
- In case you have already created an ad server and wish to connect it now, click on to edit the existing record.
- If you want to start from scratch, click the New button.
Create New Ad Server Login
...
You are able to create logins for each ad server multiple adservers you work with. Click on New to open the following page:
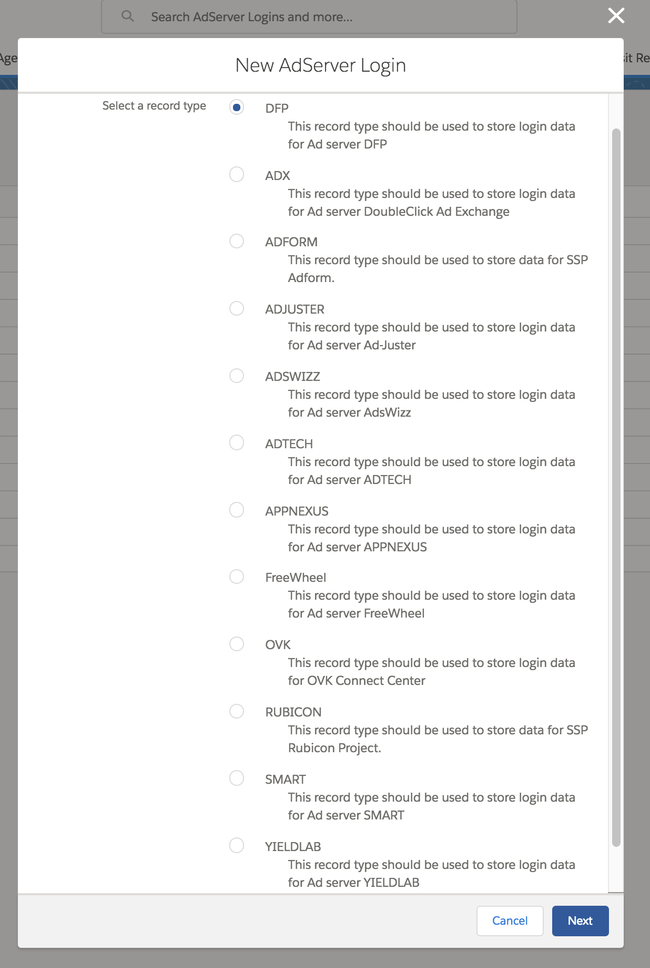
- You first choose the ad server from adserver record type from a pick-list. If you want to create an AOL ONE (ADTECH) login, please send us an API certificate first.
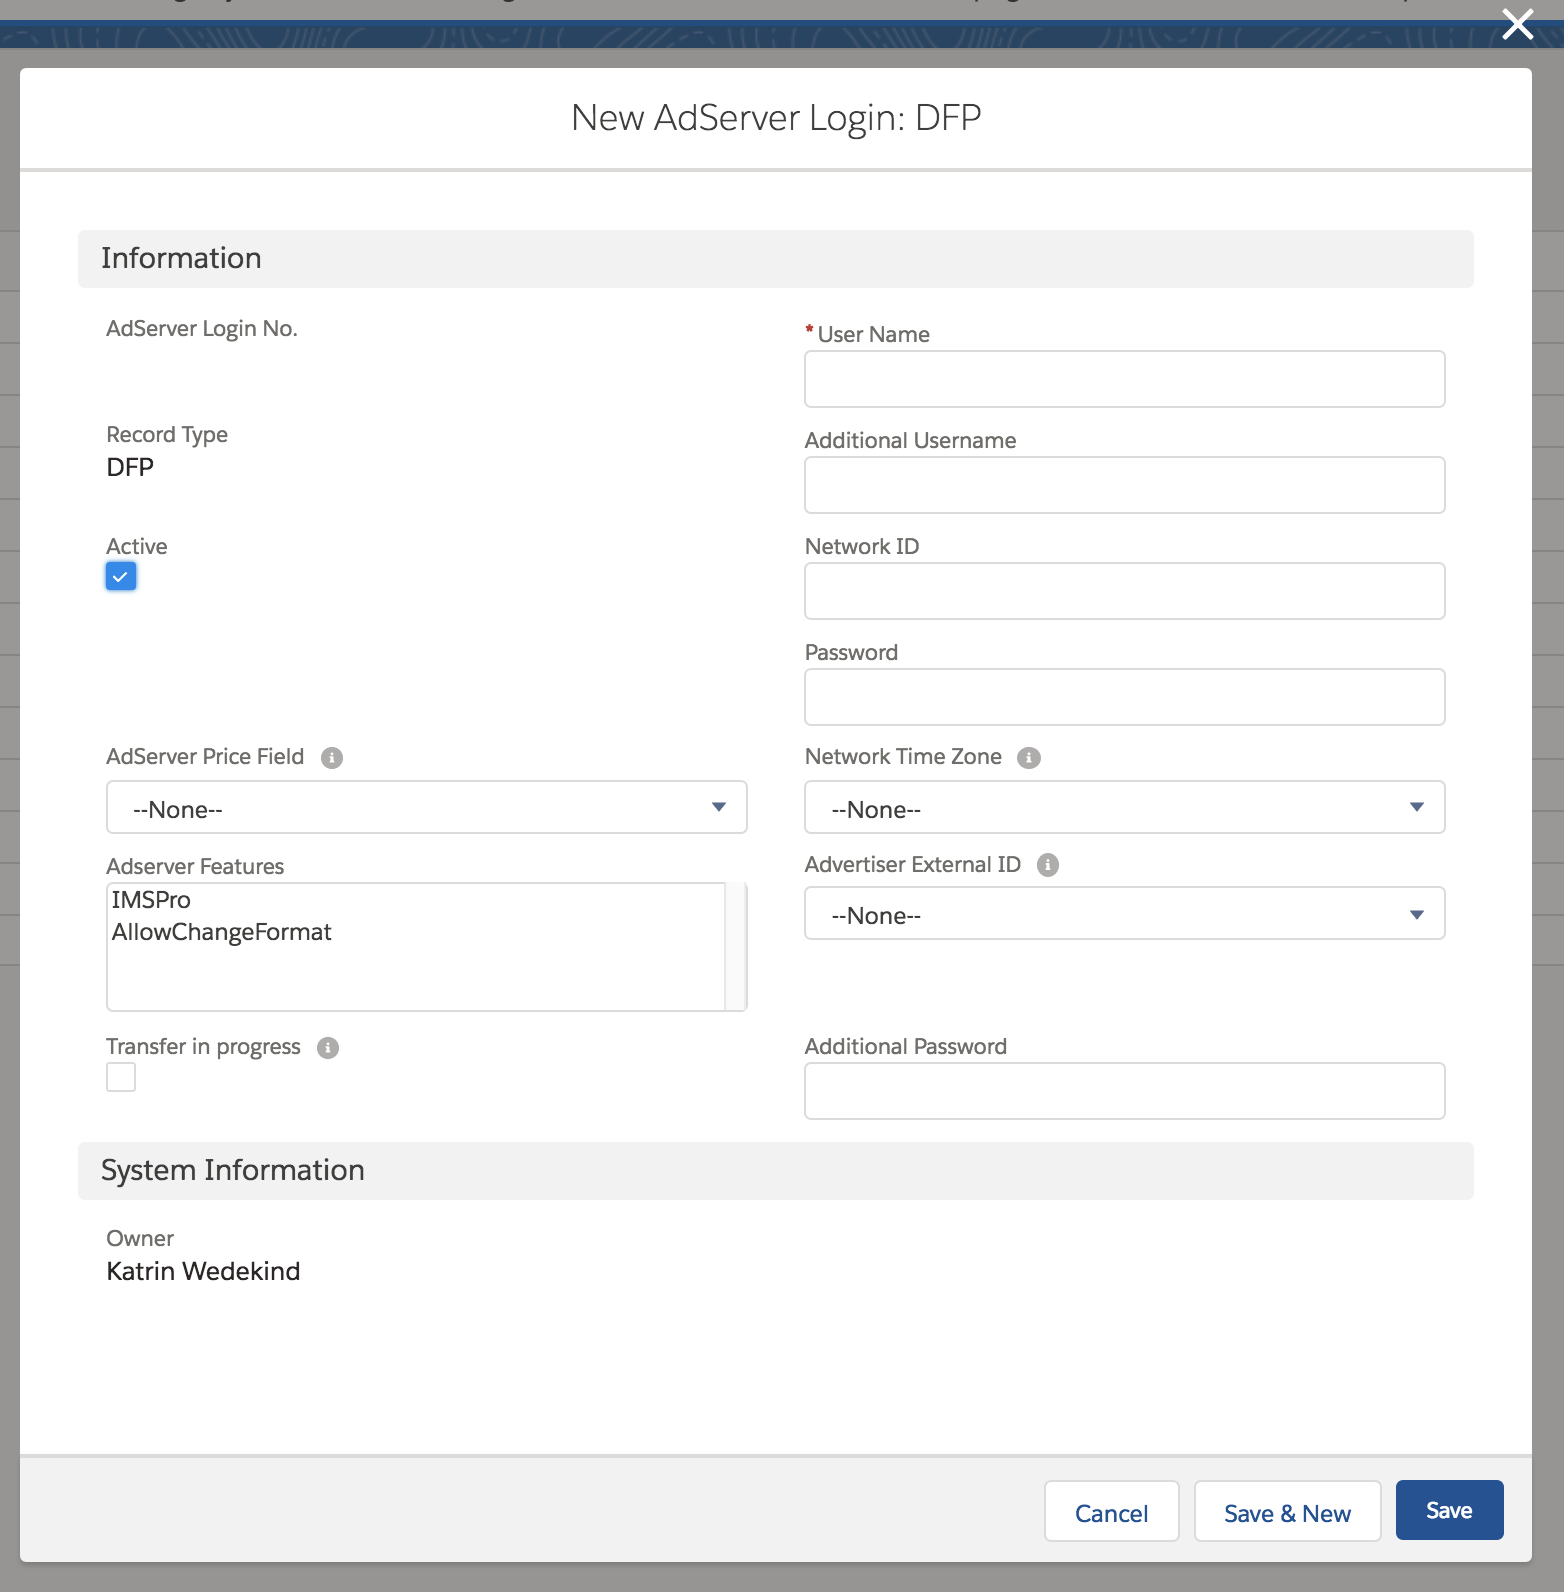
- Enter basic information, including your user name and password for your ad server environment.
- Click Save the record to successfully create an ad server login.
To establish test the connection, open the new ad server login and proceed with the following step.
Editing an Existing Record And Connect to Ad Server
When you have opened an ad server login, you are able to change the record's data, look into its details as displayed in its related lists, e.g. ad server customization, and establish the connection to your ad server.
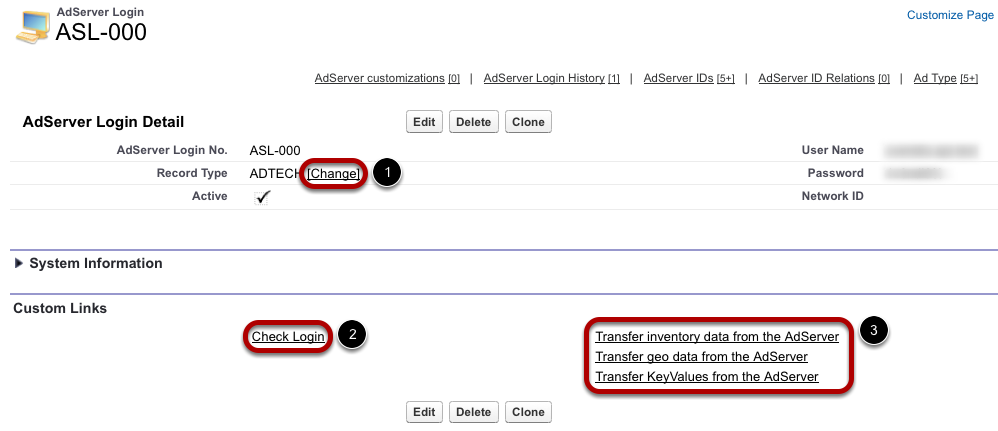
- If you need to alter the login record's ad server, click Change.
- In any case click the custom link Click the custom button Check Login to test the connection.
In case the connection does not work, please check your user name and password, network id and other specifics for your adserver: 7.3.1.1 Which Login User do I use to create Login records - If the connection works, you can proceed to transferring your ad server's data to your ADvendio.com system using the other custom links Transfer from Adserver button. The result page will display exactly how many items have been transferred to your system. These items are then displayed in related lists under the ad server login record.
- The first link transfers inventory data from your ad server to ADvendio.com: The ad server IDs from your ad server are imported into your ADvendio.com system in a hierarchical tree structure. For information on how to connect the ad server IDs to the ad specs in your inventory database, see the lesson 'Connect Ad Specs via Ad Server IDs'.
- The second link imports geo data: This link transfers available countries, regions and cities into your system in a hierarchical tree structure so you are able to choose from exactly those destinations that are supported by your ad server.
- The third link does the same with key values which are then available in the media configuration.
...
- For further details read more 7.3.2 Transfer Data from the AdServer.