| Version | 2.118 and up |
|---|---|
| Supported Adservers | Google AdManager, Appnexus, Freewheel, Adswizz |
| Info |
|---|
This feature is currently in Beta, not all functionalities are generally available and the feature set is subject to change over the coming releases. You can however already use this to see how to best incorporate this feature into your business processes and also to test the current capabilities. We will further deliver improvements in the coming releases. |
Required Fields and Objects
Before starting to use Targeting Set, you might need to configure a few things in the setup.
Please make sure that your users have access/edit permission to the following objects and all fields:
- Targeting Sets
- Targeting Groups
- Selected Targeting Sets
- Targeting Set Account Assignment
- Targeting Set Ad Spec Assignment
- Targeting Set Ad Type Assignment
Make also sure to provide at least access to the Targeting Sets Tab.
Depending on what you are willing to use, you might need to modify the page layouts from the following objects, in order to show Targeting Set Related Lists:
- Campaign Item
- Ad Type
- Ad Spec
- Account (only Advertisers)
Create and Edit Targeting Sets
...
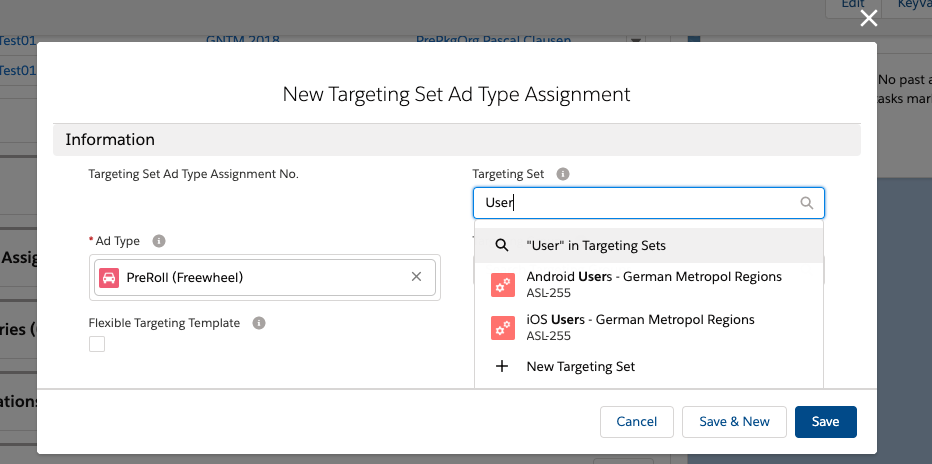
Besides Campaign Items, you can also assign Targeting Sets either to Ad Specs, Ad Types or Accounts. This way you can connect certain criteria to Inventory or Accounts.
Currently, you need to assign the Targeting Sets manually, by going to the related lists and looking for the Targeting Set XYZ Assignment list. If you can find the list, your administrator might need to add it to the page layouts first.

Click the new button and search for a Targeting Set your would like to connect with your Ad Type, Ad Spec or Account.
| Info |
|---|
Assigned Targeting Sets will be pushed automatically to the AdServer if:
Attention: Please be aware that these criteria will then always be used and are currently not displayed in the Media Configuration or on the PDF documents. |
Manually edit Targeting Sets (Advanced Criteria Editing)
...
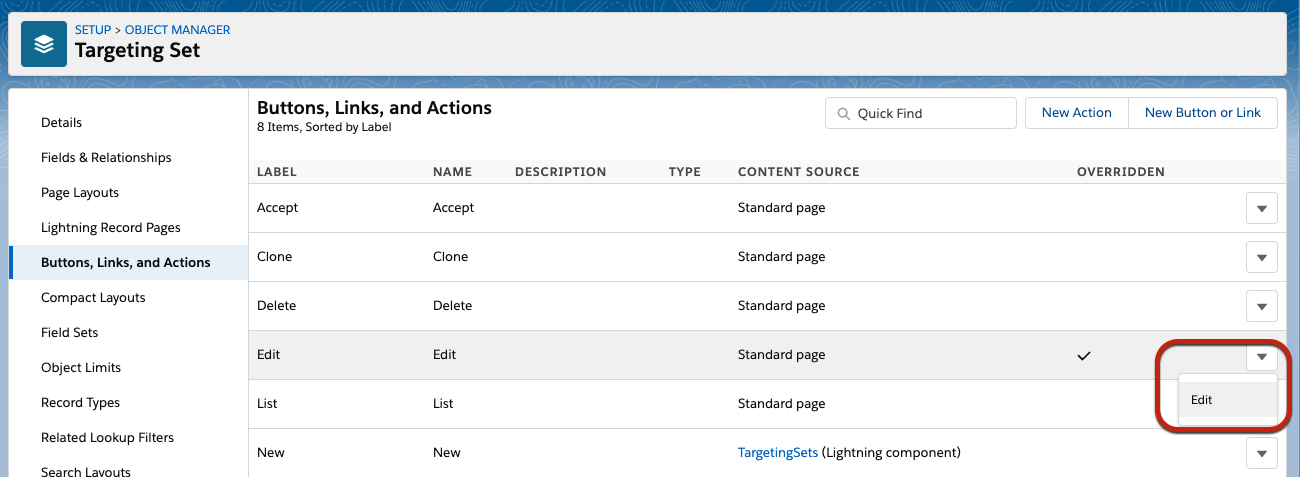
There select the Buttons, Links and Action tab and edit the override of the "edit" button
The default setting here is "Use the package default override", this needs to be set to Standard Page:

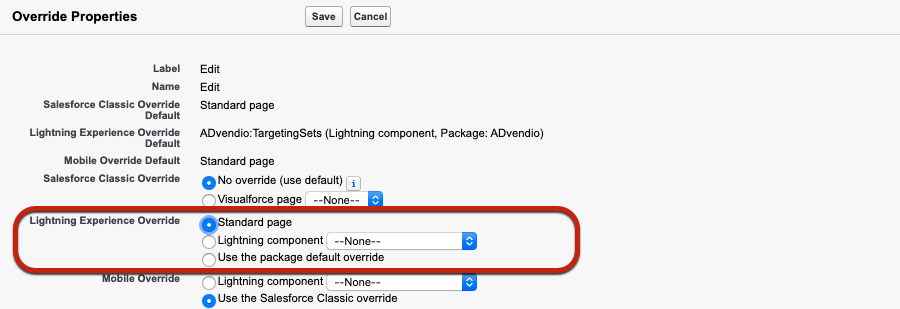
Now when you open a Targeting Set directly, you can click the edit button and modify the fields. AdServer Targeting is used for all general Targeting Criteria (Geo, Inventory, Device Targeting ect.) all other fields are named after the targeting they define.
...
To manually enter Targeting, the following format needs to be used:
| Field | Format | Example | Comment |
|---|---|---|---|
| Frequency Capping | X per Y unit | 2 per 1 hour 1 per 30 minutes | the possible combinations and units depend on the AdServer in use, we currently have no further validation here |
| Day Time Targeting | {"Day":[{"hour":"StartingTime"},{"hour":"StartingTime"}],"Day":[{"hour":"StartingTime"}]} | {"Monday":[{"hour":"1"},{"hour":"2"}]} | |
| Preconfiguration | {"FieldName":"Value","FieldName":"Value"...} | {"advendio__priority__c":"high"} | These field values will be transported directly to the AdServer and not set at the Campaign Item, thus only AdServer related fields |
| Info |
|---|
For Frequency Capping and Day Time Targeting you can also create a Campaign Item, configure the desired targeting and save the item. Then you can copy the string out of the Frequency Capping / Day Time Targeting fields from the Campaign Item and reuse them in Targeting Sets. |