| Table of Contents |
|---|
| Info |
|---|
| The general feature is called Forecasts and it has two record types assigned to it: Site and Sales Goals. |
1. Set Up Goals
Navigate to the app launcher and search for Forecasts. (Make sure to open the ADvendio forecasts. If you happen to have a full Salesforce licence you might find a second object called "forecasts" which is a standard Salesforce feature). Create a new record by clicking on the New button:
...
If both types are set up by your administrator please choose the correct record type and proceed:
1.1 Sales Goals
1.1.1 Forecast - Sales Goals Visual Force Page
A new forecast or editing an existing forecast for each sales representative can be done by using the visual force page or the object Forecast itself. Advertiser, Agency, Site, Media and Publication Dates can be used. However, not all fields are required (like Advertiser or Agency), so that a more coarse planning is also possible.
...
- Advertiser: Select for which Advertiser this goal is applicable.
 Attention: If you set an Advertiser Agency Relation, the Advertiser won't be populated until you click on the "Revenue Forecast" button on the Advertiser-Agency Relation.
 - Agency: Select for which Agency this goal is applicable. You can also use only an Agency without an Advertiser for your goals. Attention, if you set an Advertiser Agency Relation, this field the Agency won't be populated until you click on the "Revenue Forecast" button on the Advertiser-Agency Relation.
- Site: Select a Site using the Lookup icon.
- Media Type: Value can either be selected using the picklist or it is automatically filled by selecting a site (if media is filled at this site).
- Media Segment: Select a media segment using the picklist.
- Start Date: Select a Start Date to define a specific date range.
- Period: Select a Period to define specific date range.
- End Date: Value is automatically calculated using the start date and period.
- Amount: Enter an amount.
- Add / Delete: Click the green plus icon to create a new line or the red delete icon to remove the corresponding line.
...
e.g.
Sales Rep A - Annual delivery revenue goal $1,000,000
Sales Rep B - Annual delivery revenue goal $2,000,000
Sales Rep C - Annual delivery revenue goal $1,500,000
1.1.2 Sales Goals: Edit Forecasts for other people
Alternatively, you can enter data using the standard Salesforce site layout. Here you can also enter the same data at the object Forecasts, which makes it possible to enter data for other users than yourself. Your administrator has to enable this: 7.2.5 Setup Forecasts (Sales/Site Goals).
...
| Info |
|---|
| Note: Advertiser or Agency can be left blank using the object Forecasts and are automatically populated using the object Advertiser-Agency-Relations. |
1.2 Site Goals
1.2.1 Forecast - Site Goals Visual Force Page
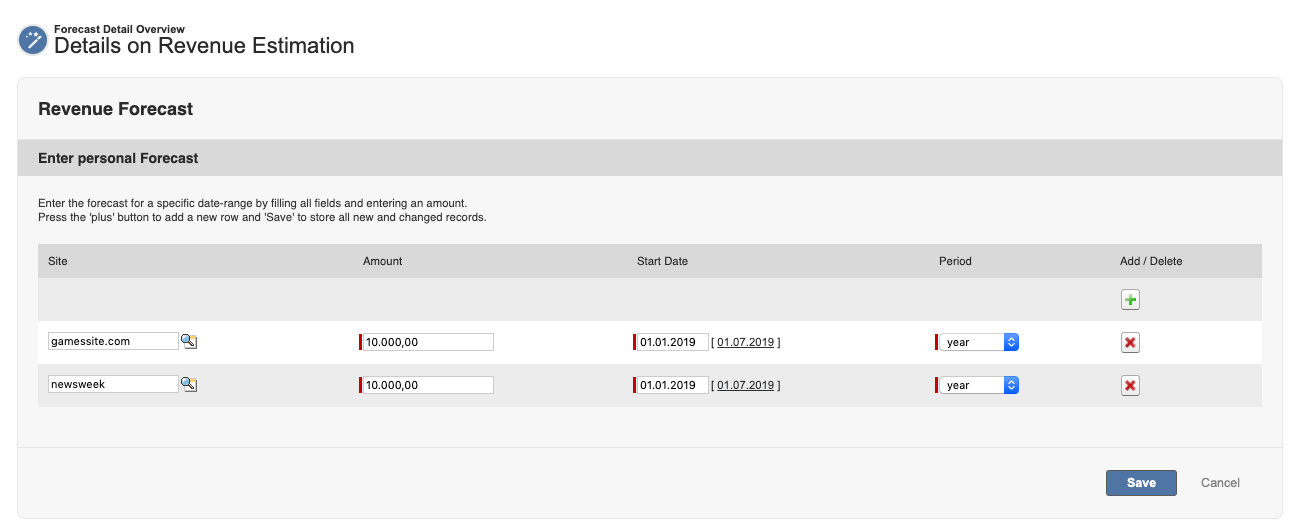
Enter all relevant information to define the site goals for each sales rep by the appropriate period:
- Site: Select a Site using the Lookup icon.
- Start Date: Select a Start Date to define a specific date range.
- Period: Select a Period to define a specific date range.
- Amount: Enter an amount.
- Add / Delete: Click the green plus icon to create a new line or the red delete icon to remove the corresponding line.
Click the button Save to store all new and changed records.
1.2.2 Site Goals: Edit Site Goal Forecasts
Alternatively, you can enter data using the standard Salesforce site layout. Here you can also enter the same data at the object Forecast. Your administrator has to enable this. 7.2.5 Setup Forecasts (Sales/Site Goals).
...