TEXT (Was ist Yieldlab?)
Yieldlab - Create Ad Server Login
Before activating the integration between ADvendio and your Yieldlab network, you have to create a Yieldlab Ad Server Login first.
Navigate to the Ad Sever Login:
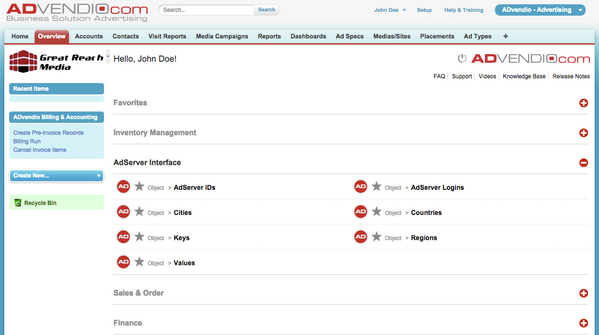
- Navigate to Overview.
- Scroll down and open the section AdServer Interface.
- Click the button AdServer Logins.
- Click on New AdServer Login to create a new record.
- Select Yieldlab as record type and click Continue.
Yieldlab - Edit Ad Server Login
Enter all necessary information to create the Yieldlab integration.
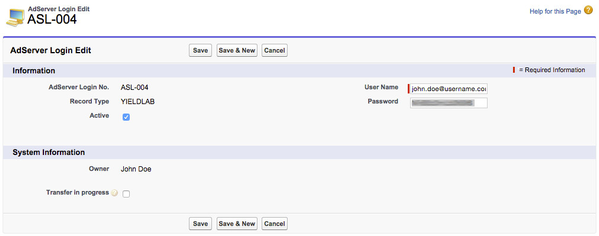
After selecting the record type Yieldlab please enter User Name and Password:
- Enter User Name.
- Enter Password.
- Click the button Save.
You have successfully created the Yieldlab integration.
Note: You can validate the Yieldlab integration by clicking the link Check Login at the AdServer Login detail page.
Title
Description
*Image*
Description:
- fsf
- adada
- asdsda
Description
Note: Description
To activate the integration between your ADvendio org and your Yieldlab network proceed as follows:
1. Open the "Overview" tab.
2. Navigate to the section "AdServer Interface" and click on "AdServer Logins" to open the Adserver Logins tab.

3. On the Adserver Login page click on "New AdServer Login" to create a new record.

4. Select "YIELDLAB" as record type and click "Continue".

5. Fill out the relevant fields and click on "Save".

6. On the detail page of the newly created record click on the "Check Login" link. You should receive a success message, if the entered credentials are valid.

7. Navigate back to "Overview" -> "Setup & Setting" -> "Delivery Report Settings"

8. Within the section "Delivery Report Settings for RTB-Server" fill out the relevant data and click on "Submit".
