With approval processes, you are able to create structures to review items. Thus, you can apply hierarchical structures in your team's work. These approval processes define what happens when an item is submitted for approval and who may approve these items.
Manage Approval Processes
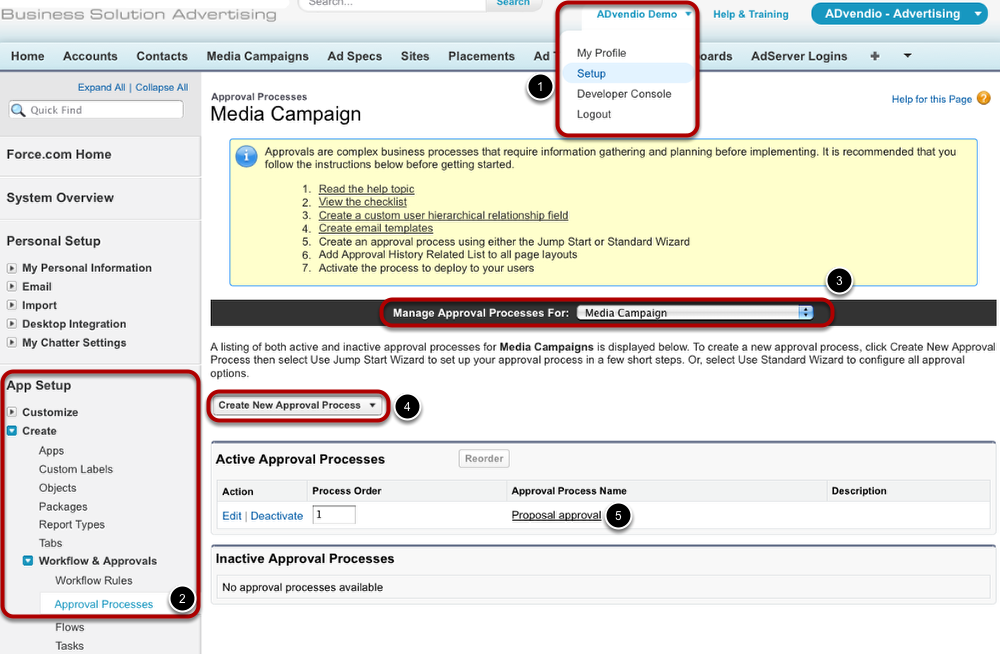
You find the approval processes in your setup:
- Open your User Setup.
- Go to Approval Processes under App Setup / Create / Workflow & Approvals.
- Choose the object type for which you want to manage approval processes.
- If you want to create a new approval process, click the Create New Approval Process button and choose one of the available values.
- To see an approval process's details, click on the process's name.
Approval Process Details
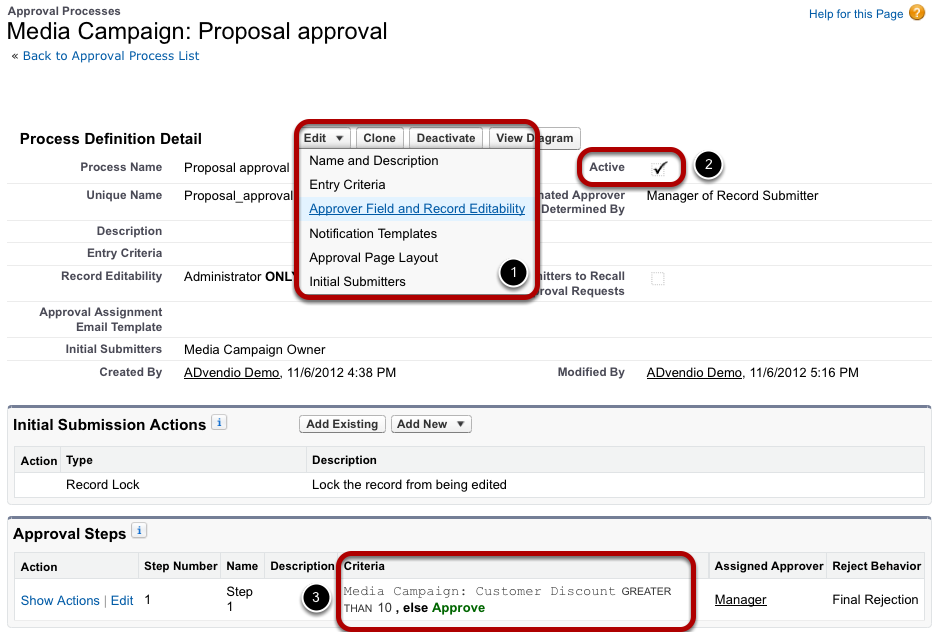
- When you open an existing approval process, you are able to edit different aspects, such as Entry Criteria or Notification Templates.
- In case you do not need the approval process anymore, untick the Active checkbox.
- In our example, proposals need to be approved by the assigned approver if the customer discount is greater than 10 %. Proposals not meeting the entry criteria, e.g. with a customer discount below 10 % or if no customer discount is granted, are automatically approved. When a media campaign is submitted for approval, it will be locked from being edited as an initial submission action.
Actions
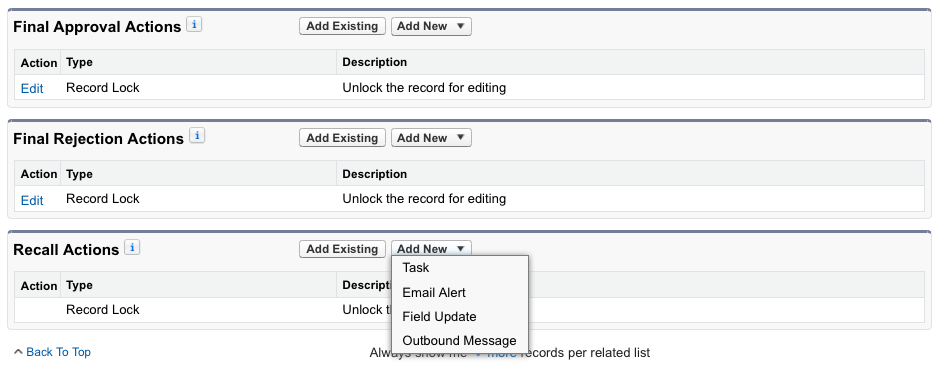
Next to the initial submission action which take place automatically as soon as the item is submitted for approval, you set actions which performed after approval, after rejection or upon recalling the submission for approval. You are able to add new tasks using the Add New button.
Process Diagram
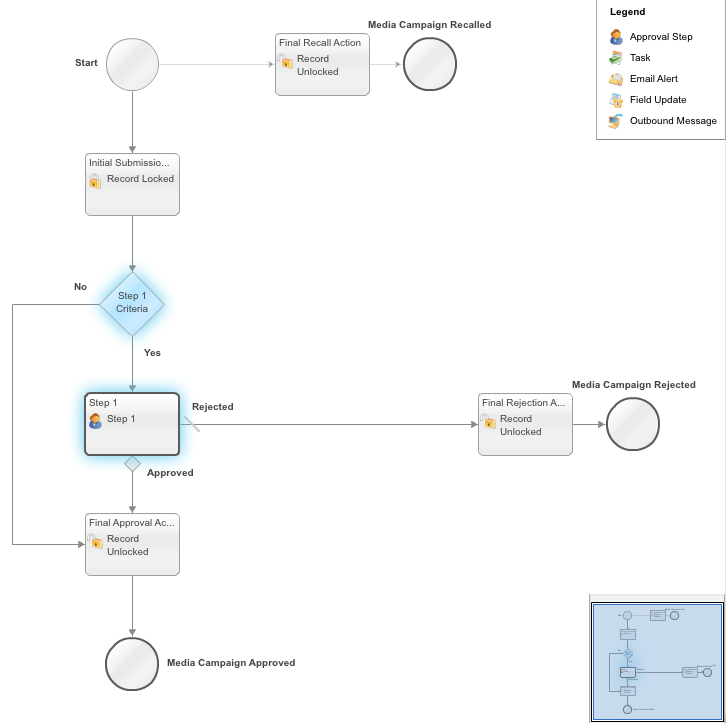
If you click the button View Diagram in the Approval Process's details, you see a diagram of how the process runs.