We have added additional reporting features on your campaign item that pull contending line item or sell-through information directly from DFP into your ADvendio system. Here is how to set it up:
1. Insert the Contending Line Item Button
Open the Campaign Item Layout.

- Find the Button Contending Ads under Buttons and drag onto your page.
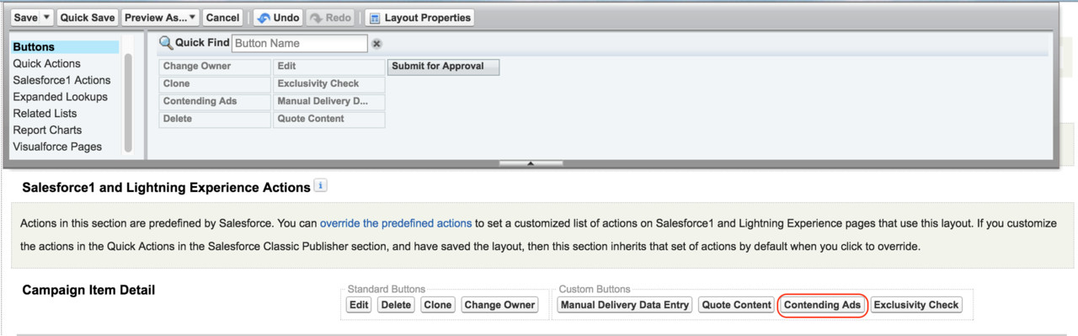
- Save the layout.
- If you like to run the report push the button now in the layout. A report similar to this will open:
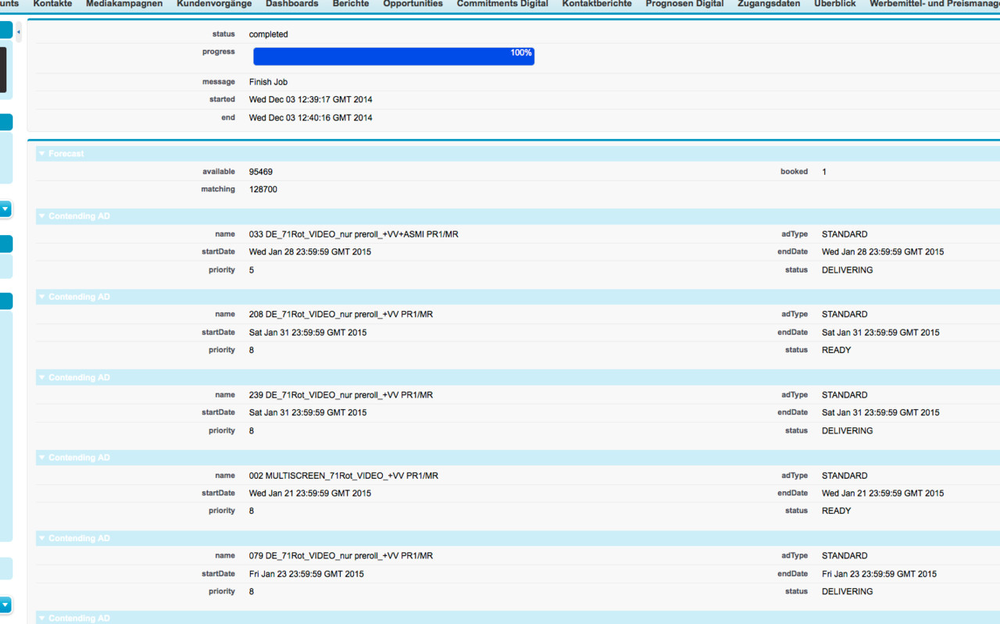
2. Add the Sell-Through Visual Force Page
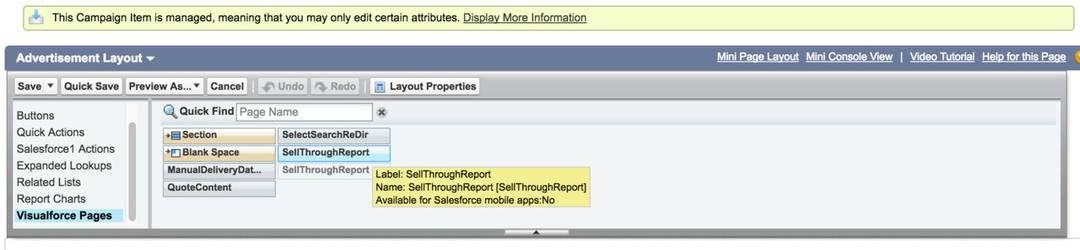
Open your Campaign Item Layout.
- Create a new section or use an existing section within your layout.
- Find the SellThroughReport under VisualForce Pages and drag onto your section.
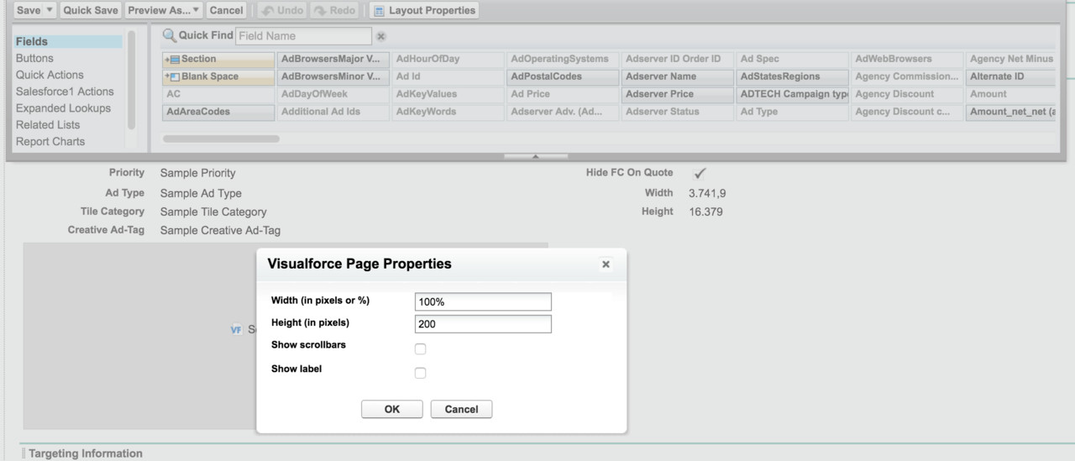
- Set the properties of your Visual Force Page by clicking on the little wrench icon.
- Save the layout.
- Run the report by clicking on the Run Report button in the layout.

- Result might look similar to this:

- You can customize the following Custom Labels you find in the Setup under Create → Custom Label, search by Category "SellThroughReport".
- ButtonRunReport
- SellThroughReportTitle
- SellThroughReportResult
- SellThroughImpressionAxisLabel
- SellThroughRateAxisLabel
- SellThroughTimeAxisLabel
- SellThroughImpressionAvailable
- SellThroughImpressionForecasted
- SellThroughImpressionReserved
- SellThroughRate
Please notice that before you can use this feature the a campaign item needs to be linked to dfp by Ad Id. That means that you must submit the line item to DFP successfully before you will get any data back.