If you are selling Ad Specs exclusively, it’s important to check thoroughly if a booking is possible or not to prevent double bookings. Before using the booking calendar please set up your 3.1.4 Ad Prices and mark them exclusive or limited.
With the help of the Booking Calendar, available, offered, booked, and over-booked inventory is displayed. You can also watch this video Ad Booking Calendar to get an idea how to use this tool. Additionally you can use the 4.4.6 Check Availability for Exclusive Products to manage exclusive items (Version 2.83 and up).
More details you find here:
Your administrator might need to adjust the booking calendar to your needs please refer to this page 7.2.4 Setup Booking Calendar.
Open the Booking Calendar
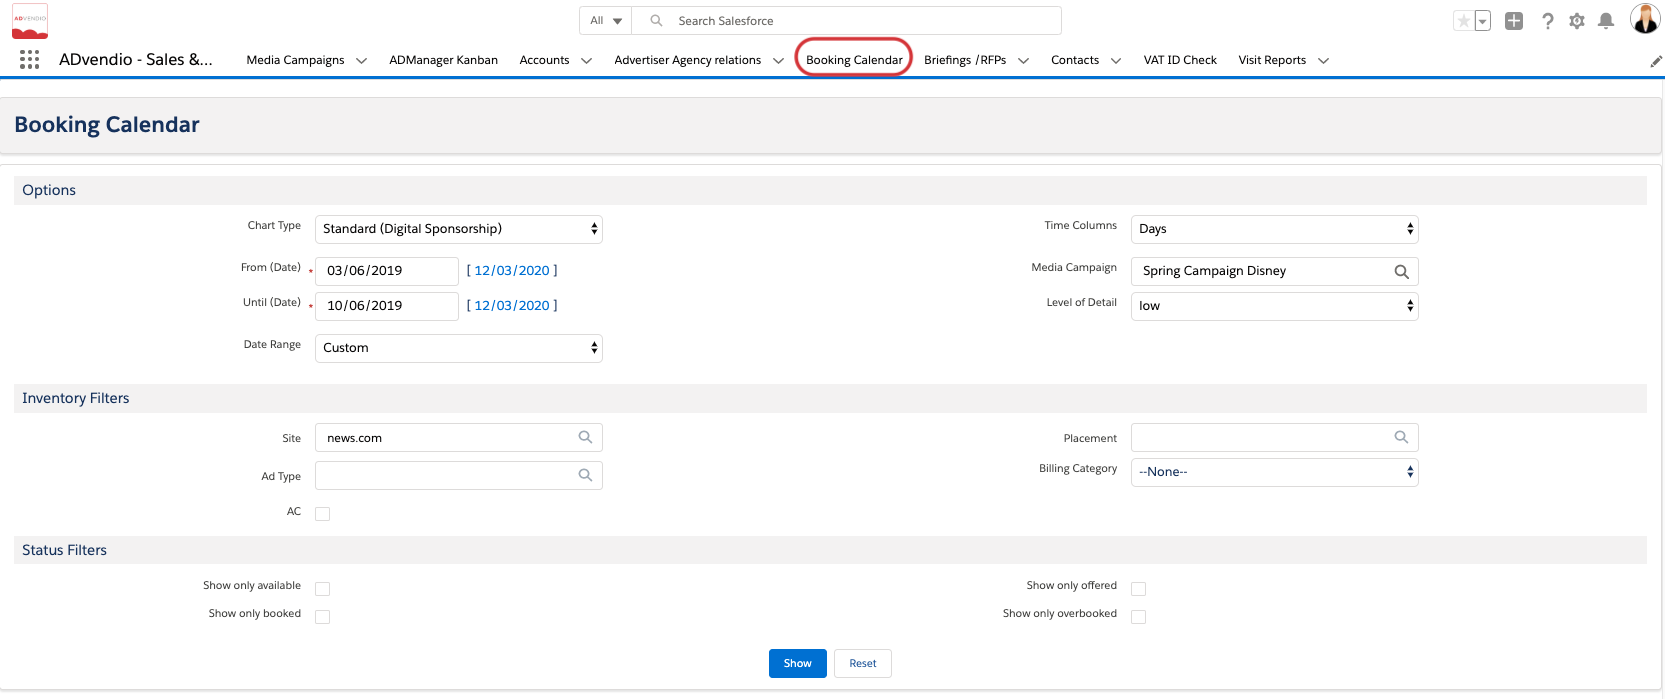
Navigate to the App Launcher and search for Booking Calendar. You can also open booking calendar from the Overview Tab, the tab bar or out of a media campaign:
1. Add exclusive products to your Media Campaign
After creating a new Media Campaign the Booking Calendar is available as a button to see at a glance which inventory is available to be sold at a certain date.
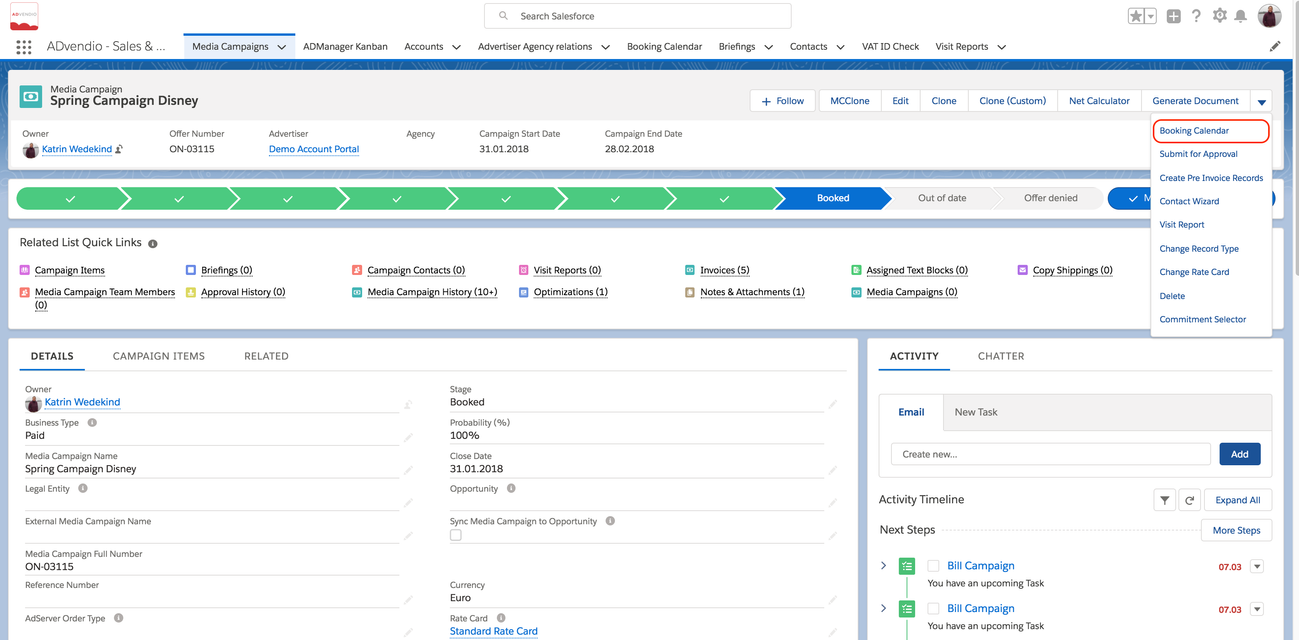
Click the button Booking Calendar. The Booking Calendar opens and the field Media Campaign is automatically filled with the just created Media Campaign data.
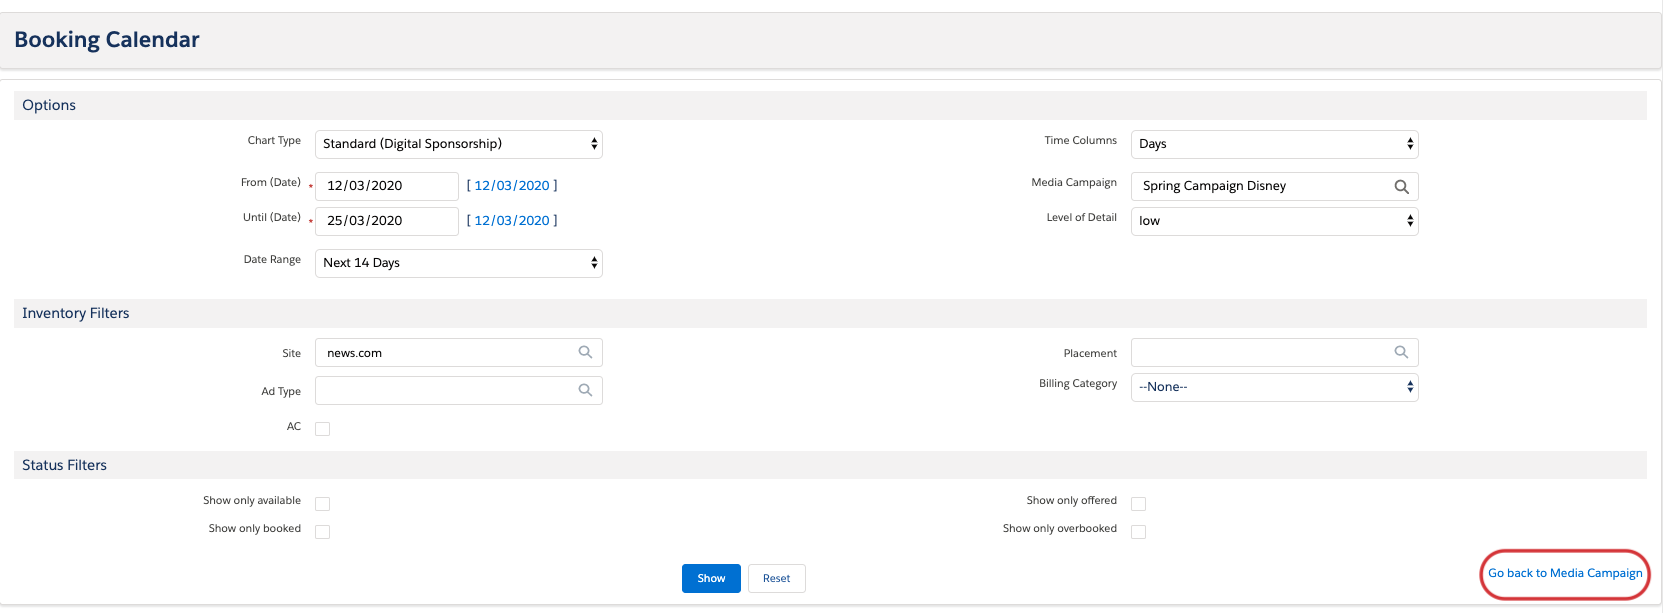
You are able to go back to the Media Campaign via a link next to the Show button:
1.1 Working with the Booking Calendar
The Booking Calendar shows
- available,
- offered and
- already booked
Campaign Items which are marked as "exclusive".
1.2 Filter options
- Chart Type: The chart type defines, which fields, filters, and information are available. For instance, the system administrator could create different chart types for digital or print inventory with different filters that are already filled with sites, placements, ad types or a billing category.
- From (Date): Enter a date to specify the start date. This fields is a mandatory field.
- Until (Date): Enter a date to specify the end date. This fields is a mandatory field.
- Date Range: This field defines time frames. You can select some values from this picklist to automatically define the fields From (Date) and Until (Date).
- Time Columns: If you need to display a longer time frame, it is recommended to limit the view from Days to Weeks, Months, Quarters, or Years.
- Media Campaign: Enter a Media Campaign to add products directly to the basket using the button Add to basket.
- Level of Detail: You can select
- low - The value "low" shows the booked, offered and available products. (This can be configured by your administrator)
- high The value "high" shows additionally the Campaign Item and Account Name, if some products are offered or booked. (This can be configured by your administrator)
- Display Content Column: Select the checkbox to show the content filter and column in the Booking Calendar.
- Display Publication Date Column: Select the checkbox to show the Publication Date filter and column in the Booking Calendar.
Time Columns
The search results for the selected time column will show only the list results with the exact same unit or "shorter" units which can be converted. Longer max App Units are never converted to be used when selecting shorter time columns. I.e. Years will not be shown in Quarters. But Weeks can be listed in Months, Quarters and Years.
- Version 2.87 and up: The Booking Calendar hides Weekly and Monthly Applicability Units in the "Day".
- Version 2.96 and up: You can also use Quarterly and Yearly Units.
Here you can see which smaller units on your AdSpec are converted and shown in the booking calendar if the following time columns are selected:
| time columns → / max AppUnit | day | week | month | quarter | year |
|---|---|---|---|---|---|
| day | converted | converted | converted | converted | converted |
| week | - | converted | - | - | - |
| month | - | - | converted | converted | converted |
| quarter | - | - | - | converted | converted |
| year | - | - | - | - | converted |
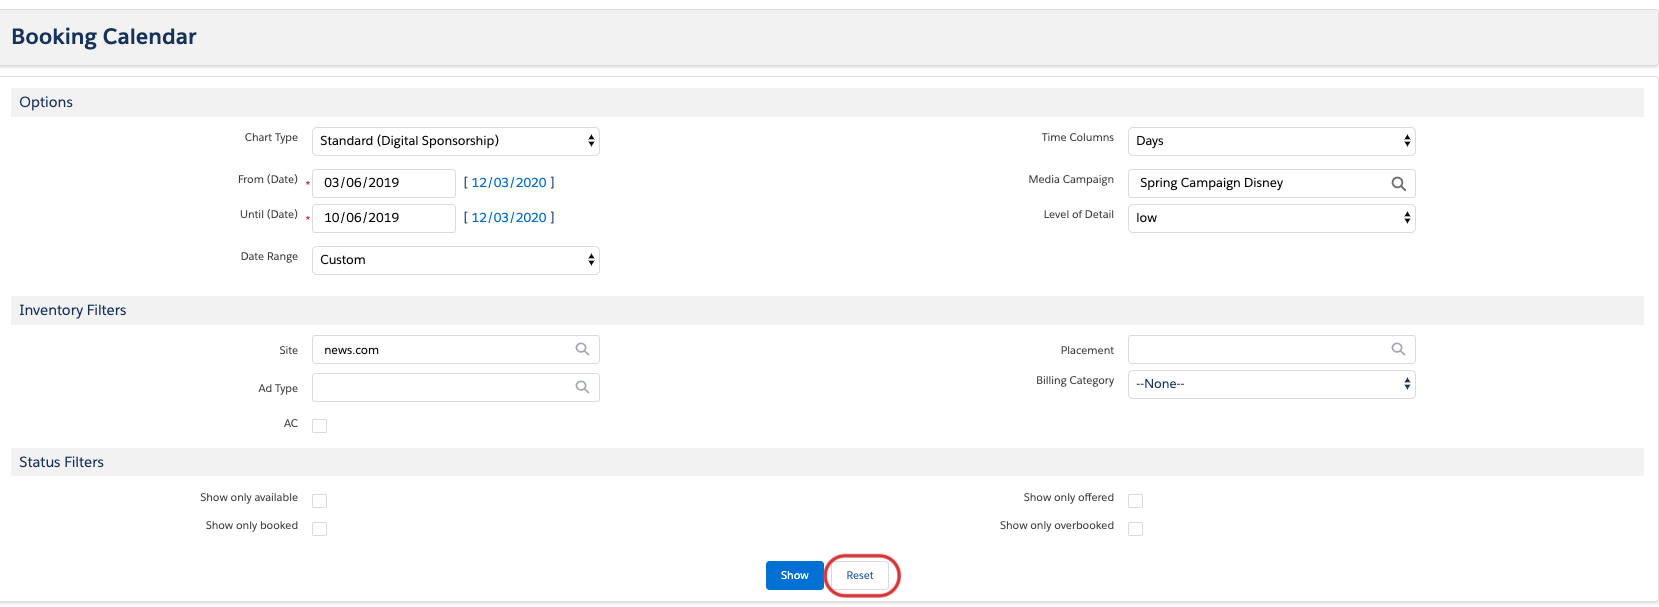
1.2.1 Reset filters
Version 2.108 and up
If you need to reset your filters as you changed the predefined fields you can use the Reset button next to the Show button.
Due to procedural implementation the filter Media Campaign will never be reset and would need to be cleared manually if desired.
1.3 Inventory Filters
- Filter Site: You are able to filter the Booking Calendar for specific sites.
- Filter Placement: You are able to filter the Booking Calendar for specific placements.
- As of version 2.119, the placements available for selection will be filtered by those relevant for the selected site.
- Filter Ad Type: You are able to filter the Booking Calendar for specific ad types.
- Filter Billing Category: You are able to filter the Booking Calendar for a specific billing category.
1.4 Status Filters
The following checkboxes only works after you have searched and filtered some results:
- Option Show only offered: Check this box to limit the results to all offered items. This checkbox only works after you have searched and filtered some results.
- Option Show only available: Check this box to limit the results to all available inventory. This checkbox only works after you have searched and filtered some results.
- Option Show only overbooked: Check this box to limit the results to all overbooked items.This checkbox only works after you have searched and filtered some results.
- Option Show only booked: Check this box to limit the results to all booked items. This checkbox only works after you have searched and filtered some results.
Next Click the button Show.
1.5 Add Products To Basket
With the Booking Calendar, you see at a glance which inventory is booked, offered and available. You are also able to add inventory directly to your Media Campaign.
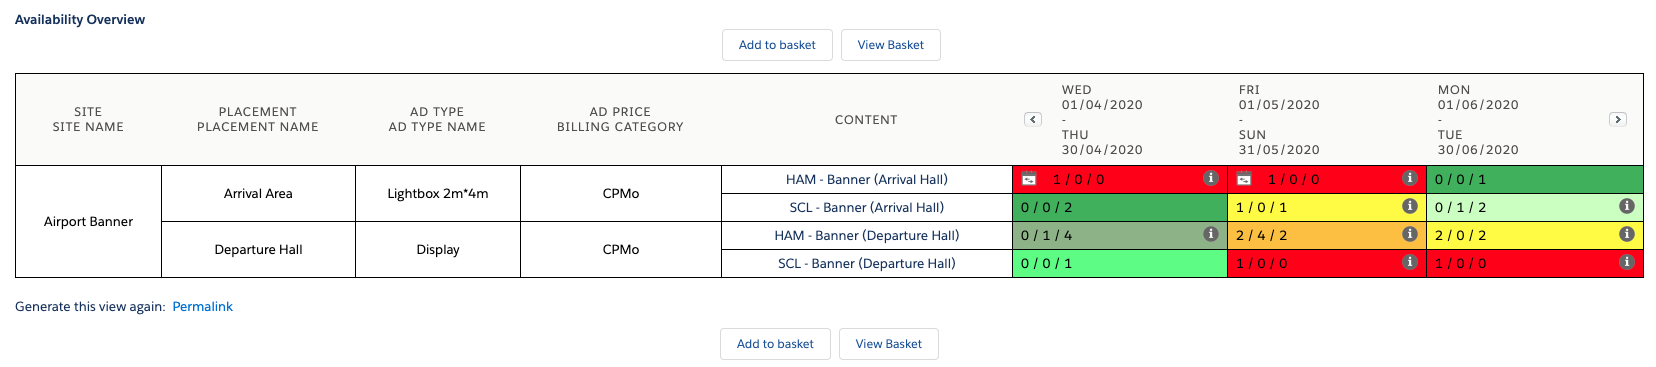
Select available inventory and add it to the basket:
- Select your available inventory, it is displayed grey. You can select and deselect inventory by just clicking the table cells.
- Click the button Add to basket.
- A success message 'Basket successfully created' will appear on top of the Booking Calendar.
The inventory, as well as your selected dates, are automatically transferred, you can go directly to the media configuration to configure your new Campaign Items.
Note
1.6 View Basket
The inventory, as well as your selected dates, are automatically transferred, so you are able to configure these new Campaign Items.
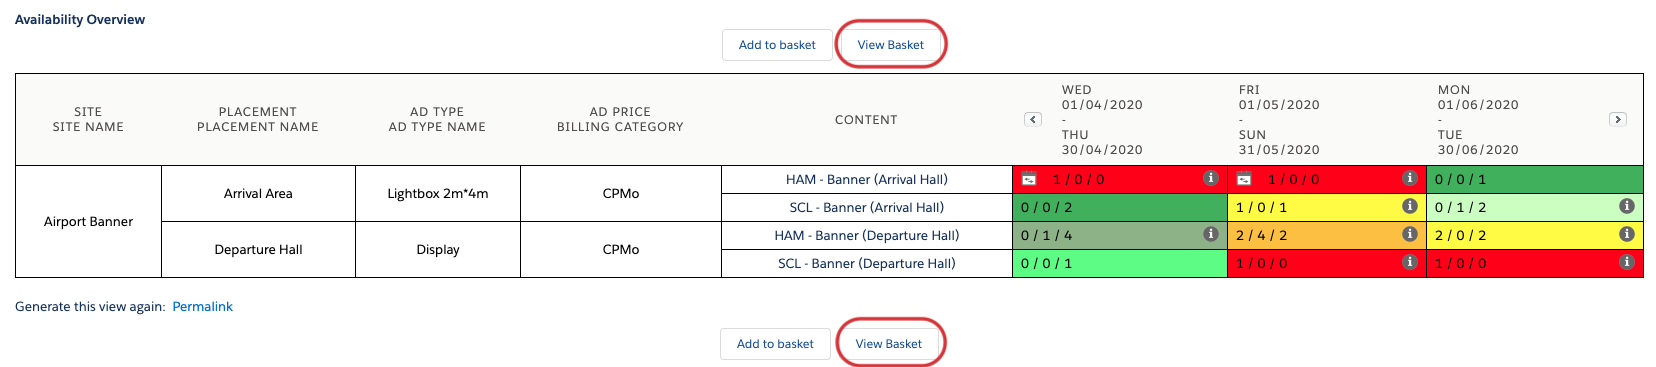
To configure your items:
- Click the button View Basket.
You are lead to a view of your Media Basket:
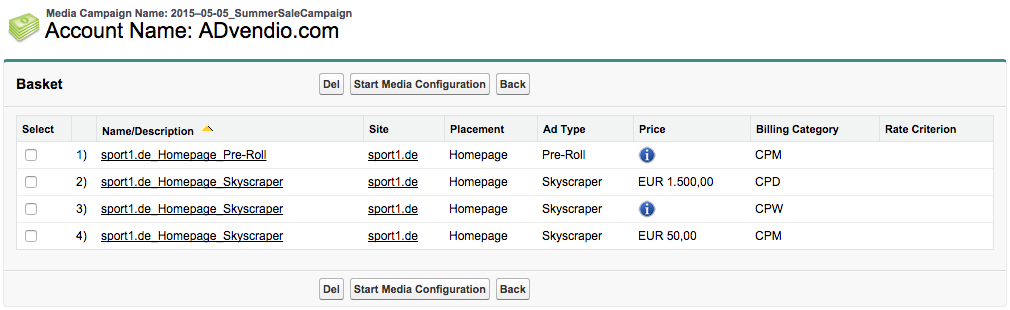
There are three different buttons:
- Click the button Start Media Configuration. to start to configure your items
- If you mark the select Checkbox for an Item and click the button DEL, this item will be removed from your basket
- Click the button Back to go back to your Booking Calendar View
After finishing the media configuration you are back into your Media Campaign.
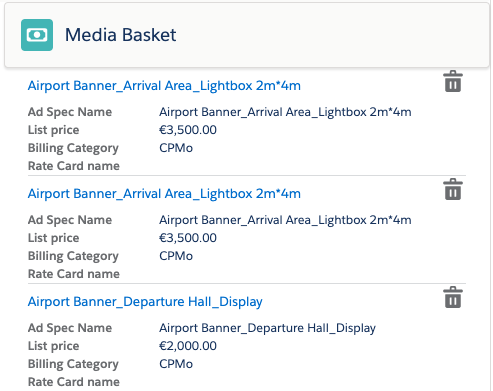
1.7 View Basket (Media Search Lightning)
| Version | 2.115 and up |
|---|---|
| Supported Adservers | n/a |
With version 2.115, you are now also able to use the Media Search Lightning in the Booking Calendar. See 8.4.5 Setup and Configure the Media Search for Lightning (BETA) for detailed steps, how to activate this feature.
2. Create a NEW Media Campaign using the Booking Calendar
If you have started the booking calendar directly you also have the option to create a new media campaign directly in the booking calendar. Available in Lightning from /wiki/spaces/SO/pages/811270145 onwards.
- All you need to do is select your line items in the calendar
- Press 'Create Media Campaign'
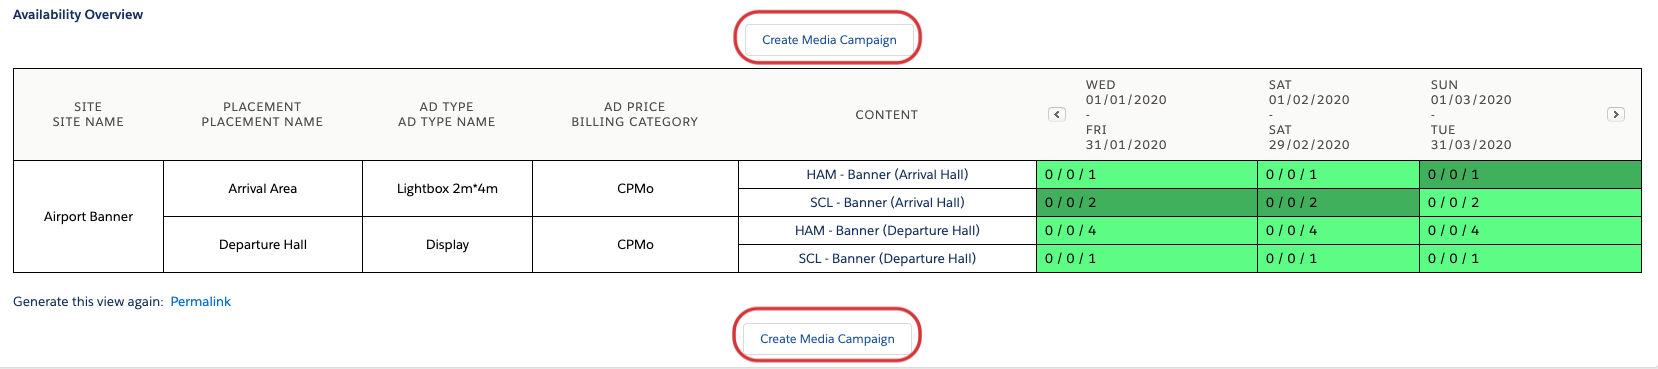
- A popup will appear where you can enter the information for your new Media Campaign
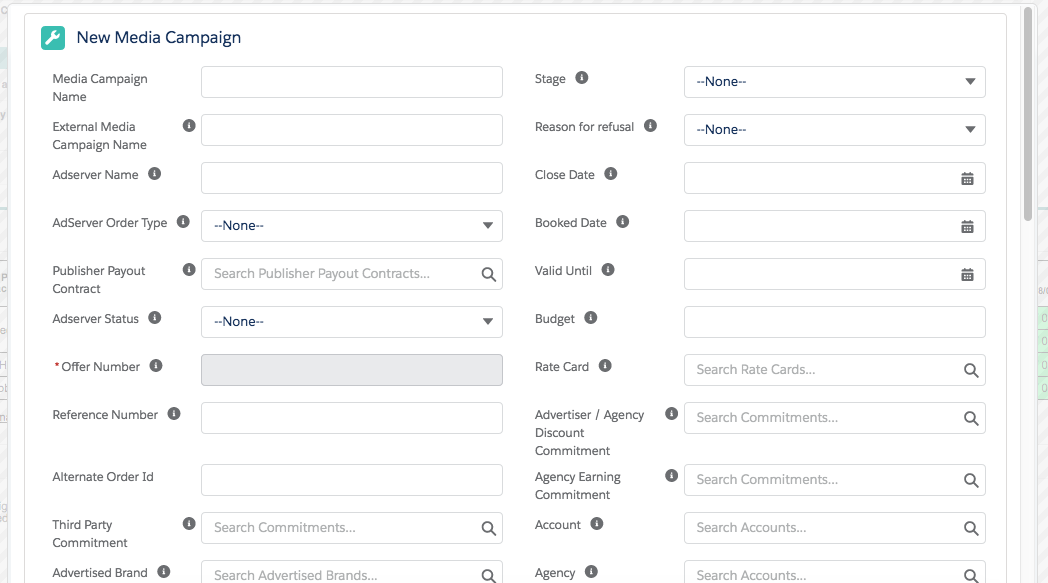
- Press save. You will be brought directly to the Media Configuration
Attention:
We're currently facing problems, that a user creates a Media Campaign for the first time, the process doesn't finisher properly and leads to the Media Campaign Page instead of the Media Configuration with the selected items. This happens only the first time and afterwards everything works as expected.
Salesforce limitations
- This feature is not usable in Lightning when combined with auto-number fields. In order to use this feature, do not display such fields in the page layout
- There are limits in searching for Records in a Lookup Field.
- Help texts within the popup don't display information