...
| Info |
|---|
As soon as you transform a pre-invoice into an invoice using the billing run, the invoice should not be edited anymore. If adjustments need to be made after the billing run we advice to cancel the invoiced items. Invoices are un-deletable after the billing run. This is necessary to guarantee secure accounting and consistent data. (You administrators might have also taken the rights of you to edit an invoice at all manually.) To make changes use 6.4 Cancellations & Credit Notes. |
...
Filter Invoice Criteria
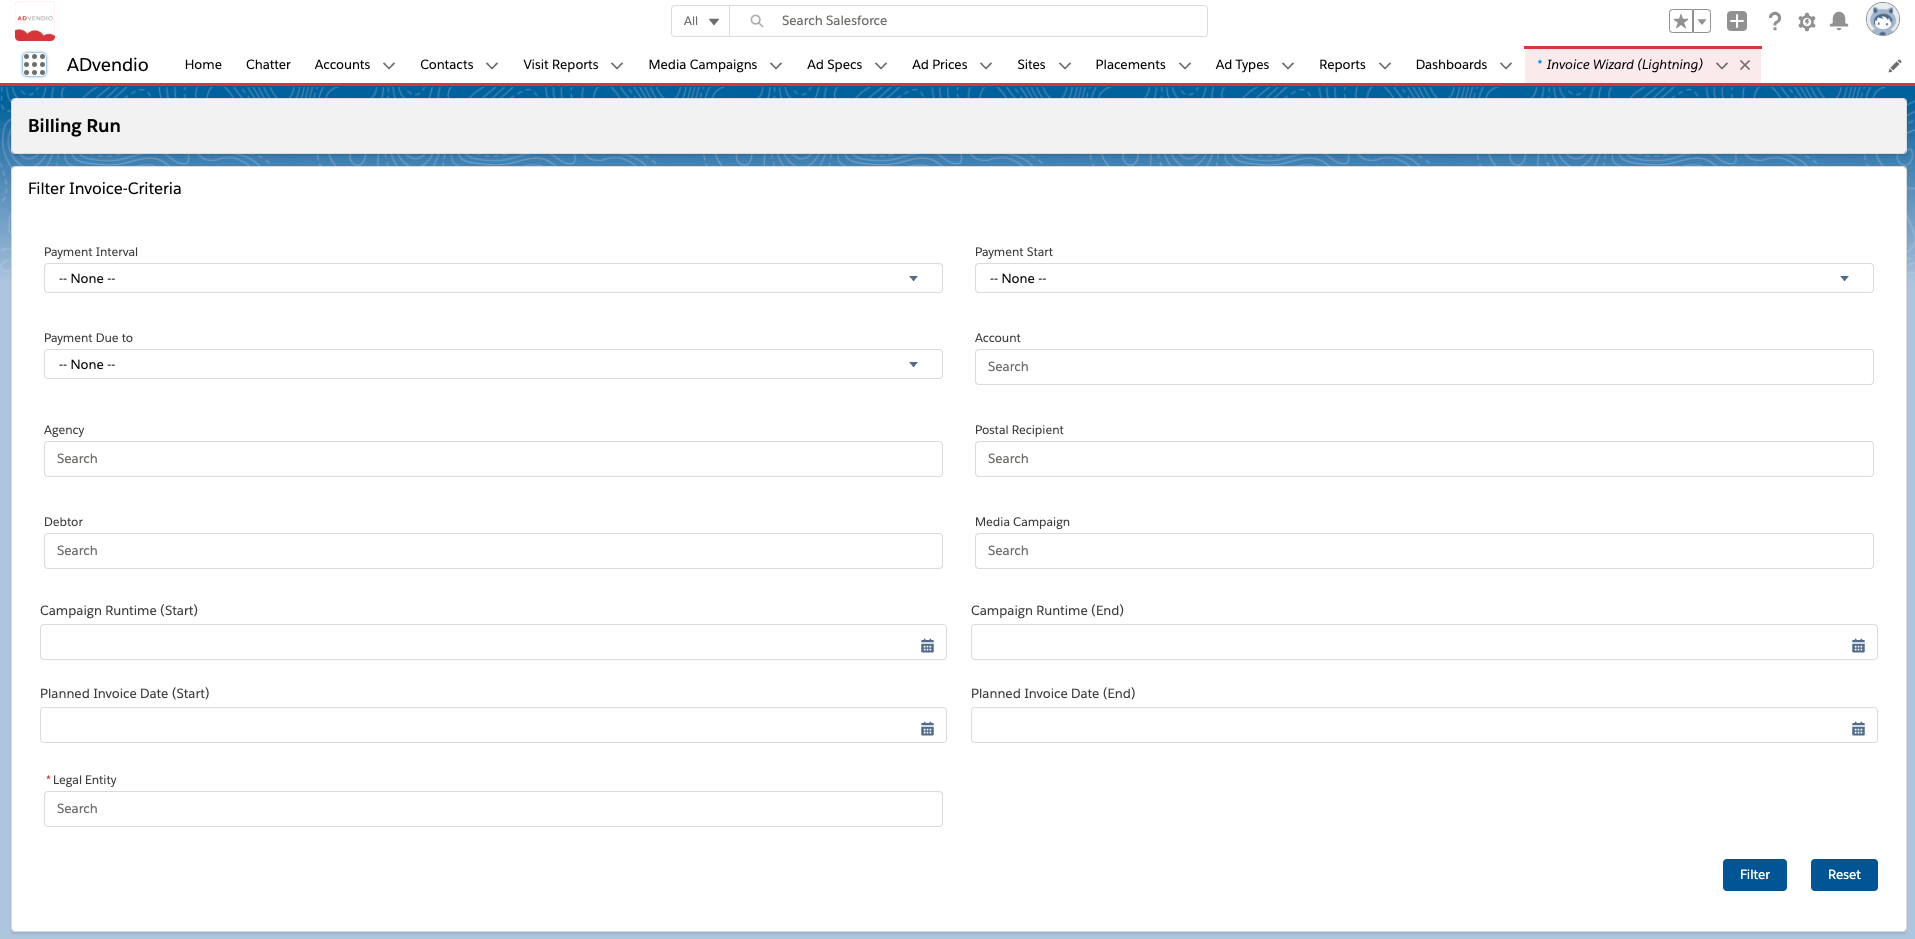
To be able to transform a pre-invoice into an invoice, first search for the according pre-invoices using these filters:
- Find pre-invoices by selecting a Payment Interval, Payment Start or Due Date, or additionally, search for Media Campaign name, accounts associated or use the Campaign Runtime or Billing Run Start/End Date.
- You can also set the Planned Invoice Date (Start and End) manually.
Click the button Filter to start the search or Reset to clear all filters
Info Now all available pre-invoices which match the filter criteria will be displayed. Also your filter can vary from the ones shown, as your administrator can configure the fields.
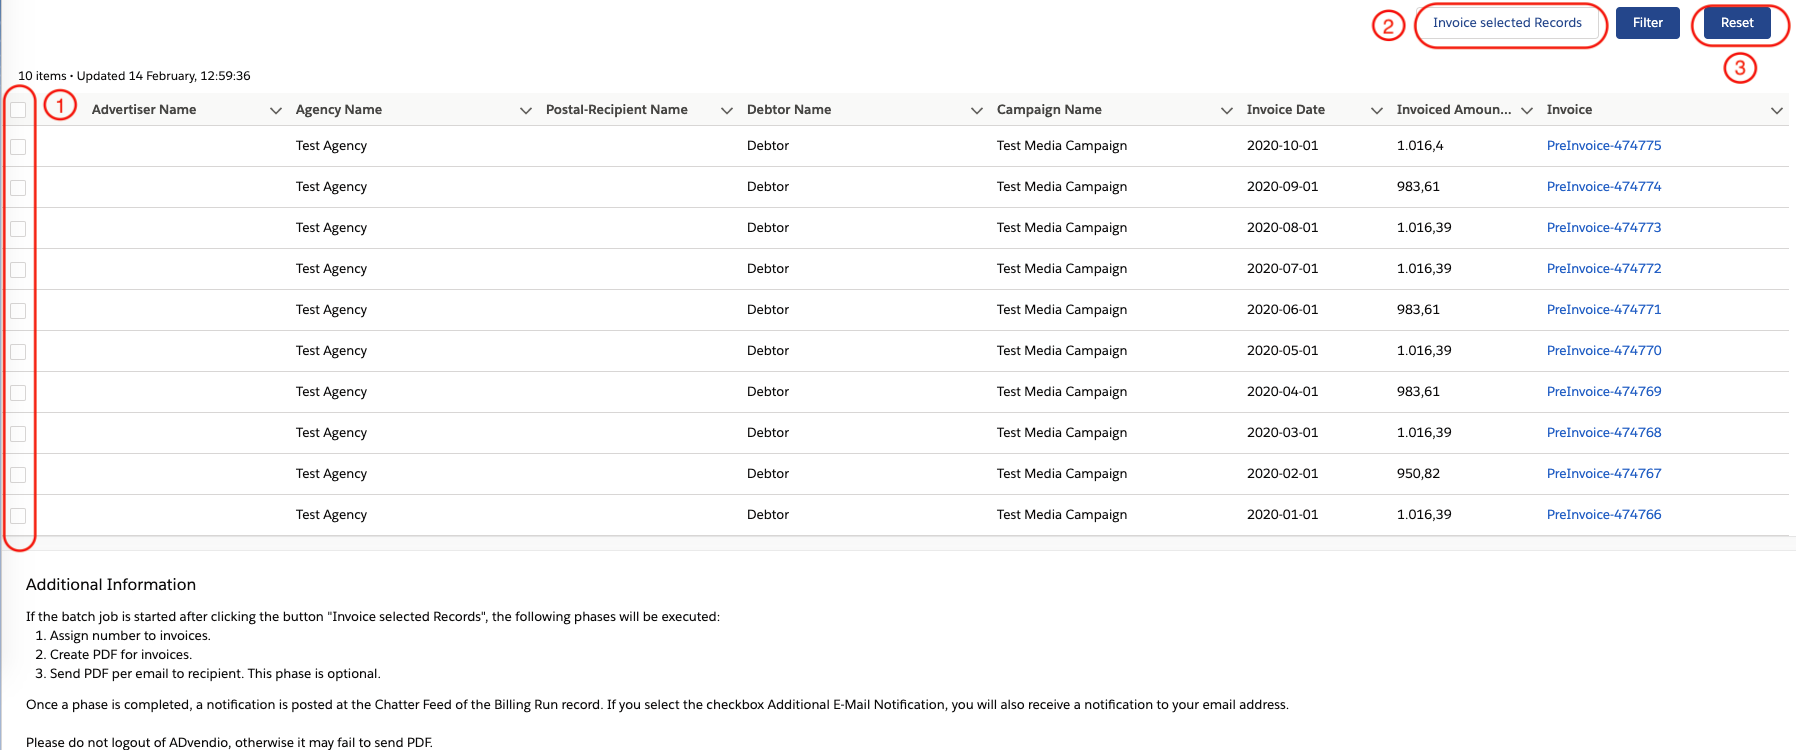
Invoice all selected Records
To create invoices:
- Select the records you like to invoice by using the checkboxes.
- Click the button Invoice selected Records to convert pre-invoices to invoices.
- Click the button Reset to define other specific filter criteria to find pre-invoices.
- Configure which fields show in your Invoice Wizard Lightning datatable through a feature setting
Invoice all selected Records
- Configure the invoice settings for your billing run, such as Invoice Date (see point b), Accounting Period
- You can configure the invoice date for all invoices in your Billing Run using the Invoice Date Field. Leaving this field blank invoices all invoices with their planned invoice date
- When Accounting Periods are in use, you will need to assign an Accounting Period to the billing run. This will be pre-populated based on the Invoice Date entered but you can also change this manually.
- You can also opt to receive additional email notifications throughout each phase of the billing run
- Press Invoice selected Records to start your billing run
- From version 2.125 onwards, you can configure the default Invoice Date for your Invoice Wizard directly in the Administration Settings.
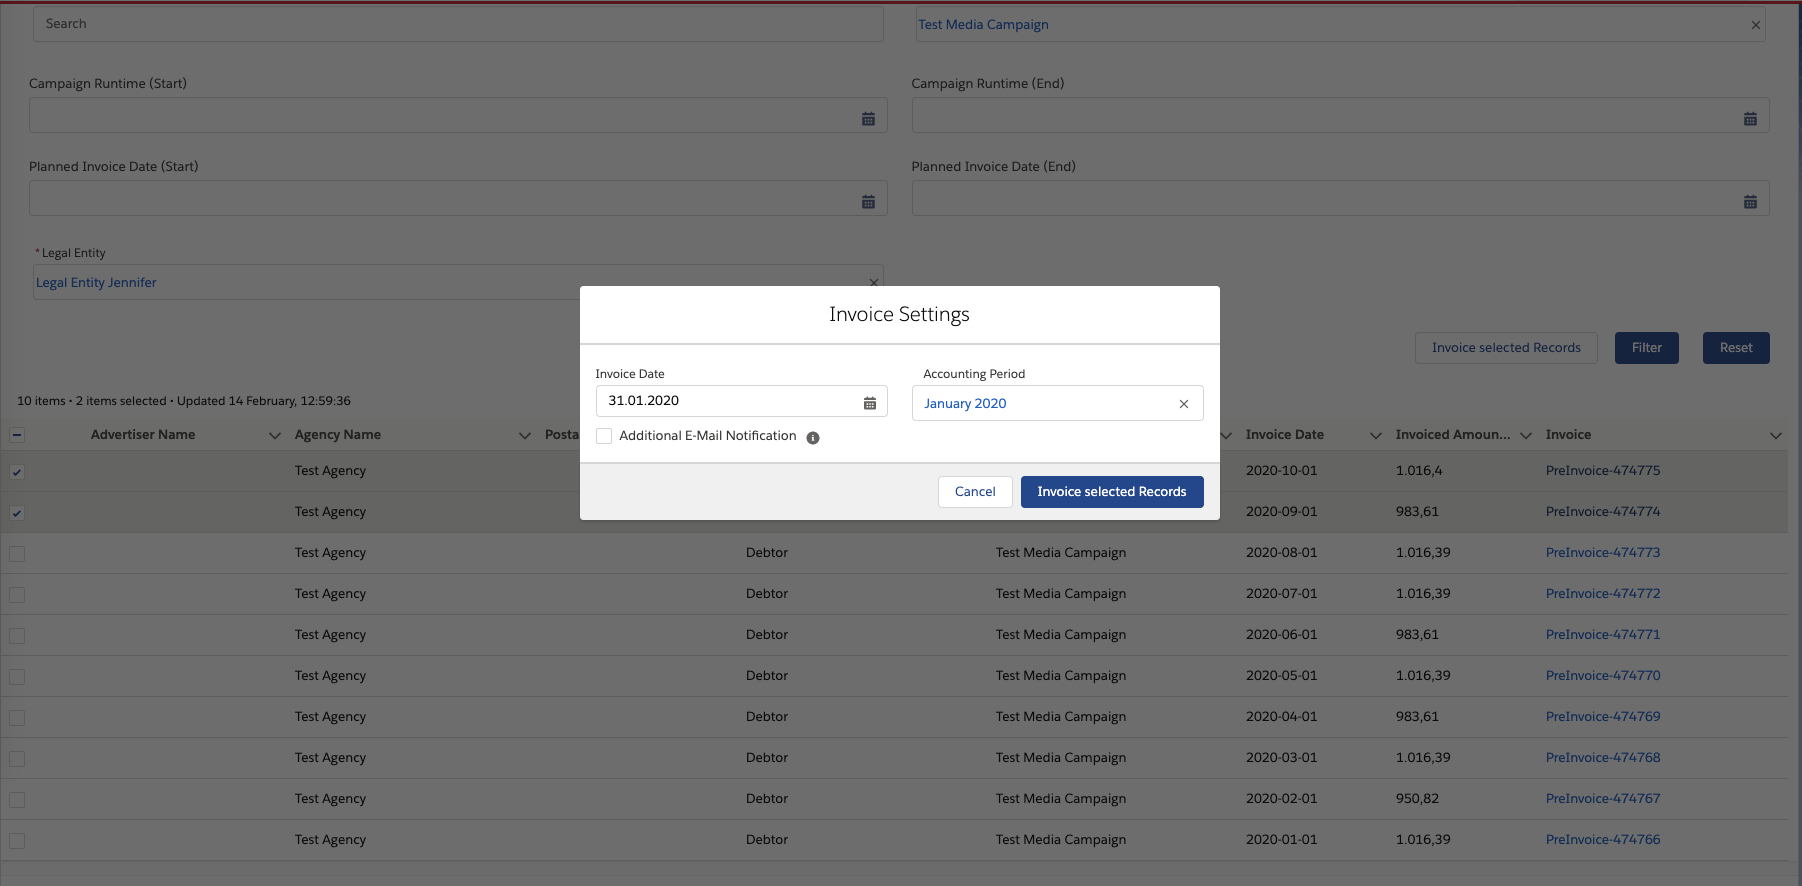
- Configure the invoice settings for your billing run, such as Invoice Date (see point b), Accounting Period
Invoice Wizard
Filter Invoice Criteria
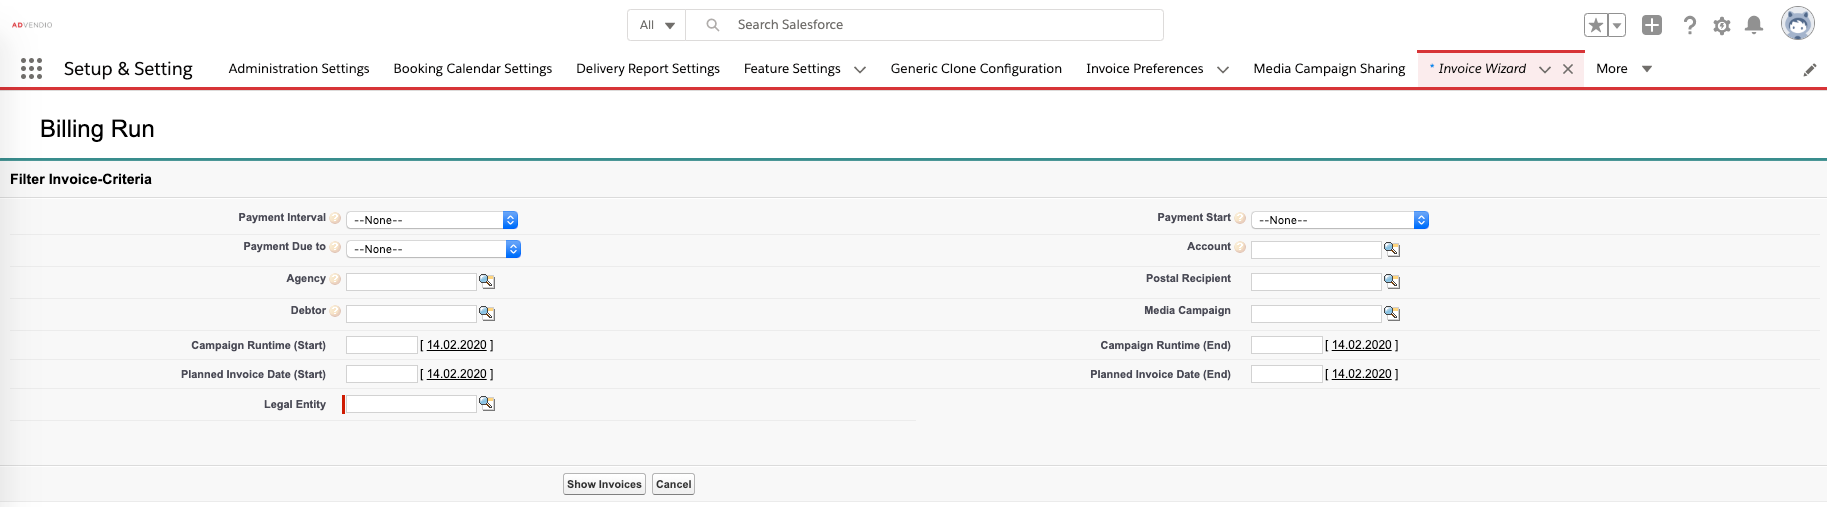
To be able to transform a pre-invoice into an invoice, first search for the according pre-invoices using these filters:
Find pre-invoices by selecting a Payment Interval, Payment Start or Due Date, or additionally, search for Media Campaign name, accounts associated or use the Campaign Runtime or Billing Run Start/End Date.
You can also set the Planned Invoice Date (Start and End) manually.
Click the button Show Invoices to start the search.
Invoice all selected Records
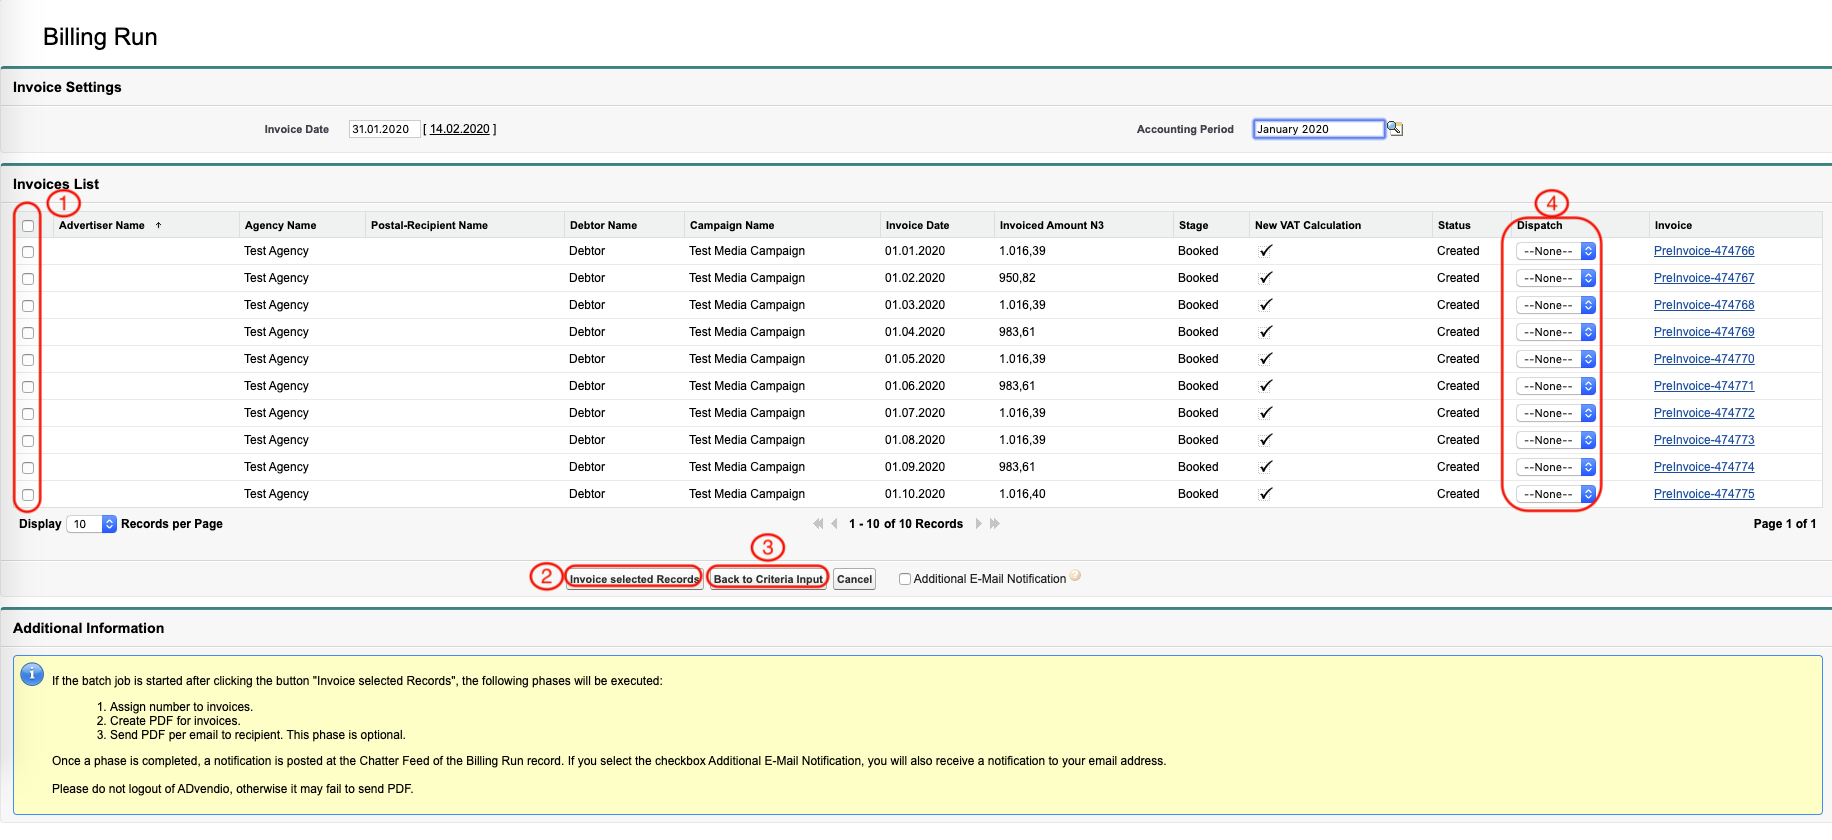
To create an invoice(s):
Select the records you like to invoice by using the checkboxes.
Click the button Invoice selected Records to convert pre-invoices to invoices.
Click the button Back to Criteria Input to define other specific filter criteria to find pre-invoices.
Choose between Email or Print to define if you want to print all invoices or send them via email. If you always use one type have your administrator select that one as a default value or establish a workflow.
...