The Media Configuration is the central location where the user can enter all necessary information to adjust Campaign Items. With the Media Configuration, it is possible to display or hide every field, tab or action button and customize those to specific needs. Conditions can be used to specify, if fields are mandatory, read-only or hidden. Furthermore, it is possible to use roles or profiles to create different page layouts for different user groups. Actions are now faster and easier to use and especially cross media requirements can be handled easily by display only the relevant fields for corresponding Campaign Items. This media configuration leads to an increase of quality and efficiency.
...
- Tabs can be renamed, removed and created with different fields in the tab setup.
- Fields can be displayed at every tab as input field, read-only field or hidden field. It is also possible to display one field for every tab.
- Action buttons can be enabled and disabled. Moreover, all action buttons are redesigned and coming with new functionality: Copy Item, Delete Item, Copy Value and Split Item.
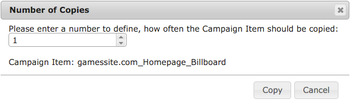
- Copy Item: The user is able to copy a Campaign Item multiple times.
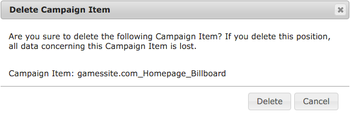
- Delete Item: The user is asked if he is sure to delete the corresponding Campaign Item.
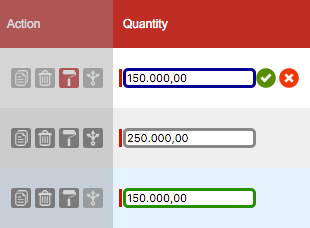
- Copy Value: The user is able to Copy any Value to other Campaign Items, for instance Dates, Quantity, picklist values or Key Values. That feature saves at lot of the time.
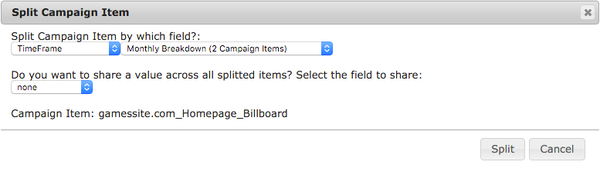
- Split Item: The user is able split a Campaign Item by Time Frame, Countries, Regions, Cities, Content, Key Values, Publication Dates, Web Browsers or Operating Systems. Furthermore, the user can share a value across all splitter items, for instance, Quantity, Sales Price or Guaranteed Ad Impressions.
- Products are displayed with product icon.
- Packages are displayed with package icon and component icons. Packages and Campaign Items can be combined as AdHoc Bundles, Publication Dates can only be selected for components.
- Linear Package: All information should be entered at package header level and automatically written down to the components.
- Prorated Package: All information should be entered at package header level and automatically written down to the components.
- Individual Package: All information should be entered at component level and automatically written up to the package header.
- Tab Setup: All tabs and their fields are configured in the object Tab Setup as well as the the sort order. The system administrator is also able to select different tabs and their fields for different features: It is possible to show different fields for the Media Configuration and the Commercial Optimizer. Moreover, it is possible to show other fields for the "Add Items" button as for the "Edit Items" button. It is important to setup all relevant fields and tabs at this point, because restrictions are made at Tab Rules.
- Tab Rules: Tab Rules defines, under which conditions fields are editable (input fields), read-only fields or fields, that are hidden for a specific user or user group. It is also possible to define, under which conditions action buttons are enabled or disabled and for which feature this rule should work. Tabs and their fields are configured in the object Tab Setup.
...
- Copy Item: This function allows the user to copy a Campaign Item. The user is able to define a number, how often the Campaign Item should be copied. Moreover, the user sees the corresponding Campaign Item to make sure, that the right item is selected. He is also able to abort the process.
- Delete Item: The user is asked if he is sure to delete the corresponding Campaign Item. Moreover, the user sees the corresponding Campaign Item to make sure, that the right item is selected. He is also able to abort the process.
- Copy Value: The user is able to copy any value to other Campaign Items, for instance Dates, Quantity, picklist values or Key Values. First, the user has to activate the feature by clicking the icon. Second, the user has to select one field, that should be copied to other ones (for instance, Quantity). This field is now marked with a blue border. All other fields in the column get a green border except those, where this information can not be copied. The user can deselect fields with a green border. Immediately, the old value appears again and the border of this field gets grey. Of course, the user can select those fields again by clicking on this fields. Lastly, the user clicks the green "ok" button to copy the values to all selected fields, he can also abort the process by clicking the red "cancel" button. The user is able to repeat that process for different fields in one row.
- Split Item: The user is able to split a Campaign Item by Time Frame, Countries, Regions, Cities, Content, Key Values, Publication Dates, Web Browsers or Operating Systems. Those values are only selectable, if the Campaign Items meets the requirements like having Geo Targeting information for Countries, Regions or Cities. Furthermore, you can share a value across all splitter items, for instance, Quantity, Sales Price or Guaranteed Ad Impressions.
Action Buttons can be enabled or disabled by using Tab Rules. Furthermore, those action buttons can be enabled or disabled for different features.
...
- Navigate to Overview > Setup & Setting > Tab Rules and click New Tab Rule to create a new rule using conditions or click Edit at an existing Tab Rule to edit this rule. You can also delete not necessary rules by clicking Del at those rules.
- Edit the Tab Rule Name.
- Select all Feature Assignments, for that this rule should be used. If you make no selection, this rule is used in every feature if the condition is true.
- Select a Condition, the Operator and the Value to create an input criteria. As Source, you should use already existing fields in objects like Ad Specs or Ad Price, because Campaign Item fields does not exist at this moment (exception could be the "Edit Item" button). You can also select Profile or Role using the pick list value "Current User". Click the "plus" icon to create a second condition (AND connection). Click the "delete" icon to delete the condition.
- Define all Actions, that should be enabled or disabled.
- Select all Fields, that should be Required Fields.
- Select all Fields, that should be Read-Only Fields. You can also select the Checkbox All fields read-only to have only read-only fields in the Media Configuration.
- Select all Fields, that should be Hidden Fields. Those fields will not be displayed, if the Condition is met.
- Click the button Save to create your tab or save your changes.
...
- Name: Make optimized Campaign Items read only
- Condition Source: Campaign Item Field > Optimization Exclusion
- Condition Operator: not equal to
- Condition Value: empty
- Read-Only Fields: All fields read-only (TRUE)
Example:
- Name: Agency Commission
- Condition Source: Campaign Item Field > Ad Price > Ad Spec > No Agency Comission
- Condition Operator: equals
- Condition Value: TRUE
- Read-Only Fields: AC
2. Net Calculator
To add this function to your media configuration you need to either modify your pricing tab or create a new tab with the following information:
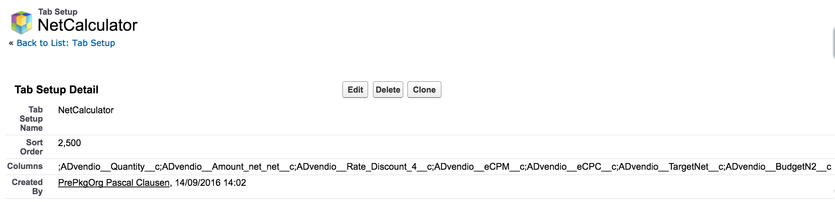
Columns:
|
Sum up any you like: i.e. ADvendio__BudgetN2__c
2.1 Configure the Media Campaign Budget
...
Click on Manage and then Edit and set the Campaign Item field API for the Budget Amount Field API Name:
...
| Info |
|---|
| The default value is N2. Also make sure that you have the selected amount field in your tab setup, otherwise the calculation will not be shown. |