You can configure the 4.11 Optimizer the following by navigating to the respective Feature Setting record. Go to the App Launcher und search for Feature Settings.
...
- Feature Name = Optimizer
- Feature Setting Name = ConfigurableDisplayFieldsOfOptimizedItem
- TemplateName: leave empty
- Value: Semicolon separated list of field names (with ADvendio Prefix)
...
5. Change the Required Fields
Navigate to Feature Settings and create records to customize the Optimizer:
- Feature Setting Name: RequiredOptimizingVersionFields
- Feature Name: Optimizer
- Template Name: <leave blank>
- Value: Semicolon separated list of field names lower-case only; depending on your needs
i.e. "Name; ADvendio__amount_net__c; ADvendio__amount_net_net__c; ADvendio__Amount_net3__c; ADvendio__Ad_Price__r.ADvendio__Ad_spec__r.ADvendio__Placement__r.ADvendio__Site__r.Name; ADvendio__Sales_Price__c"
...
| Info |
|---|
Available with Version 2.111 and higher |
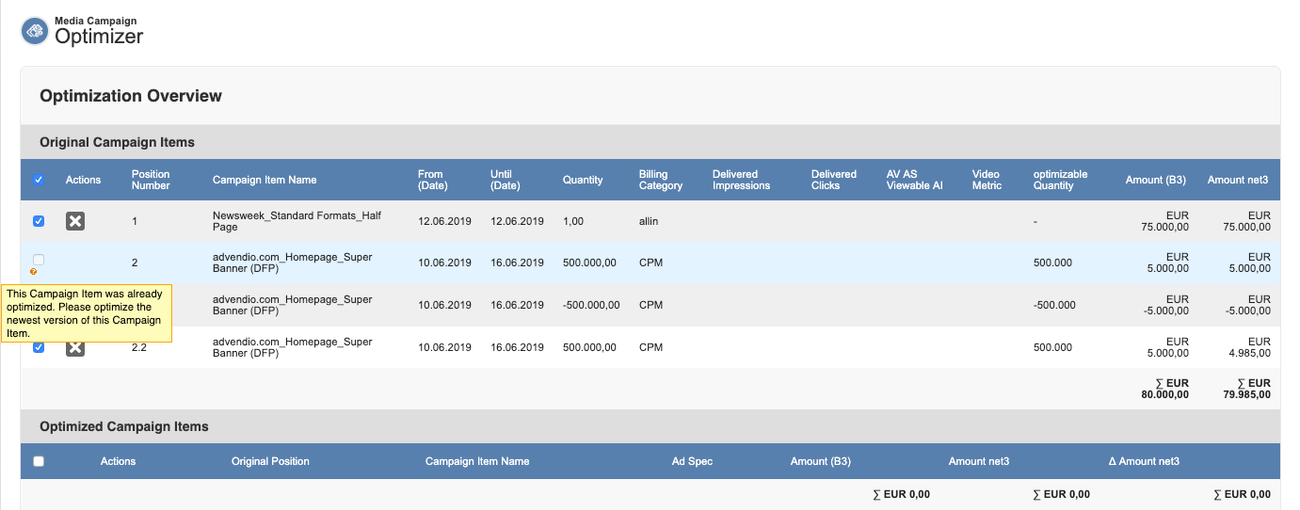
If you like, you can further configure which Items are available for optimization and which not. You can define, that if a Campaign Item matches certain criteria, it will not be usable in the Optimizer. Those Items will be shown as disabled. The Checkbox will not be selectable and a little icon is shown, with a short explanation, why this item is disabled.
To configure this, navigate to Feature Settings and create the following records:
- Feature Setting Name: DoNotAllowOptimizationCriterion
- Feature Name: Optimizer
- Template Name: Reactive OR Proactive
- Value: The name of the field you like to compare and the required value. Please use the full API name of the field (ADvendio__fieldname__c), for your own custom fields it would be (fieldname__c) . You can use either equals (=) or not equals (!=) to compare it to the desired value.
- You can create one feature setting for reactive and one for proactive optimizations.

| Info | ||
|---|---|---|
| ||
Please keep in mind, that it's currently only possible to use a single field and value as matching criteria. Also it's only possible to match on fields from the Object Campaign Item.
|
Change the information displayed to your users:
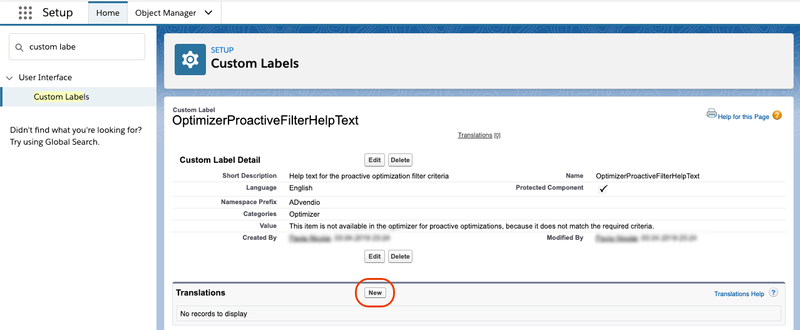
If you like to change the message displayed to you can do so by going to Setup → Custom Labels. Search for the following labels:
- OptimizerProactiveFilterHelpText → For proactive Optimizations
- OptimizerReactiveFilterHelpText → For reactive Optimizations
You can add a manual translation and if you do so, this text will be shown to your users instead of the ADvendio default text.
Examples, how to use this:
Let's say once your sales process hits a certain stage, where your customer already agreed to the offer, and you want to prevent proactive Optimizations.
To mark your Campaign Items, you will create a custom Formula Field with a Checkbox and the criteria: If Media Campaign Stage = "Booked", set this Checkbox true. Now we need to teach the optimizer to ignore all items where this Checkbox is true.
- We create a new Feature Setting, like described above.
- The Template Name for our Feature Setting will be "Proactive"
- The Value will be: "YourCustomCheckbox__c=true"
Now, if a Campaign Item has this Checkbox set it will be disabled in the proactive Optimizer. If you do a reactive Optimization, it will however, still be available.
As this is a very specific criteria, we want to inform our users properly, why their Items are not available in the Optimizer. To do so, we want to create a new translation for a custom Label.
- Go to Setup → Custom Labels
- Search for a label named:
- Click on the new button in the translation section.
- Select the language you are using and enter your custom text, like: "Once an Item reached the stage booked, it can't be optimized proactively, please use the reactive optimization mode."
...