...
| Info |
|---|
In order for this to work, the new field 'Accounting Period' needs to be added to the page layout by your Admin. |
Individually on Invoice level
Version 2.112 and up
- Navigate to the relevant Invoice
- Edit the object
- Enter the relevant Accounting Period in the Accounting Period field
- Click save
En Masse Using the Invoice Wizard
Version 2.116 and up
To save time and to streamline the process of creating Accounting Records, you can also assign the Accounting Period to your invoices using the Invoice Wizard. This way you can assign one Accounting Period to all items Invoices within the same billing run.
- Navigate to the Invoice Wizard
- Enter the Legal Entity that you want to create a billing run for (since Accounting Periods are specific to legal entities, this is a required filter when you are using the Accounting Interfaces) and any other relevant filter criteria
- Click Show Invoices to start the search
- The billing run will display all invoices related to your search criteria. Based on the invoice date (1) (default is set as today), the billing run will suggest the relevant Accounting Period
(INSERT SCREENSHOT2)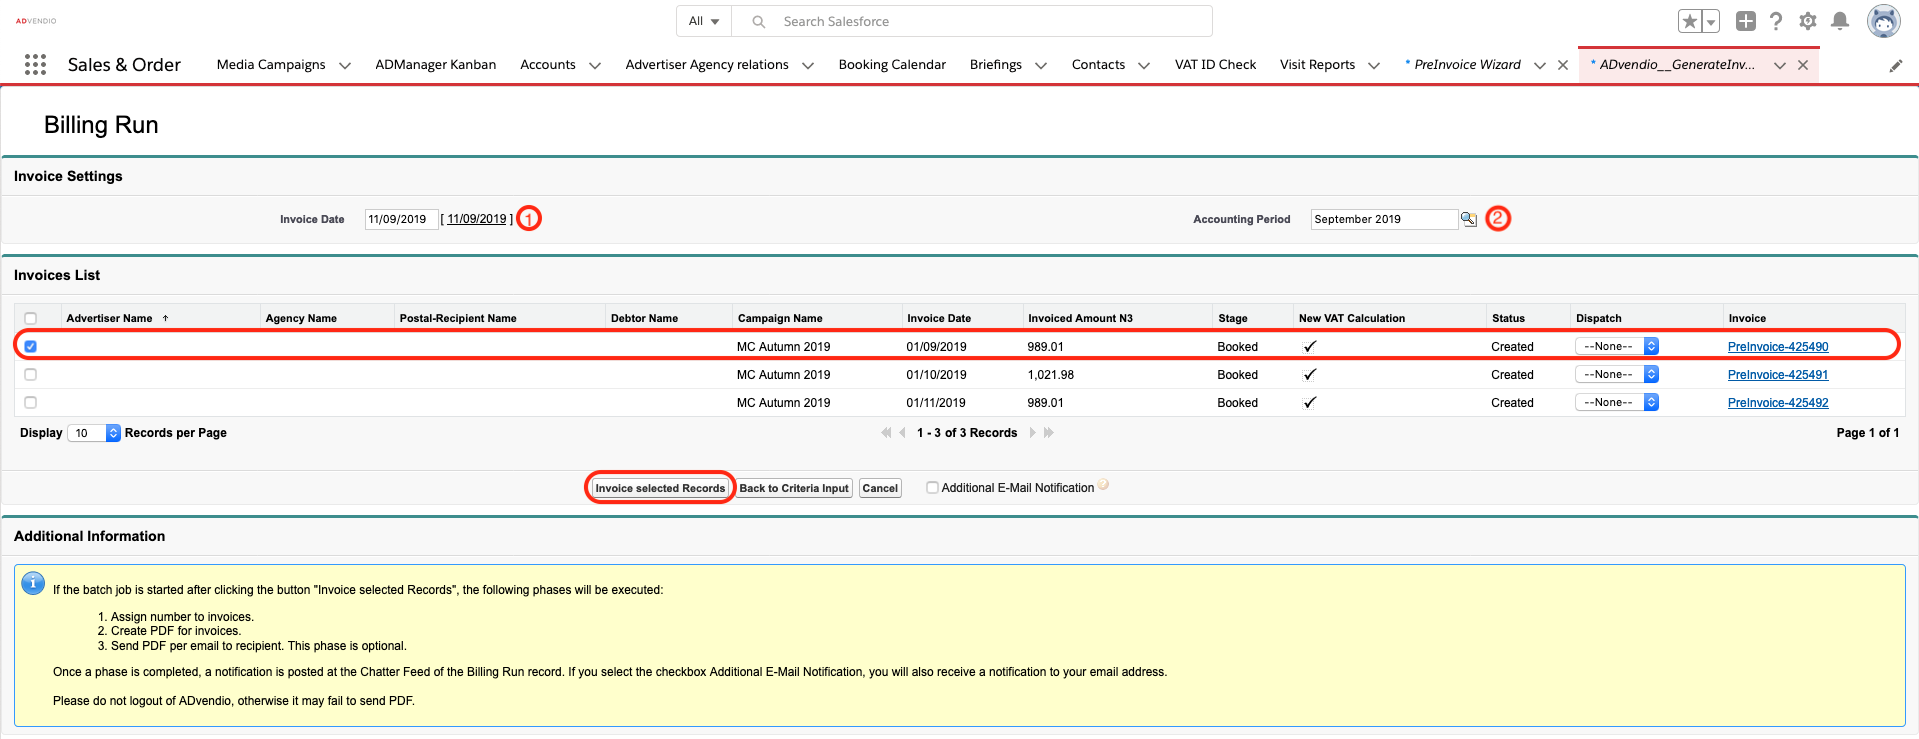
You then have the option to change the invoice date or Accounting Period, or both, if necessary.
To change the Accounting Period, click on the field and search for the Accounting Period you want to assign.
To change the invoice date, click on the field and select the new invoice date you want to use. The billing run will automatically suggest a new Accounting Period relevant to your proposed invoice date. - Once you have entered the desired invoice date and Accounting Period, select the invoices you want to invoice by using the checkboxes
- Ensure you have selected the correct invoices for the Assigned Accounting Period, once assigned it can only be changed manually on invoice level (see above)
- Click Invoice selected Records to convert pre-invoices to invoices and assign the relevant Accounting Period
- Click the button Back to Criteria Input to define other specific filter criteria to find pre-invoices.
- Choose between Email or Print to define if you want to print all invoices or send them via email.
Error Messages
...
Billing Run Error Messages
Error: Please enter an Accounting Period for this billing run.
Enter an Accounting Period in order to be able to start the billing run.
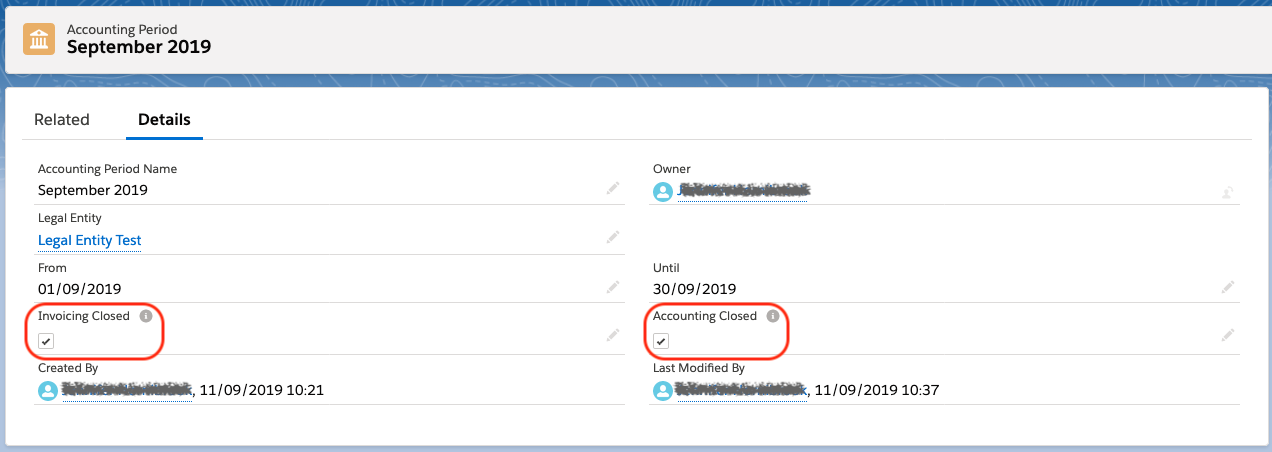
Error: The desired accounting period is closed for invoicing. Please either reopen the accounting period for invoicing or change to another Accounting Period.
To re-open a period for invoicing, you need to set Invoicing Closed on Accounting Period level to false
Error: The desired accounting period is closed. Please either reopen the accounting period for invoicing or change to another Accounting Period.
To reopen a period for accounting, you need to set Accounting Closed on Accounting period Level to false.
Once Invoices have an assigned Accounting Period, they are then considered in the 6.5.3 Accounting Records Creation Process.