...
The first step to start working with Ad Material Management is setting up the Ad Creative Templates. ℹ️ If they were not created yet please ask your administrator to do so.
Setup of templates: Depending on the type of creatives you would like to support please follow the steps linked here to create the templates:
Google image creatives: How to setup the creative upload features for [Creative Upload] Set Up Google Ad Manager ?Creative Upload Features
Custom Creative Templates and Natives for Google AdManager: How to use your Custom Creative Templates and Native formats for Google Ad Manager?
Xandr Native and Banner Creatives: [Creative Upload] How to setup the features for Xandr
Non-digital creatives: 7.2.21.1 How to setup the creative upload feature for non-digital products?
After you created your Media Campaign and added the Campaign Items to it you can open the component to manage your Ad Material for this campaign. To do this please open the action on the Media Campaign level called “Ad Material Management”.
If the action can not be opened from your Media Campaign, please ask your Administrator to add it to the layout. Please keep in mind to set an Advertiser for your Media Campaign before opening the component. Otherwise, you will see the information ”Invalid setup: Your Media Campaign is missing an Advertiser.”.
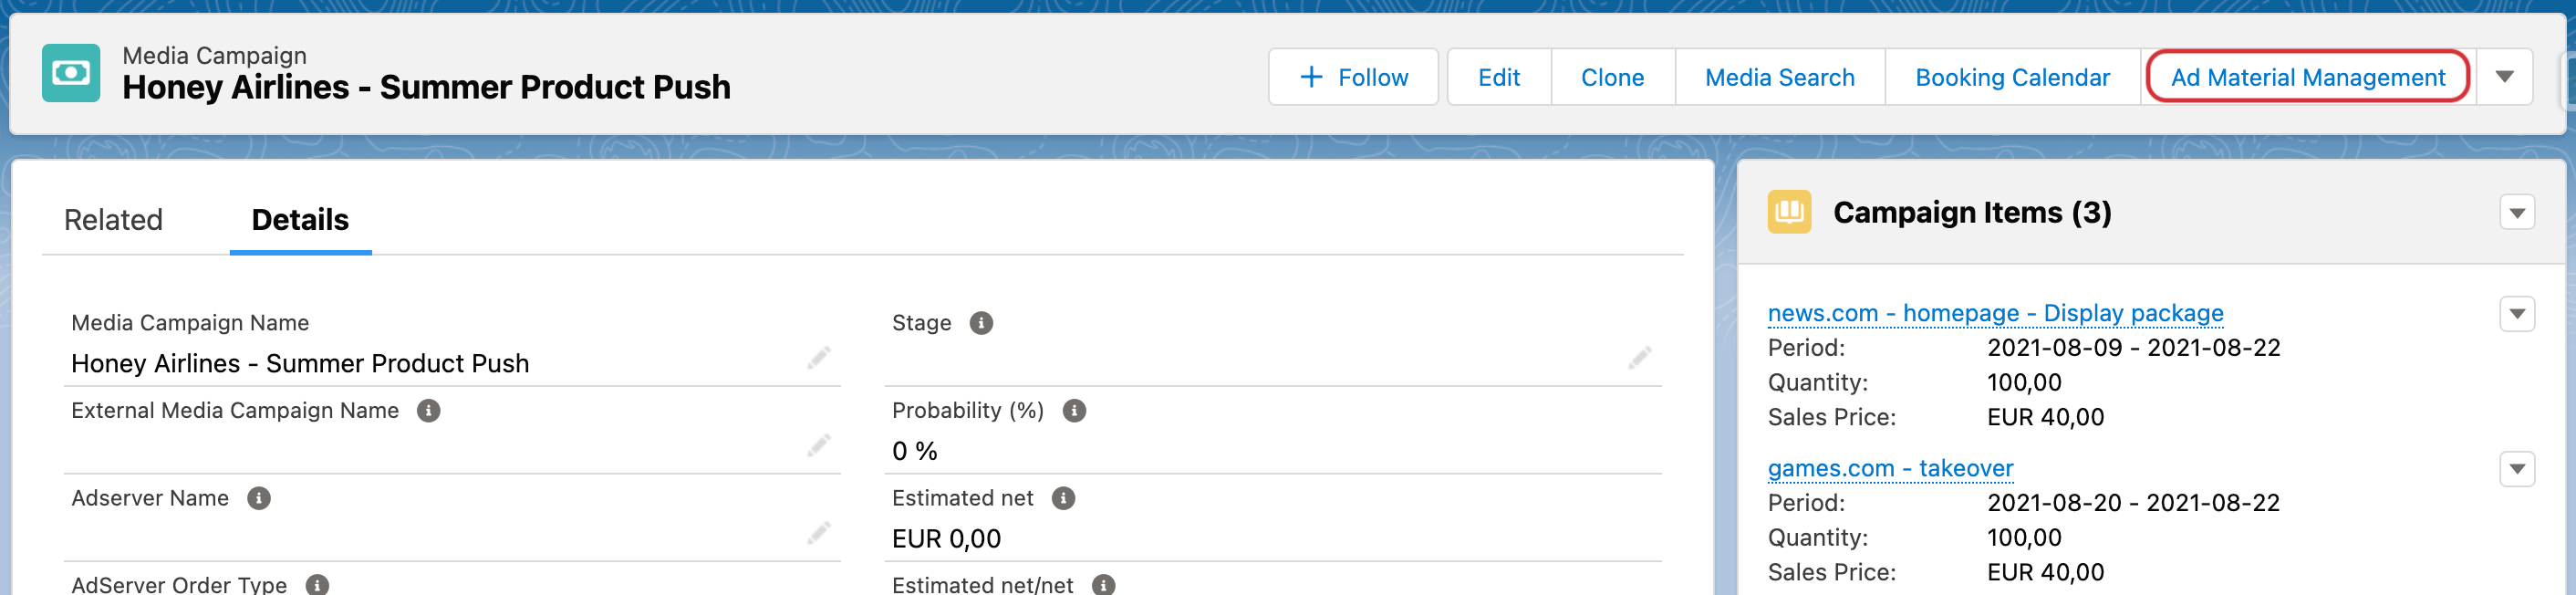
A page will open which has an overview of all Campaign Items belonging to this Media Campaign and all Creatives belonging to these Campaign Items. When you open the component the first time for this campaign you will probably not see any creatives yet, but the hint that your Campaign Item is “Missing Creatives”.

The overview page consists of the header with Media Campaign information, and a list of Campaign Items and below each Campaign Item, we have a list of Creatives summing up their information.
By hitting the “Show additional information” link you will be able to see more detailed information about your creative.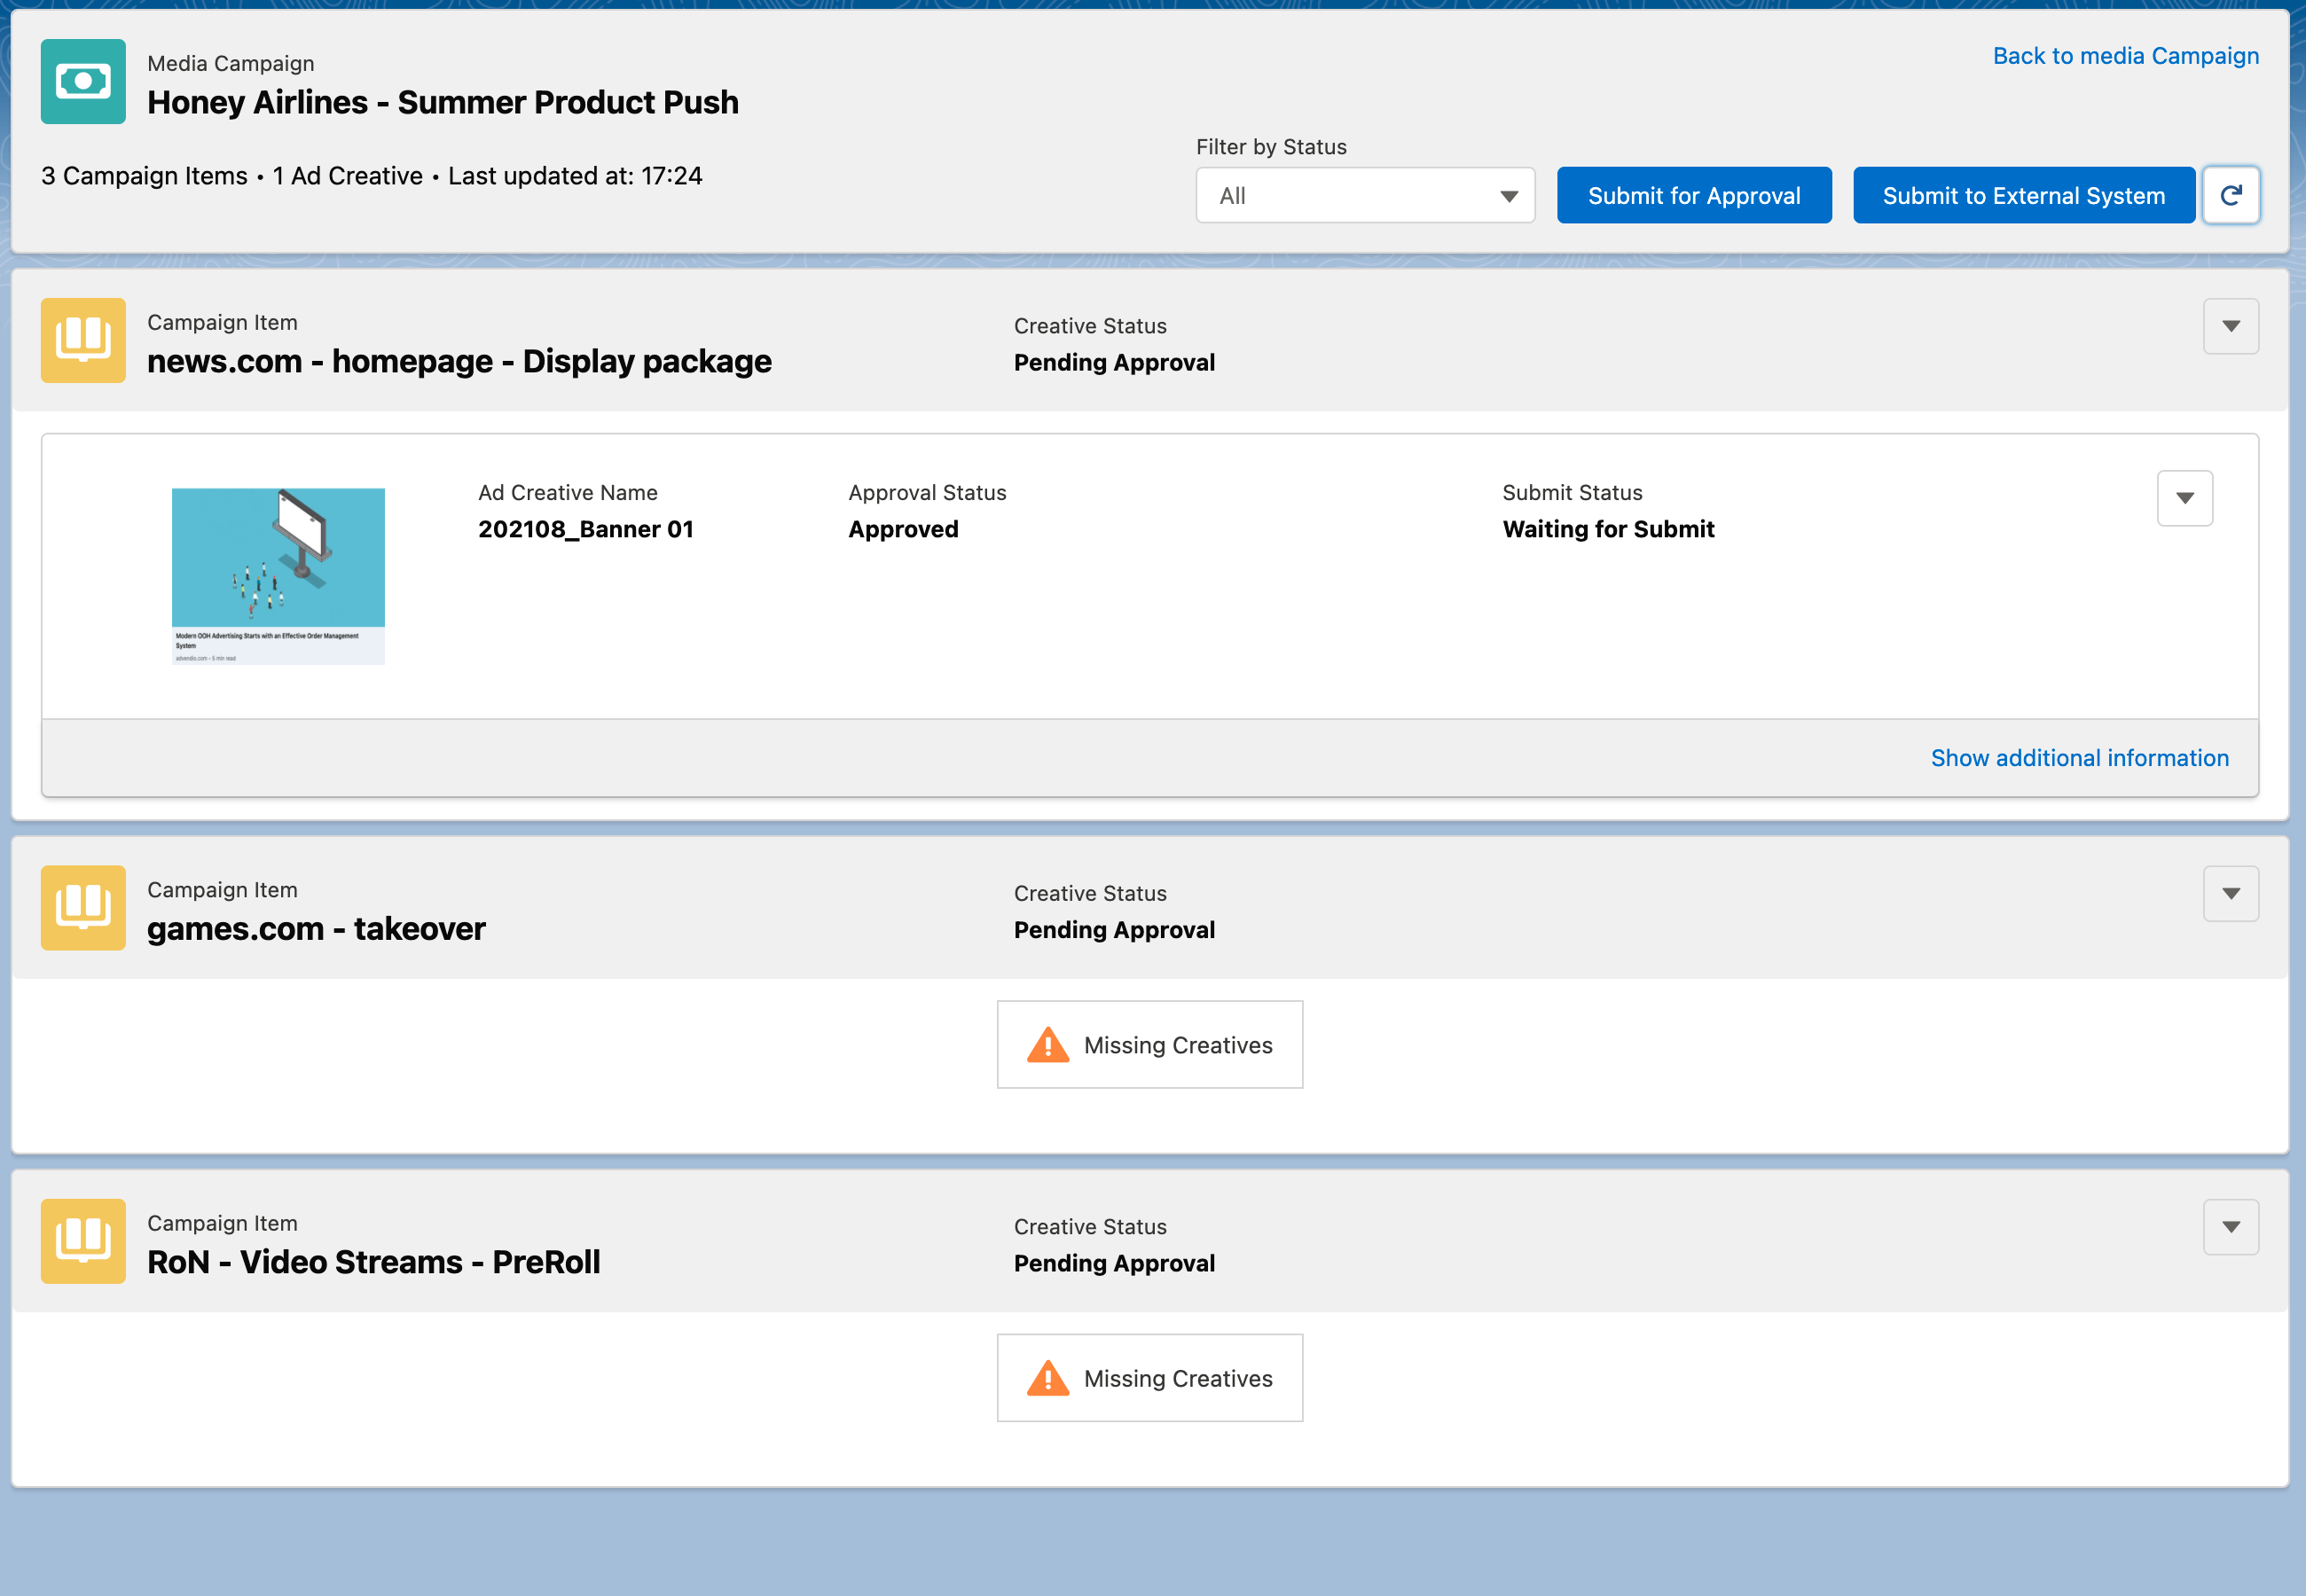
...
Please check 4.12.5 Filtering Creative Uploads based on statuses
Creative Assignment Dates for Google Ad Manager
...
GAM and Xandr in Creative Uploads support a feature called Assignment Dates which allows advertisers and campaign managers to select specific dates when they upload their ads. This gives them greater control over their advertising campaigns and helps them to manage their ads more efficiently.
...
Select your media campaign and click the "Ad Material Management" button in the top right corner
On the next page, you'll see a list of your campaign items with their corresponding Creative status on the right
Look for a drop-down menu and choose between two options:
"Upload a Creative" if you want to add a new one, or
"Select an existing creative" if you have a pre-existing one to use
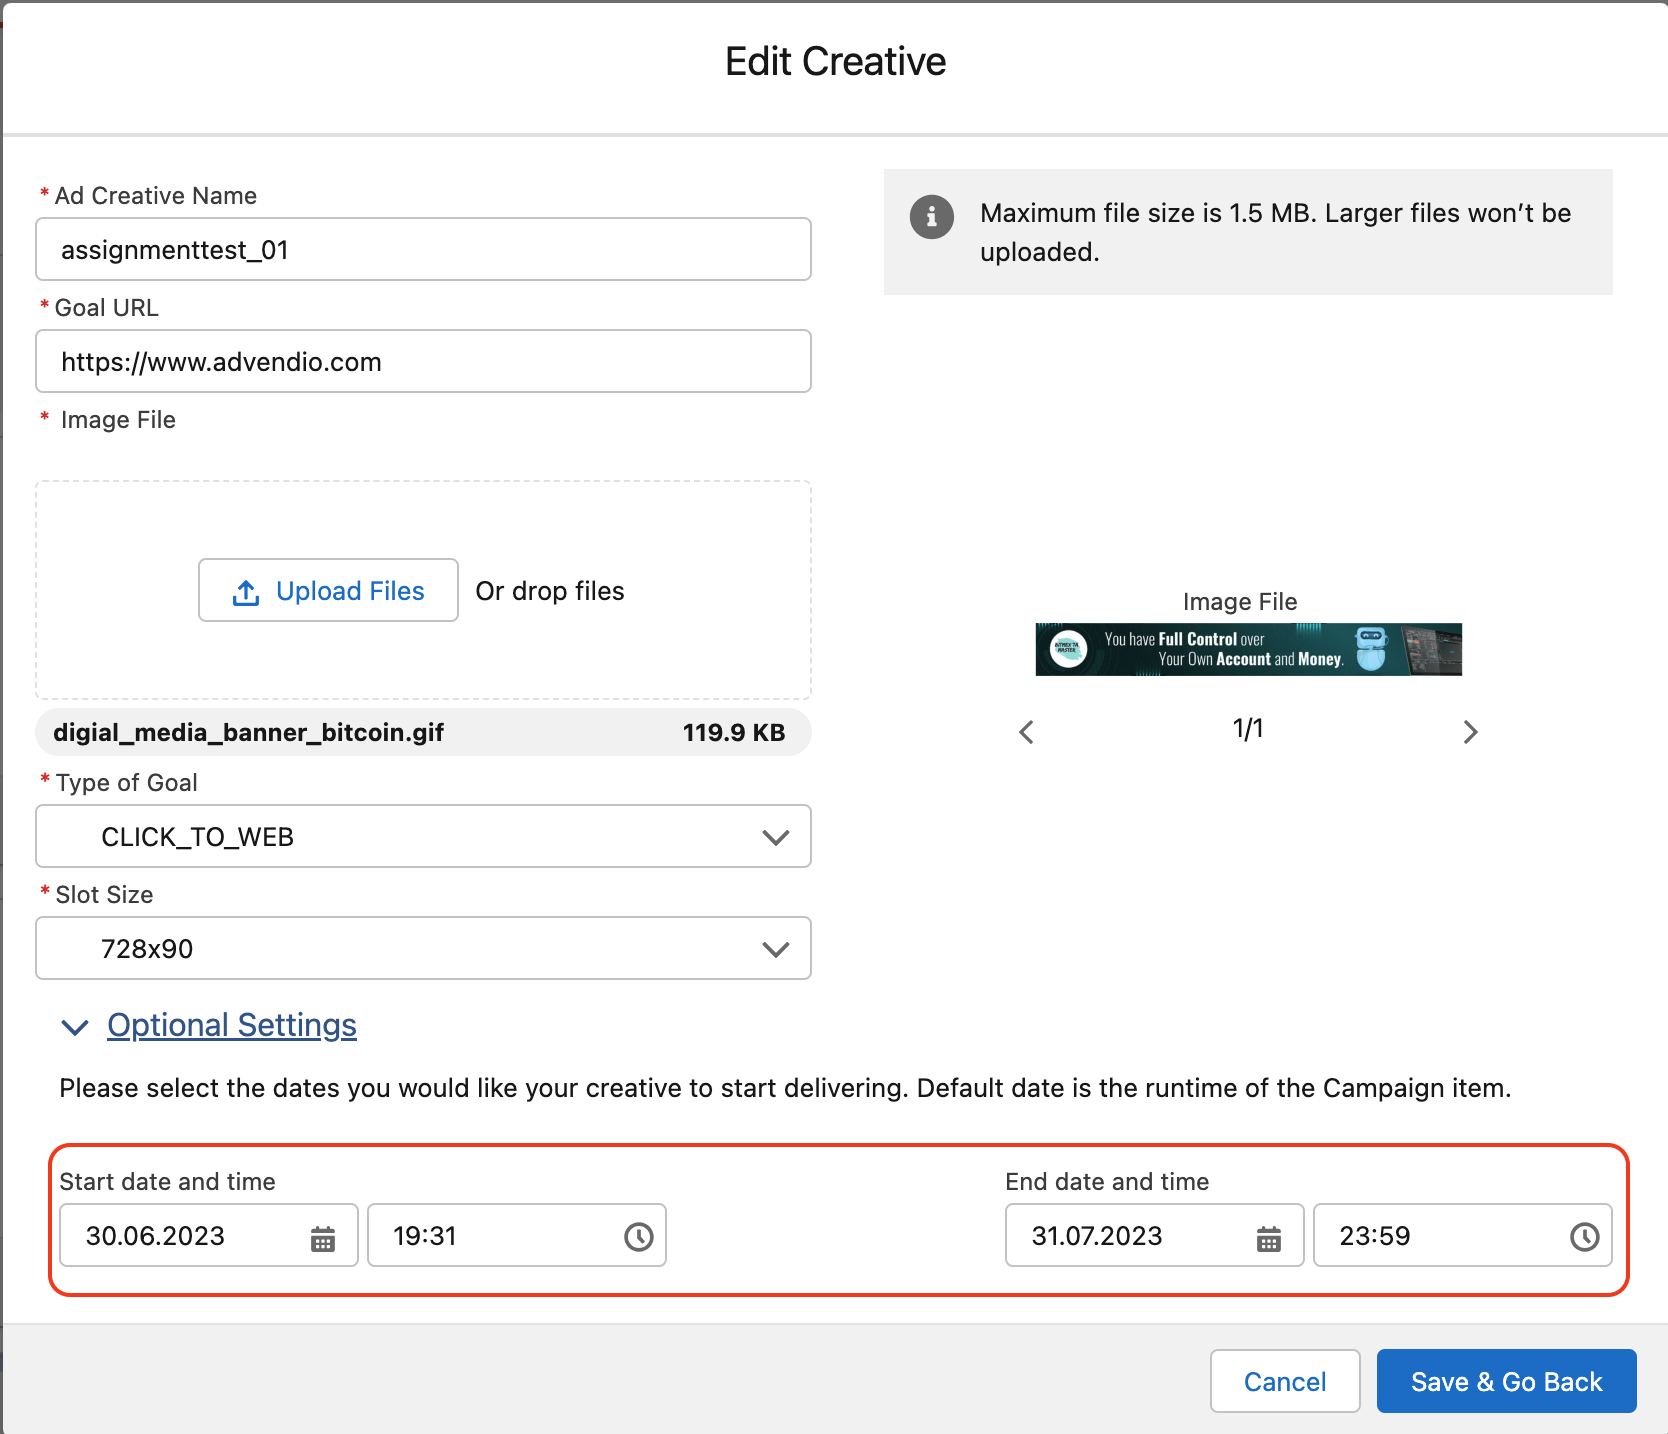
Once you select your Ad Creative Template, fill in all the required fields
Under "Optional Settings," you'll find "Start Date and Time" and "End Date and Time" in the drop-down menu.
Select your preferred date and time values for both fields
Click "Save and go Back" to save your changes
| Info |
|---|
The Formats to be used:
⚠️ If different values are used, an error will be triggered by the system. |
| Note |
|---|
Note for Custom Time Frames: If you are using custom time frames for Creative Assignments in ADvendio, you will need to remove the dates manually either in the Third Party Platform or in ADvendio before submitting the Campaign Item again to the Third Party Platform. |
Creatives Error message: no template found that matches this Campaign Items’ Ad Type
...
Permissions needed for objects:
Ad Creative
Creative Assignment
Ad Creative Templates
Ad Creative Template variables
If you want to restrict the access for different actions not to be offered on the screen please check this Wiki page: 7.2.21.2 How to define profile permissions for the Creative Upload actions?
Setup of Creative templates and variables (to be automated in the future)
Currently supported Creative templates for external System
Google image creatives: How to setup the creative upload features for [Creative Upload] Set Up Google Ad Manager ?Creative Upload Features
Xandr banner creatives: [Creative Upload] How to setup the features for Xandr
Non-digital creatives: 7.2.21.1 How to setup the creative upload feature for non-digital products?
Add Ad Material Management action to the Media Campaign layout