...
- The first part of the media campaign's information shows the owner of the campaign and the campaign's names. You can also store your clients' reference number and the system generated offer number here.
- Accounts linked: The following part stores information about the client and all other parties that are involved in this deal. You can enter the
- advertiser (account) and
- agency information using the lookup field: click on the magnifier to open a pop-up window displaying all advertisers and agencies respectively. You can also enter the
- debtor to receive the invoice and the
- beneficiary here.
- The last section reads the start date and end date of the campaign.
- If you are using Legal Entities or have customized your offer number, please fill out this section. Your administrator can also automate part of this.
- Here you can enter information on the campaign's stage. With one glance at this section, later on, you can estimate how advanced the negotiations are since each stage is assigned to a probability which makes it easy to evaluate the progress (see lesson 'Media Campaign's Stages' for more information).
- Use rate cards to preselect the product list you like to sell. Since rate cards are valid for a certain period of time, they are ideal for organizing yearly price changes. Another use case would be to make products only available during the rate card's validity period. A media campaign assigned to a certain rate card can only contain campaign items of this rate card. Additionally, enter the tax information here.
- Version 2.91 and up: You can track you customers budget given by either Advertiser or Agency. ADvendio shows you the sum of all Campaign Items of a Media Campaign and the Delta to the Budget in the Media Configuration. Please set the necessary amount field in a Custom Setting to calculate the budget against the right net or gross value.
- Starting version 2.82 and up we added a new field "Valid until" to the media campaign. This will show your clients how long this offer is valid. The date will also be shown on the PDFs and in the Optimizer.
Billing and Accounting
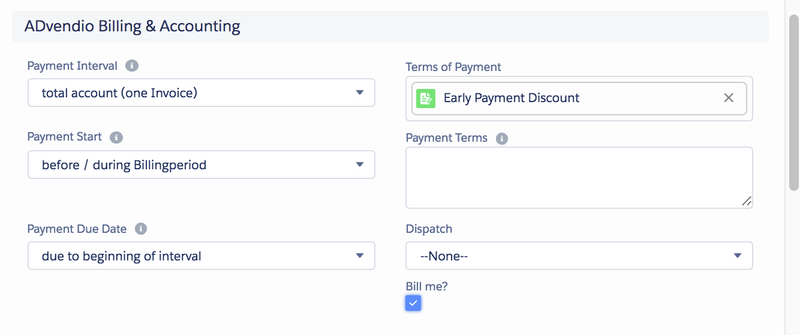
If you are using ADvendio's Billing and Accounting Module make sure that you fill out this section in order to create pre-invoices and Invoices. More details can be found here: 6.1.1 Advendio Billing & Accounting Overview
...
- This section defines the Quote's language used for this campaign's proposal and the document type.
- You can add a description to your media campaign.
Discounts & Description
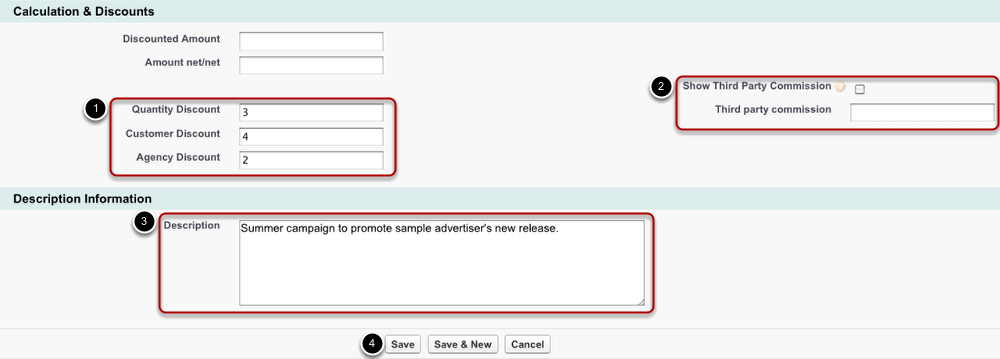
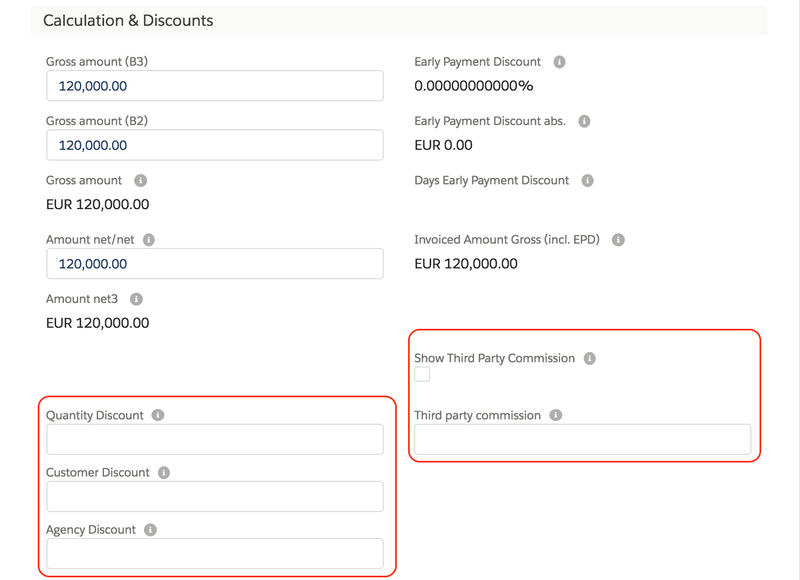
Once you have entered the basic information, you can start entering data concerning discounts and a detailed description. These steps are optional. Please note: Amounts will be filled out automatically once you have added campaign items. They are the sum of the campaign items' amounts and therefore, they are calculated and entered here as soon as you have added items to your campaign.
...
Now that you have created the basic foundation of your media campaign, it's time to add campaign items to it.
Add Campaign Items

To add campaign items, open a media campaign and scroll down to campaign items. Click the Add Items button to open the media search.
Media Search
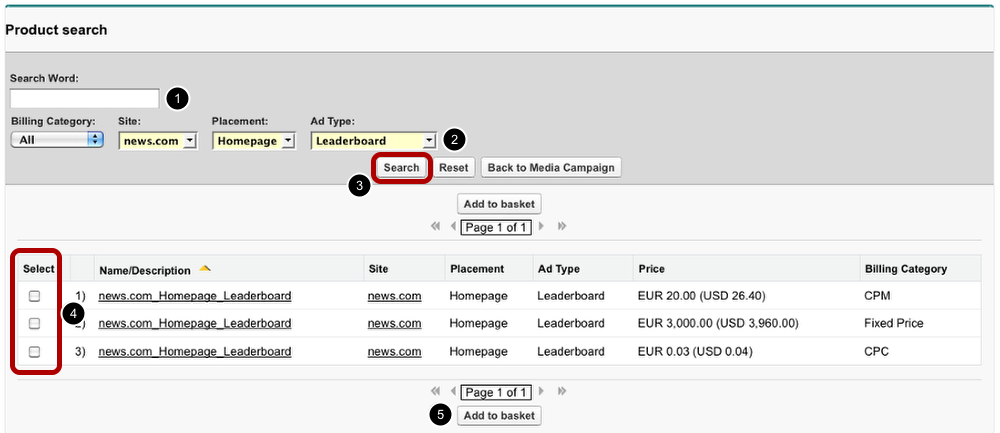
To add an item search for previously created ad specs (media).
- You can either search by word.
- Or you narrow down possible search results by choosing a value from the different criteria Billing Category, Site, Placement and Ad Type.
- Click the Search button to display all items matching your criteria.
- From the displayed results, you can select items.
- Click Add to Basket to add these selected items to your media campaign.
Basket
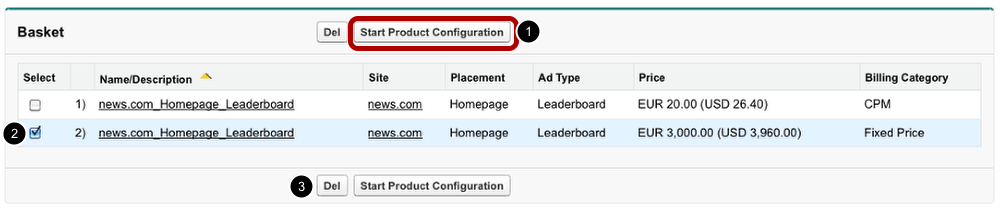
The previously selected items will then be displayed in your basket. Here, you are able to delete items or start the Product Configuration.
- If you are okay with your selection of items, select all items and click Start Product Configuration.
- If not, select the item you do not want.
- Then click Delete.
The media search is displayed below the basket. So in case you need more items, you can easily repeat the step "Media Search" and add further items to your basket.
Next steps you find here: Read about the new media configuration or the 4.3 Media Configuration.