The following section explains how to set up and configure your ADvendio Ad Material Management feature 4.12 Overview Ad Material Management & Creative Upload
General Information
The purpose of this function is to create Script/AD Advertising Material record and then get it approved by the line manager and the responsible client to be ready for publication. We would like to help our customers satisfy their creative and media requirements in terms of TV, print, radio and digital. From the initial request for creatives through the fulfillment process and finally the link up to the actual booking.
Overview
Users can create
...
Advertising Material records using the salesforce standard page and
...
then submit them to get approved by the line manager and/or the client.
...
Follow the next steps to make this work:
1.
...
Add Manager to User
Each user who is supposed to use this feature , needs to list a manager in the his user record is required. Please select the . Navigate to Setup → Users → Users and open a users record: Then please select a manager:
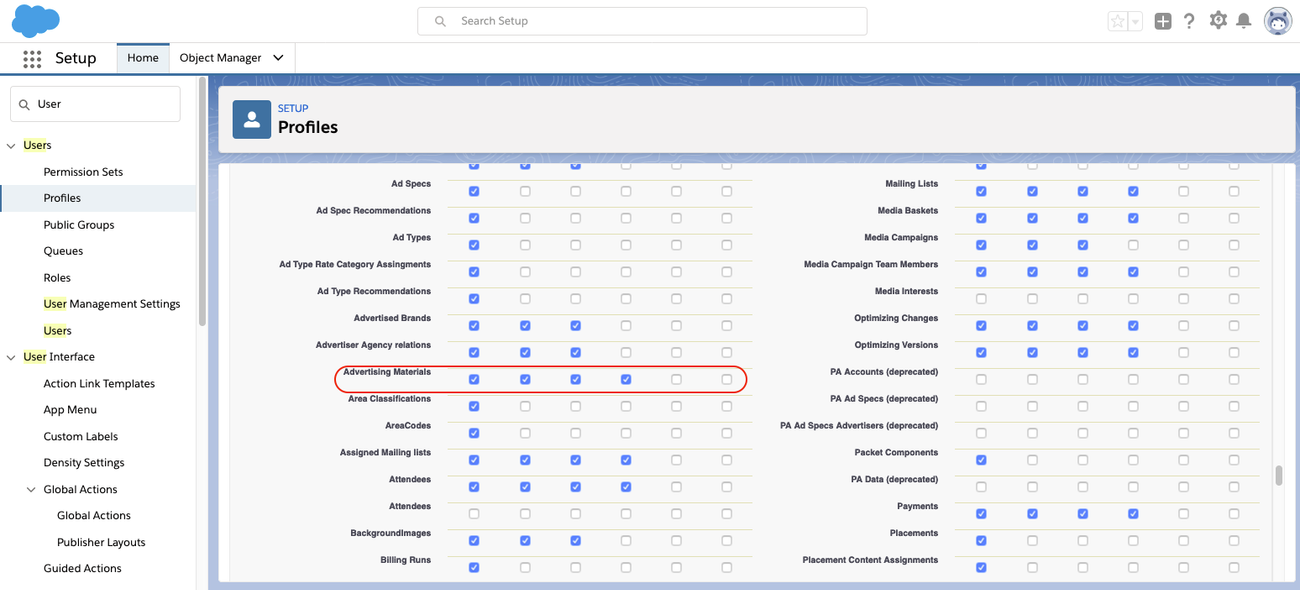
2. Profile Access Settings
Users These users profiles and manager their managers profiles need to have
- Read, Create, Edit, Delete
Permission on the Advertising Material (ADvendio_BriefingScript__c) object. Open the profile by navigating to Setup → Home → Users → Profiles.
3.
...
Adjust Page Layouts
Navigate to the Object manager and open the page layout(s) for the ADvendio_BriefingScript__c object
- Please make sure that the following fields are Read-only
- "Script Status",
- "Publication Date"
- ,
- "Sent to Client (Ad)",
- "
- Sent to Client
- (Script)"
- Make "Contact" field required on ADvendio_BriefingScript__c object page layout. Add
- Add to the related list
- Notes and Attachment,
- Approval History
4. Set Up a Force.com Site
Navigate to Setup - Build - Develop - Sites → Home → User Interface → Sites and Domains → Sites to set up a force.com site which opens the VF Page MMResponseOnClientApproval "Thank you site". Create a new domain with your company name if you don't have one already:

Next, create a new Site by clicking the Once this is done add the VF Page MMResponseOnClientApproval "Thank you" site. By clicking on the new button:
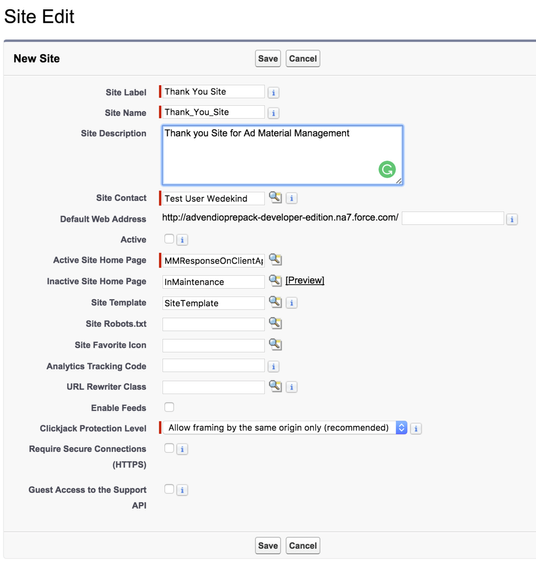
For 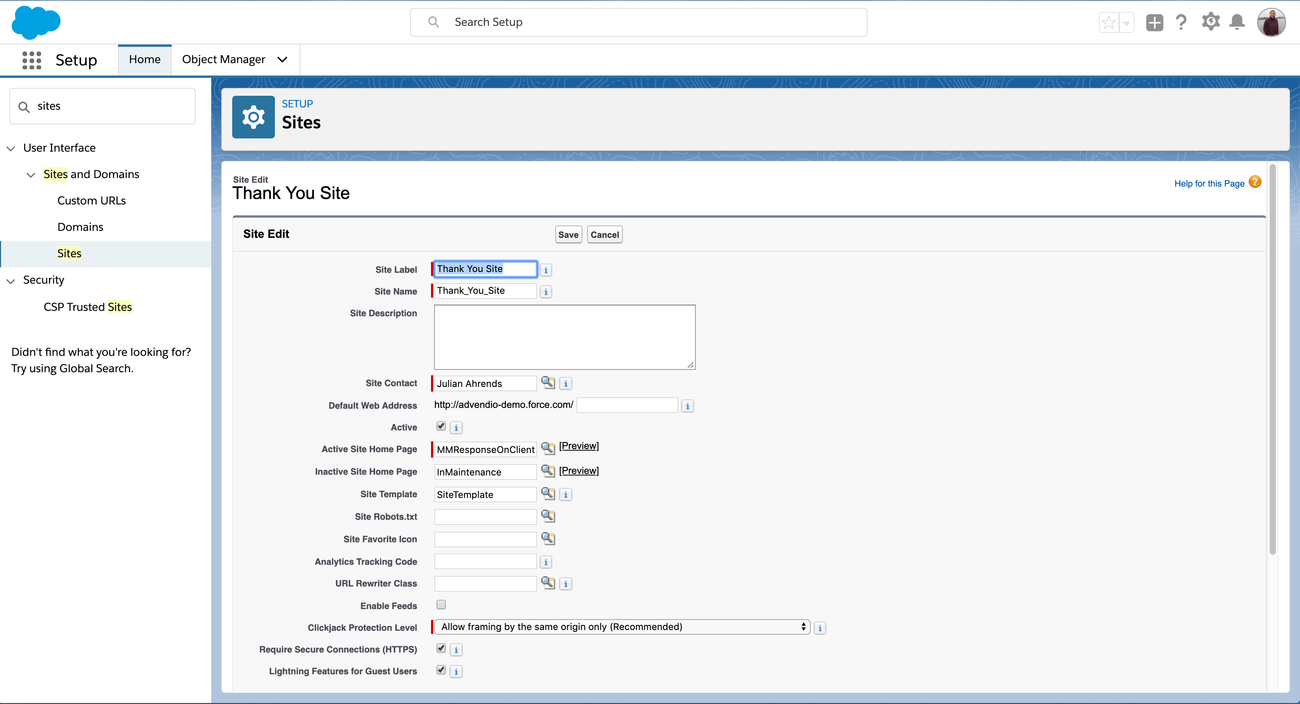
Enter Site label and name similar to the above screenshot. Set the Active Site Home Page select the = Virtual Force Page MMResponseOnClientApproval. Save
Save the site.
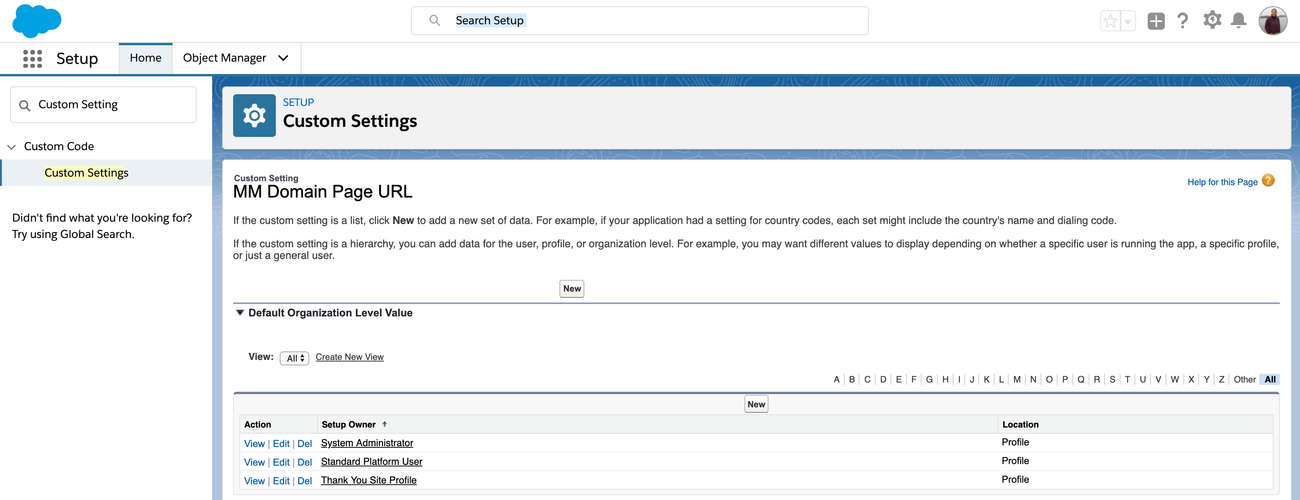
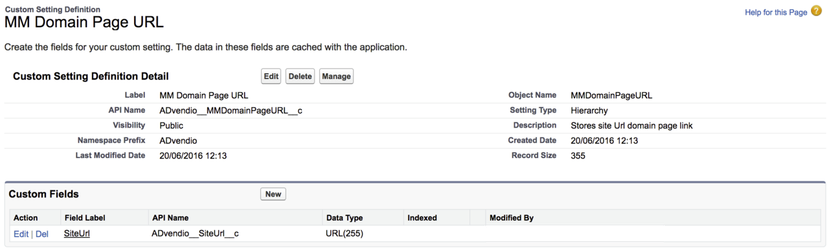
5. Set Up Custom Setting
Create Hierarchy Custom setting to store Force.com site page URL and grant access according to the profiles or user.
Navigate to Setup - Develop - → Home → Custom Code → Custom Settings (view all) and click on "manage" on the MM Domain Page URL:
Create Create a new record for all profiles needed and link by
- selecting the correct profile and
- linking to the URL that you have created in step 4. Set Up Force.com Site
...
- .
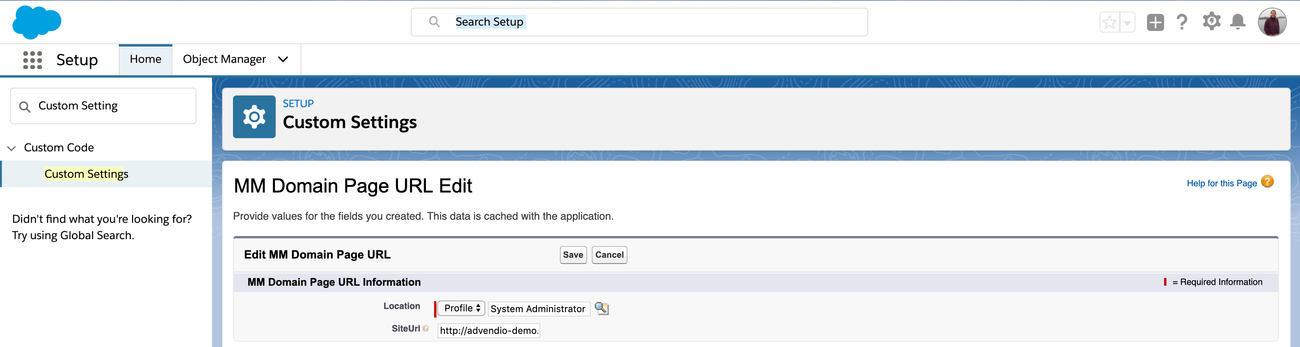
Save and repeat for all profiles needed.