Challenge
You successfully connected your external systems to ADvendio and now you want to do one of the following:
- Get in delivery data for running and finished Campaign Items, to see their performance and start invoicing based on actuals
- Set up detailed breakdowns for your Delivery Reports, so you can see delivery by site/medium or even more details
- Plan a quick update of your Items data, so that your Sales Reps can see at a glance if Campaign Items perform according to the defined goals
- Check when the next delivery import is due
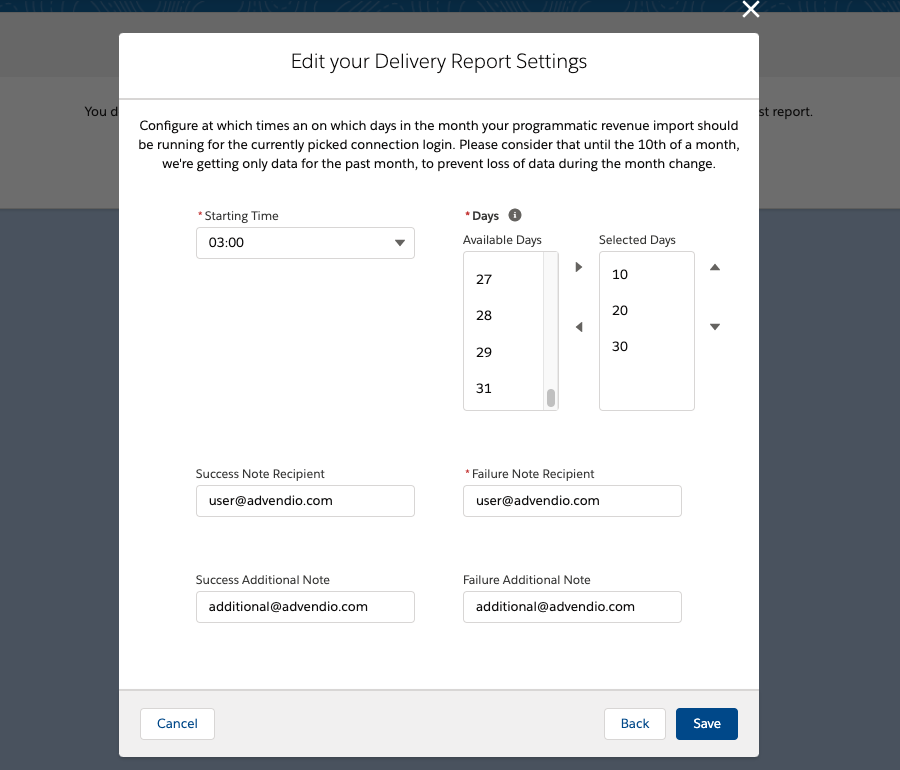
- Change the time for your planned imports or who will receive an email with the results
- Bring in your programmatic data from SSPs or DSPs to start reporting or using those information in our accounting interface
- If there was a problem
Solution
For all these things, we can offer you a single interface. So you will have all relevant information and settings in one place and can quickly change everything to your desire.
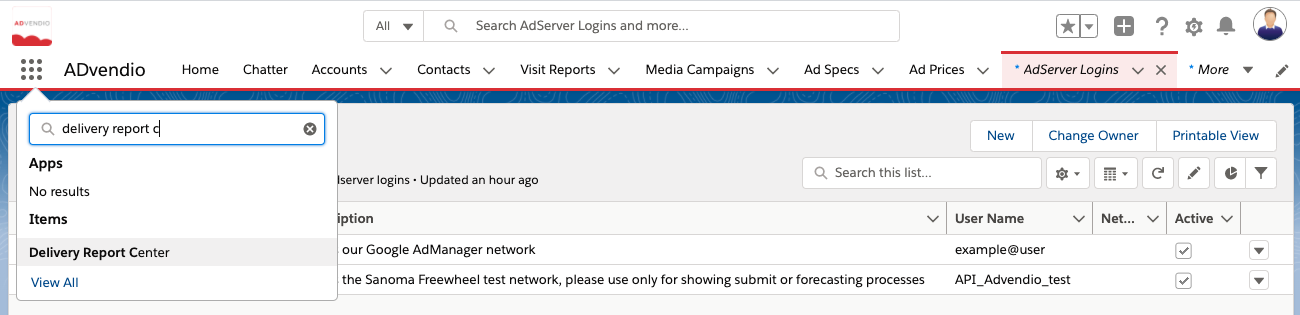
This is our Delivery Report Center. To enter it go to the App Launcher and type in "Delivery Report Center"
Once opened you will see the following overview
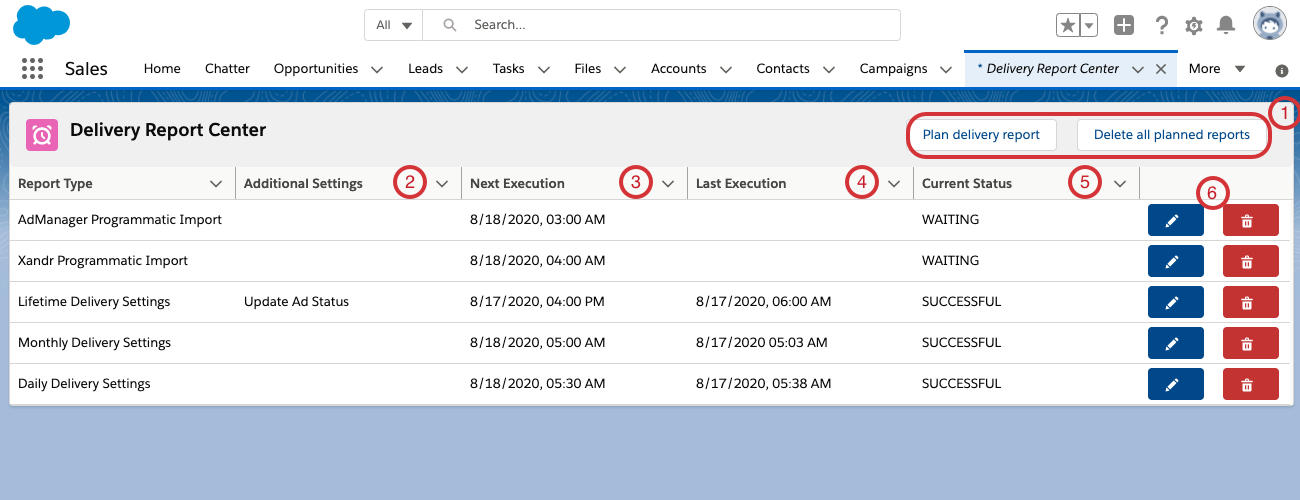
You can see all delivery reports and imports that are currently planned for your Org.
1. Use the buttons on the top right to plan a new import or quickly delete all settings for your Org
2. Additional Settings: This column shows, if any additional features have been activated for your Import. For example a status sync or enhanced delivery data
3. - 5. The next three columns show, when the next import is due, when the last one ran and the status of the import. You can see if an import is currently running or waiting for the next import.
6. You can use these two buttons to either edit or delete a single report of the list
Planning new Imports
However, if you are relatively new and currently in the setup of your ADvendio instance, the screen you will see looks like this:

Looks a bit empty, because there are no Delivery or Programmatic Imports planned yet. Click the button "Plan delivery report" to continue.
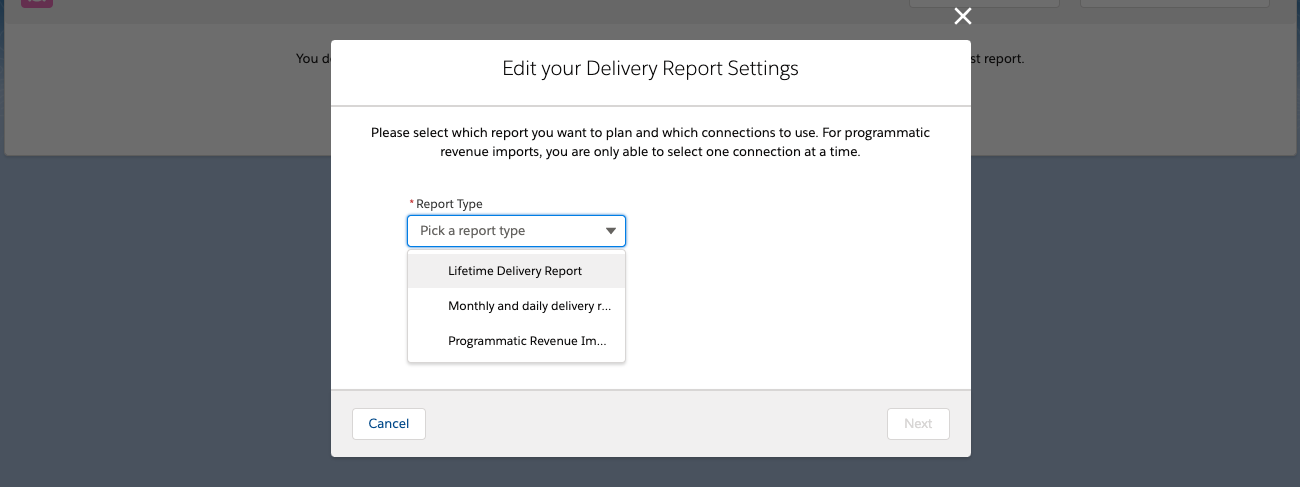
First step will be to choose what you want to plan. You have the following options:
- Lifetime Delivery Report: Updates the overall Impressions, Clicks and Status of your Campaign Items, can be used to synch your items performance, to see if they deliver according to the Campaign Item goals.
- Monthly / Daily delivery Report: Updates your Campaign Items with detailed delivery information, either on a monthly or daily basis. This will also be needed, in order to invoice your items based on actuals.
- Programmatic Revenue Import:
Customers using a version older than 2.130 will need to additionally enter the credentials for a Salesforce User including username, password and security token in order to plan the imports. For all newer versions this is not required anymore.
If you are updating from an older version of ADvendio to 2.130, this change will be applied automatically to all jobs you have previously planned. You will not need to manually update them and they will continue to run as intended.
Lifetime Delivery Reports

Monthly / Daily delivery Report
Programmatic Revenue Import
For the Programmatic Import
Setup
To access this feature, you will need to have at least one active connection configured to an AdServer, SSP, DSP or similar external system. To find out more about how to do this, you can take a look at the following pages:
7.3.1 Create an Ad Server Login
7.7.1 Connect a Supply Side Platform (SSP)
7.7.2 Connect a Demand Side Platform (DSP)
7.7.8.1 How to connect external systems to the ADvendio Programmatic Import (DSP, SSP, Exchange)
Moat - Delivery Report Settings
Once you have configured your Moat AdServer connection in ADvendio (see: 7.7.6 Setup Moat (Media Analytics)), the third party data will be transferred automatically with the monthly delivery reports for the connected 'main' AdServer Login. There is no separate report to schedule.
After you've created your Moat AdServer login, we recommend to reschedule your delivery reports to prevent problems. to do so:
- Please open the Delivery Report Settings (via the App Launcher)
- Click the Edit button
- Without changing anything, click the submit button, to replan your delivery reports
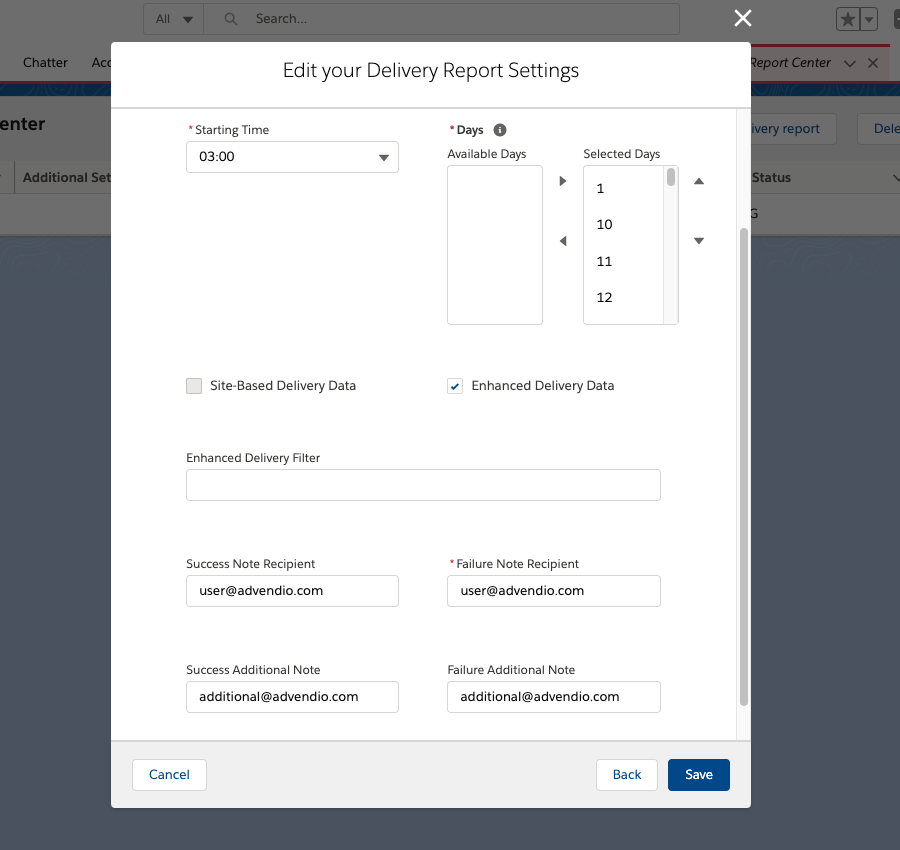
Activate Site Base Delivery Data or Daily Delivery Data (optional)
Use the App Launcher to navigate to the Administration Settings or
- Navigate to Overview.
- Scroll down and open the section Setup & Settings.
- Click the button Administration Settings.
Additional Delivery Report Relevant Settings
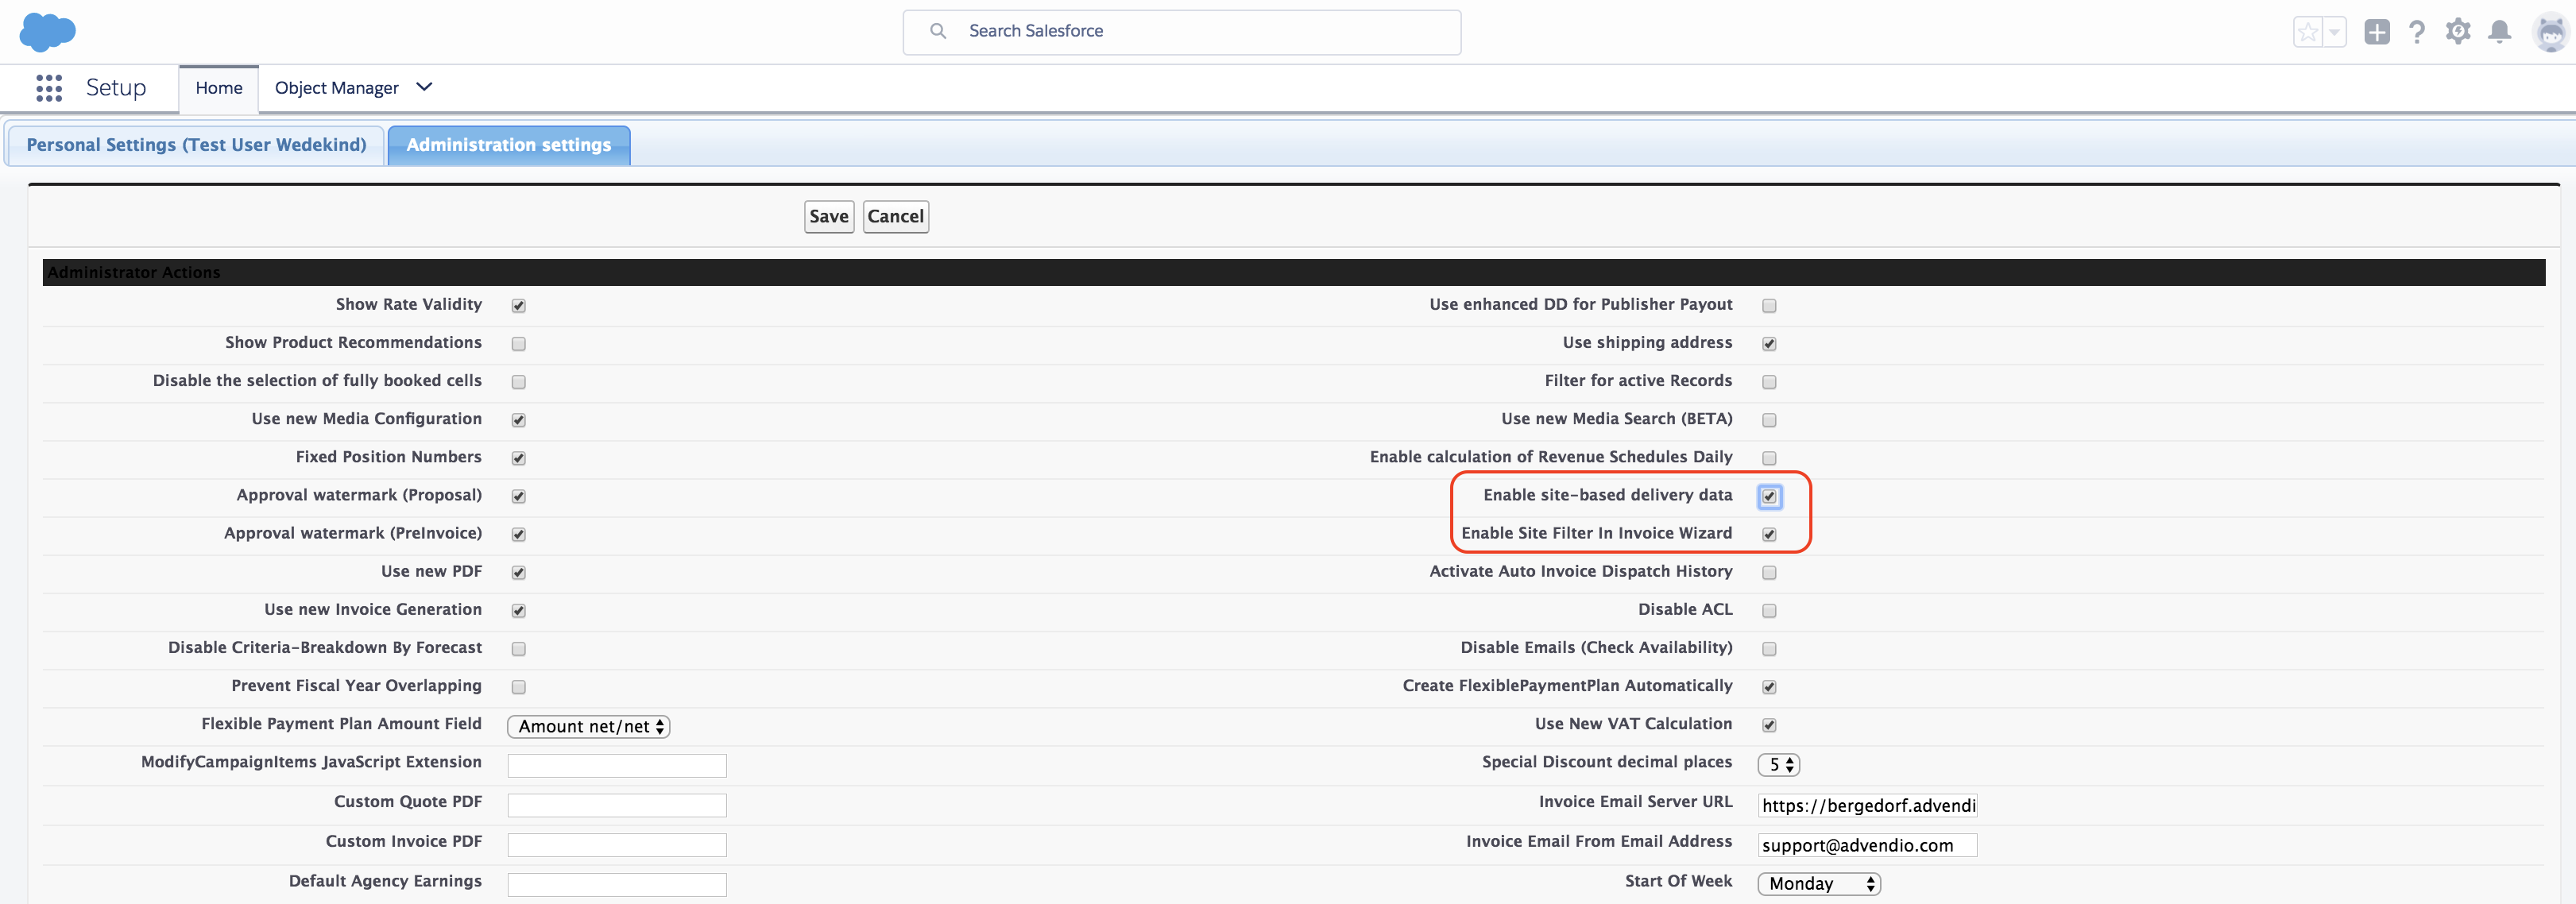
Here you can activate site-based delivery data or Revenue Schedules Daily for daily delivery data (default is deactivated). If you make changes, click Save.
Warning
System specific setting and features
Freewheel Enhanced Delivery Data
Xandr time zone settings
For Xandr reporting, it is required to set a specific time zone, you can change which time zone is used for reporting in the ADvendio user settings: