Challenge
You are planning to use the ADvendio Creative Upload features to manage your creatives in ADvendio for non digital items.
Now you are wondering how you can set this feature up to support the user during the upload to receive all information relevant for your business process.
Solution
In order to setup the Creative Upload in ADvendio, there are so called Ad Creative Templates required. Those templates control, which fields and settings will be available in the Creative Upload UI and thus which information your Sales Reps will be able to see. Additionally you can determine for which Campaign Items, which Creative Templates are available. This helps you for example to make sure to only use Print creatives for your Print Campaign Items and similar.
Underneath each Ad Creative Template in ADvendio there are Template Variables, those can configure which fields are visible in the Creative Upload Screen.
Here is an overview about the data model and what it means:
ADvendio Object | Description |
|---|---|
Ad Creative | The actual creative that will be uploaded to an advertiser in ADvendio and will be connected with a Campaign Item. |
Creative Assignments | ADvendio assigns Creatives to Campaign Items to ensure the creative connection to the campaign. |
Ad Creative Template | The Creative Template to use |
Ad Creative Template Variable | The fixed settings and fields required for non digital creatives, more information can be seen below |
To start configuring your ADvendio Org for the creative upload, you need to follow these steps:
Create Ad Creative Templates in ADvendio
Configure your Ad Creative Template Variables for each template
Connect Ad Creative Templates to Ad Types in ADvendio, to make them available to your Users
Create an Ad Creative Template in ADvendio
You start of by creating your Ad Creative Template in ADvendio, this will help you to configure the types of creatives you want to manage from ADvendio.
Let’s say we want to use a standard print template. We proceed to create an Ad Creative Template record in ADvendio, which could look like this:
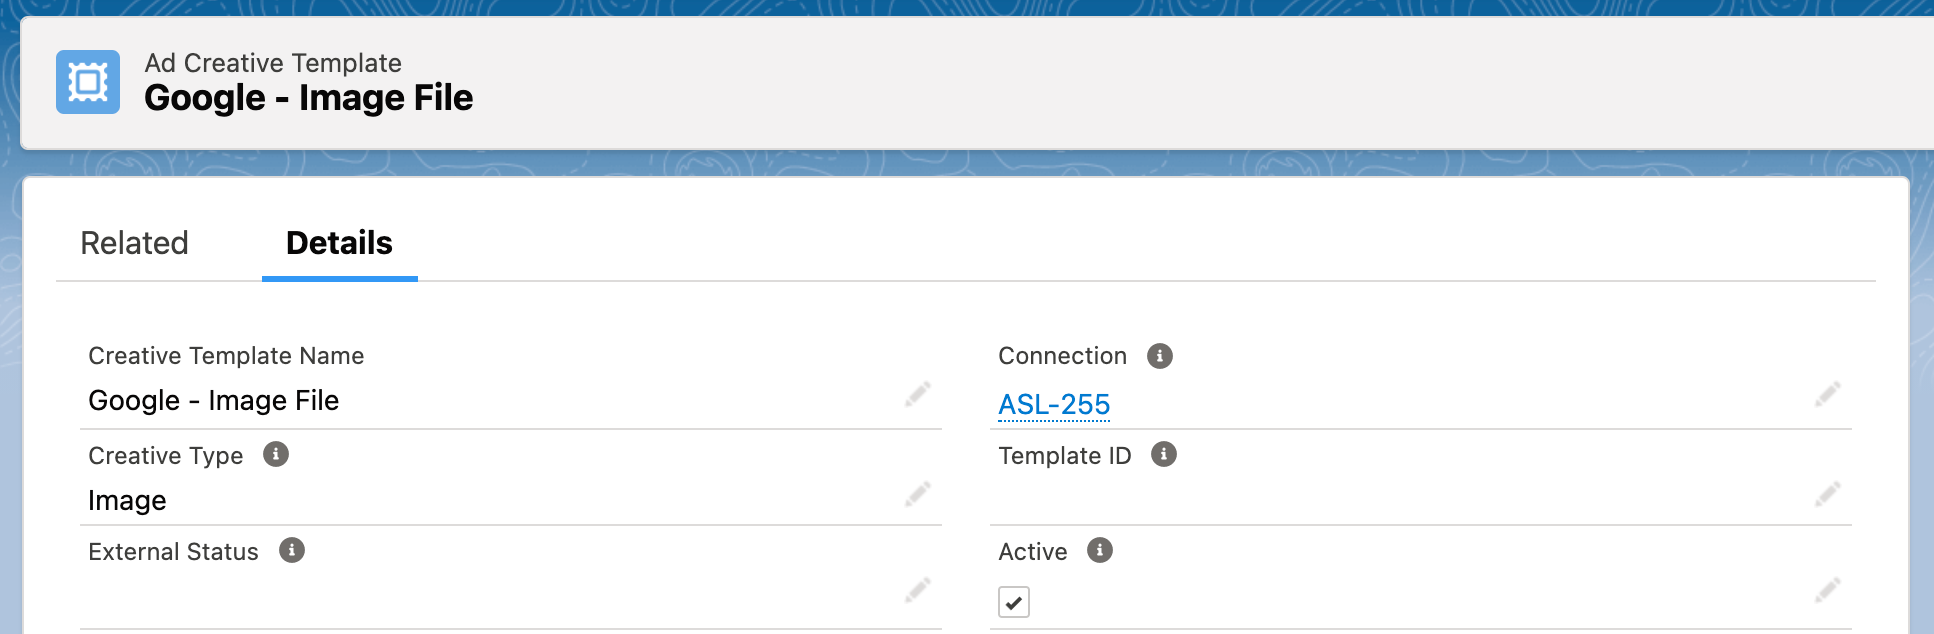
Creative Template Name: You can pick any name that you like. This name will be shown to the user when uploading a new creative to ADvendio, so we recommend using something which is relatable for your users
The following fields are not relevant when you are working with non digital products
Connection
Creative Type
Template ID
External Status
Active: Please set your template to active, otherwise it will not be available during the creative upload process
Configure your Ad Creative Template Variables
Once the template is there, you will need to define which fields you want or need to use.
To manage the variables of a template, you need to switch to the related tab in your Ad Creative Template record and view the related list ‘Ad Creative Template Variables’
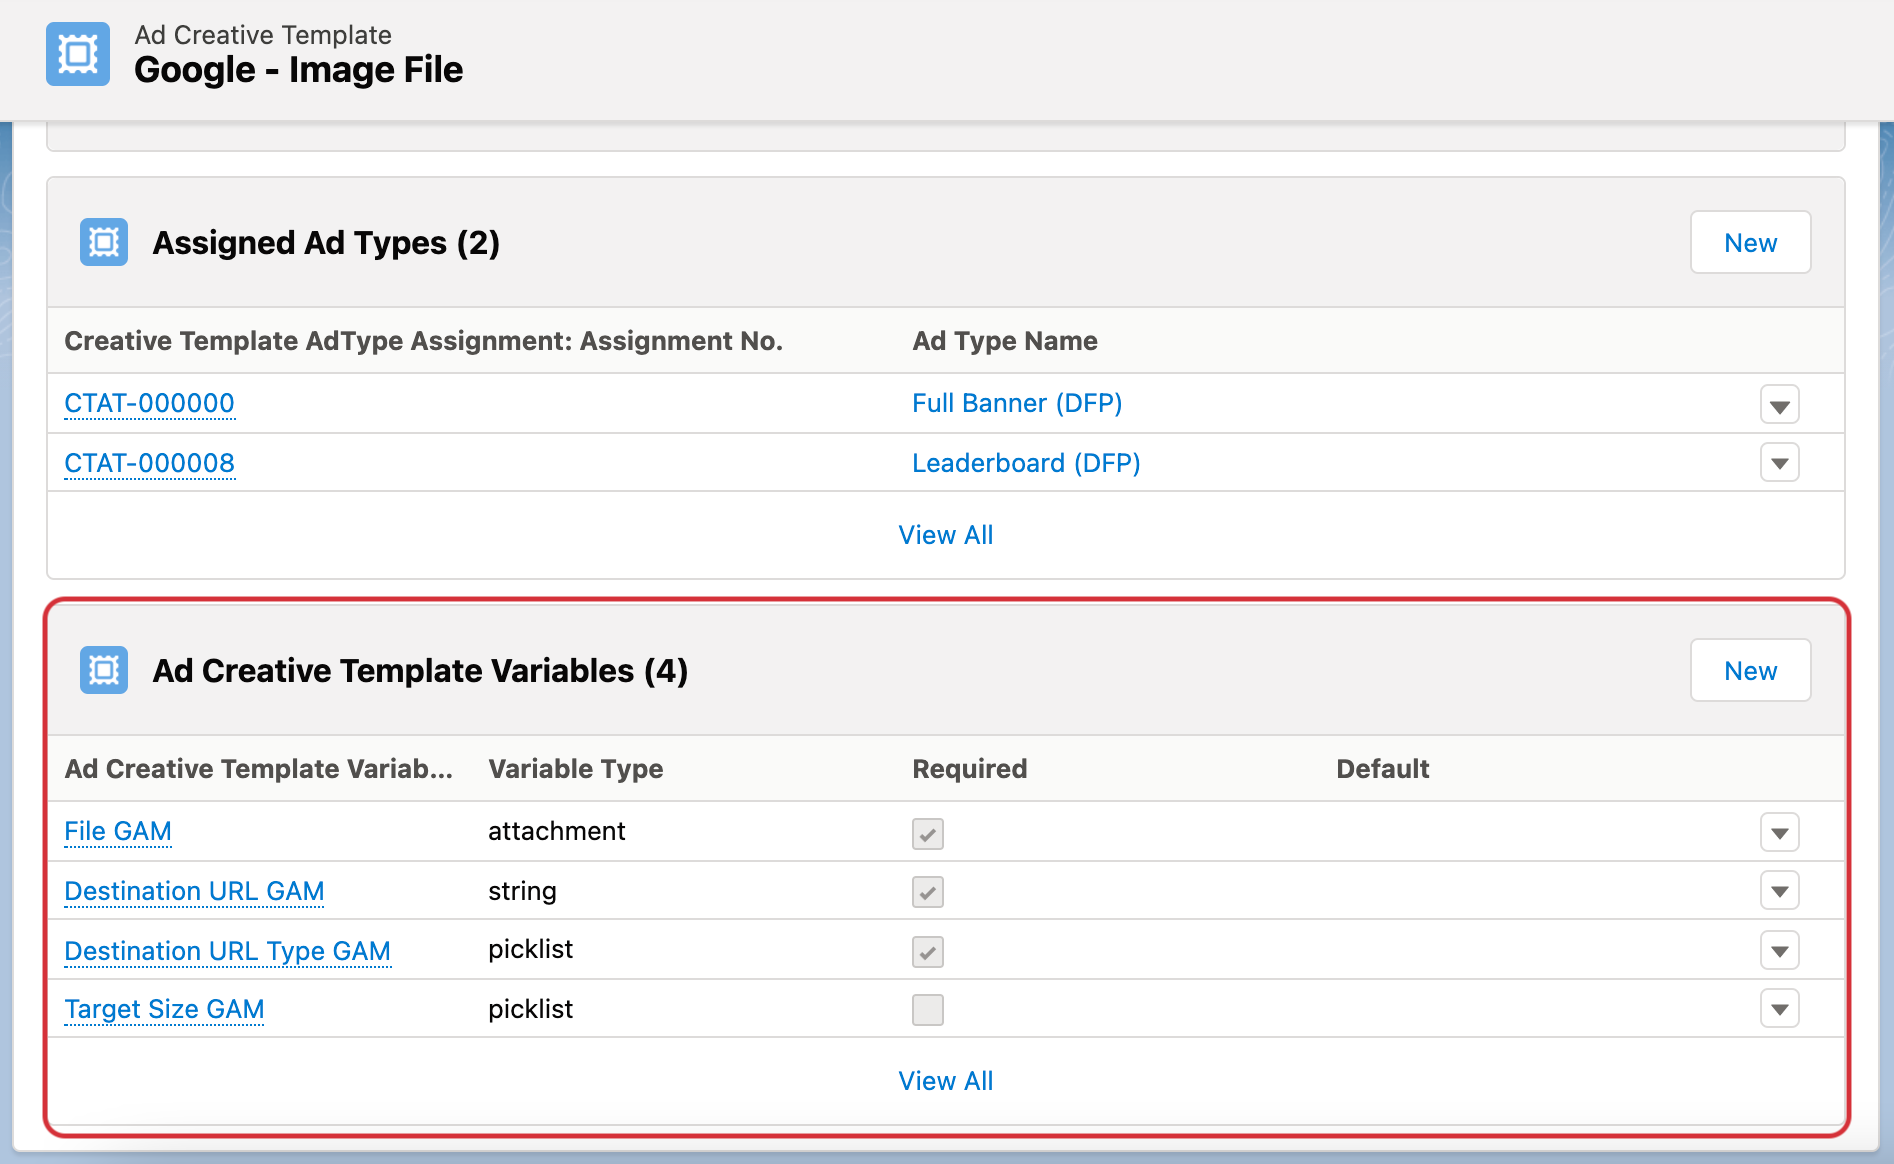
Click the button new to create a new Variable. Depending on your creative type there are certain Variables which might be needed. Each Variable record you create will then be an own field in the Creative Upload window your user sees, so they can fill in the required information.

The fields mean the following:
Name: A general name for your variable. This will also be shown as Field Name to the user during creative upload process, so we recommend picking something your users can recognize
Variable Type: Which data type is this variable? The selection will also reflect how your field will be shown for the users. Possible types are:
attachment: This type should be used for files.
boolean: This type represents a checkbox with true or false.
date: This type represents a date with a calendar selection.
integer: This type represents a whole number.
picklist: This type represents a list of multiple values.
string: This type represents a text.
textarea: This type represents a longer text.
attachmentURL: This type should be used for URLs to externally stored images.
Required: Check this if the field is required for the user.
Possible Values: Only applicable for picklist Variable Types to enter the possible values to be selected separated by a semicolon.
Variable ID: An Id to save the value in the background. This value can be chosen from you but needs to be set, for example you could set the same value as the name.
Default: A possible the default value to support the user in the selection.
Help Text: A possible help text which will soon be shown in the UI.
Example for a Print Creative Template in ADvendio
So to upload a standard print creative a simple example for a template can look like this:
AdCreative Template Field | Value |
|---|---|
Name | Standard Print creative |
Active | True |
Underneath this AdCreative template, the following AdCreative Template Variables are created:
Ad Creative Template Variable Name | Variable Type | Variable ID | Possible Values | Required | Help Text | Default Value |
|---|---|---|---|---|---|---|
Image File | attachment | Image File | True | Upload the image file you want to use for your ad. | ||
Additional information | string | Additional information | False | Enter any additional information you would like to add. |
Connect your Template to Ad Types
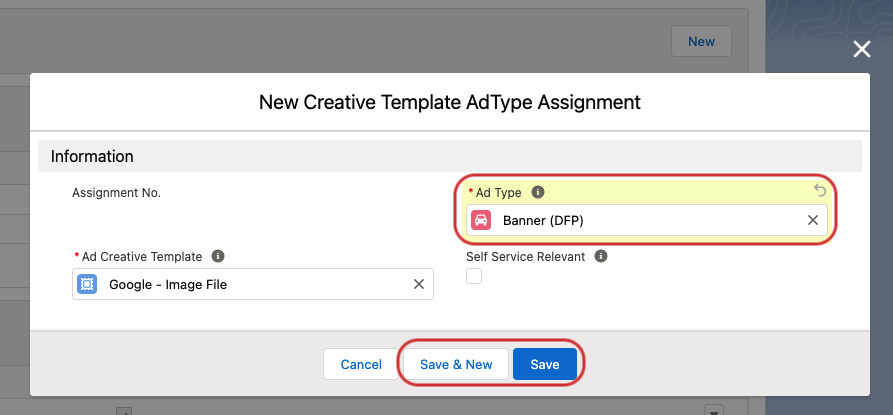
Once the template is created with all its Ad Creative variables, you will need to define for which Ad Types you would like to assign this template. Without assigning the Templates to Ad Types you won’t be able to create new Creatives in the UI as described in: 4.12.3 How to manage Ad Materials (Creatives) for my campaigns? (BETA)
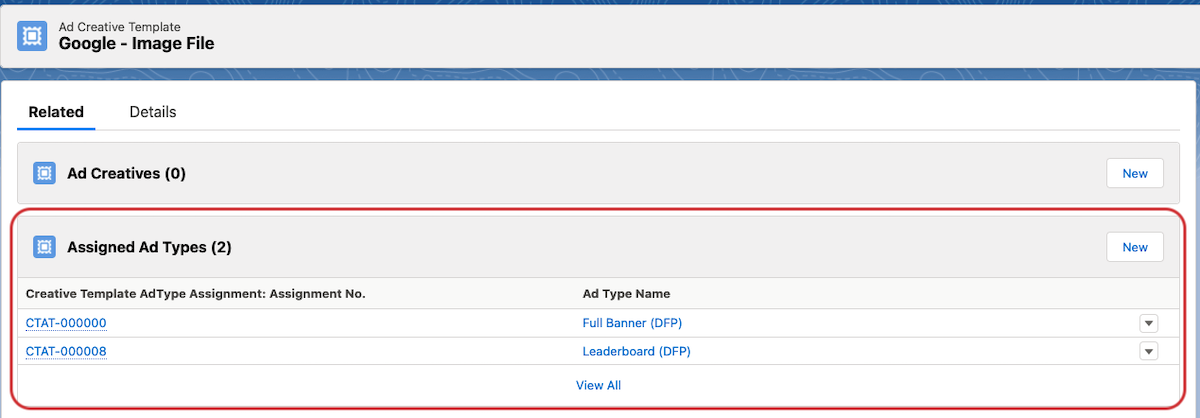
To connect the template to one or multiple Ad Types please go to the related lists of the Ad Creative Template record. For the related list “Assigned Ad Types“ you just need to hit the new button in order to select the relevant Ad Type for which this template and its variables should be usable. After you selected the Ad Type you can either hit the save button if you just want to assign one Ad Type. If you would like to assign multiple Ad Types you can also hit the Save & New button.