...
First of all, we ask you to check the fulfilment of the requirements. These settings are binding for the correct installation of ADvendio. Please read the requirements here: 7.1.1.1 ADvendio Requirements.
Please also check the following warning:
Warning title Package and Custom Objects and Fields We highly recommend avoiding the usage of custom objects or fields that use the same API name as the ADvendio Package. So please make sure to rename any object you already have custom made.
Example to avoid:
- Advendio Package Object: ADvendio__Ad_Type__c vs.
- Your Custom Object: Ad_type__c
Applications and components are installed as packages.
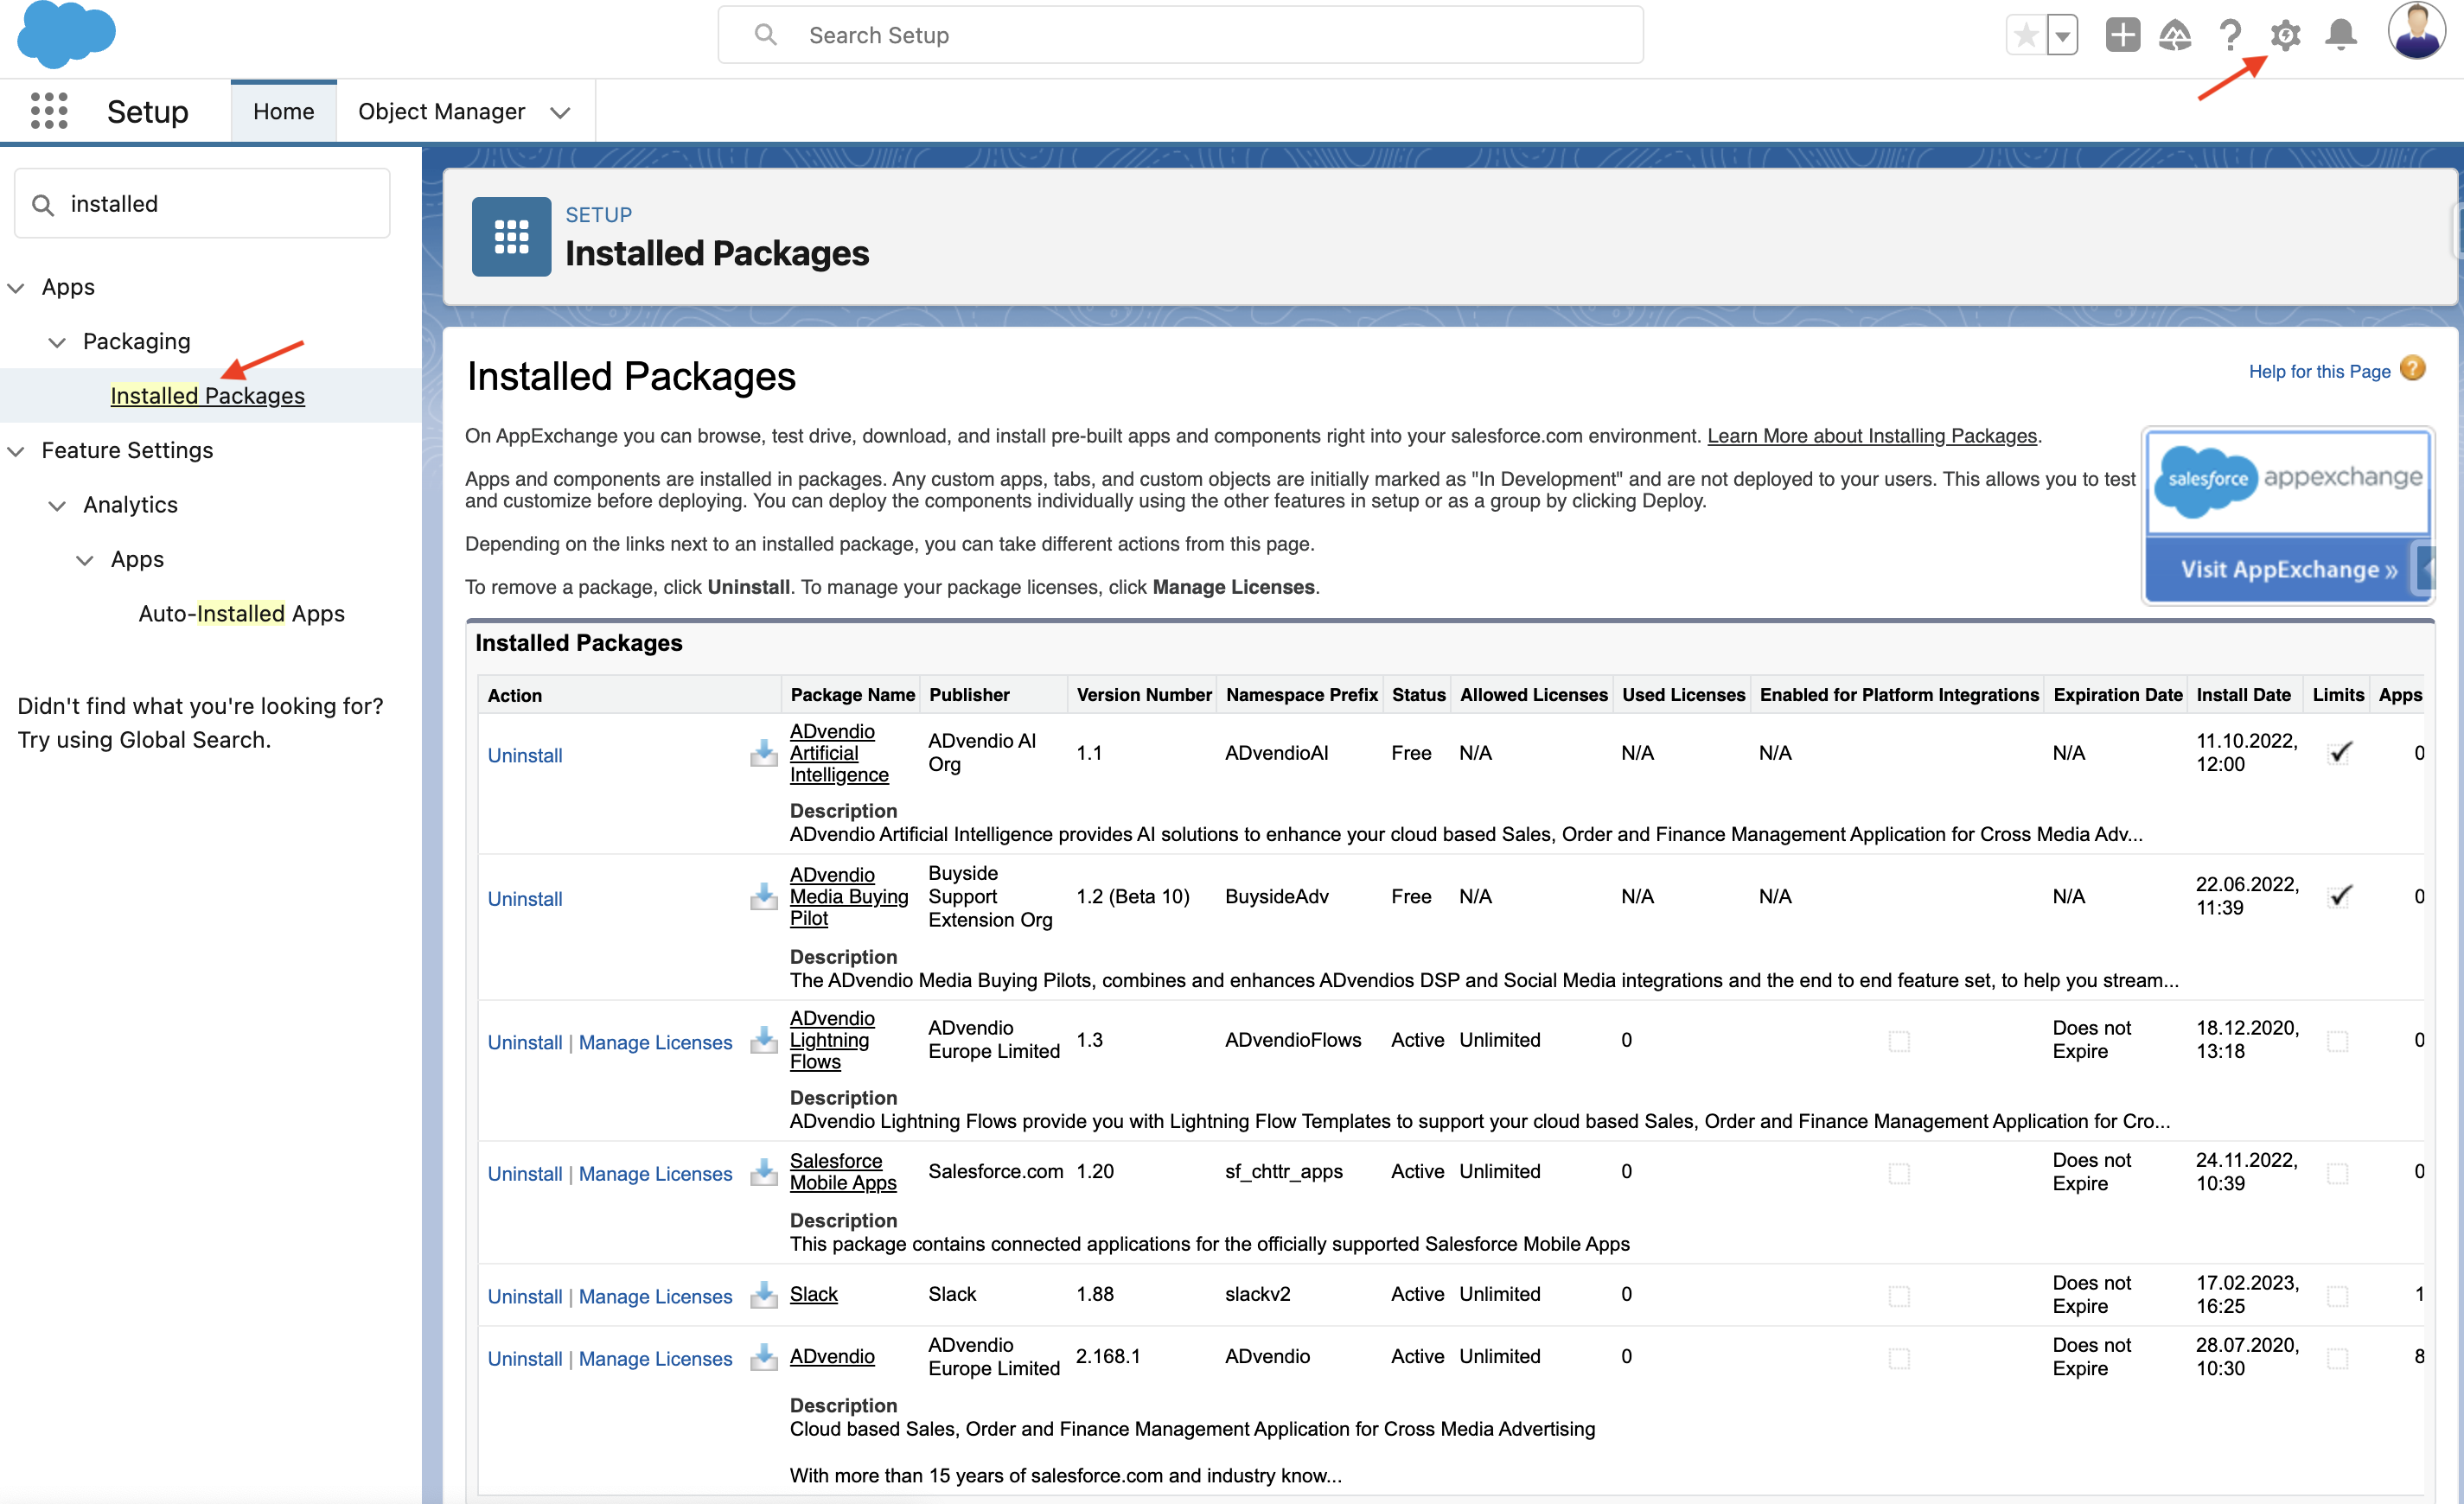
Click Setup to navigate to your installed packages.
Click Installed Packages to see all packages.
Check, if any package of ADvendio is already installed.
If ADvendio is already installed, you only need to update your version to the latest one. Therefore have a look at this article: 7.1.1.2 Update ADvendio.
After this check, you may finally start the installation as explained in the next chapter.
...
You find the installation links in our Release Notes. Make sure to always use the latest version. Then open the link in your browser and proceed directly with the installation as explained.
An alternative for you is the installation with the help of the Salesforce AppExchange.
...
Now that the installation is completed take a closer look at our knowledge base to customize ADvendio to your needs. The introduction part will help you get started. To be able to use ADvendio your media database needs to be structured as explained in the inventory management chapter. If you want to connect ADvendio with your AdServer, find out how to enter your AdServer login.
...