The Media Configuration is the central location where the user can enter all necessary information to adjust Campaign Items. With the Media Configuration, it is possible to display or hide every field, tab or action button and customize those to specific needs. Conditions can be used to specify, if fields are mandatory, read-only or hidden. Furthermore, it is possible to use roles or profiles to create different page layouts for different user groups. Actions are now faster and easier to use and especially cross media requirements can be handled easily by display only the relevant fields for corresponding Campaign Items. This media configuration leads to an increase of quality and efficiency.
Overview
1. Activate Media Configuration
The system administrator is able to activate or deactivate the media configuration at any time.
Please activate the Media Configuration:
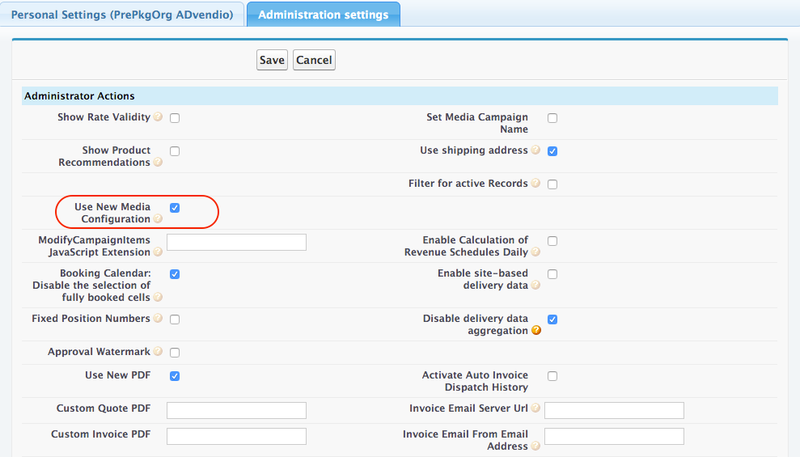
- Navigate to App Launcher > Administration Settings and select the tab Administration settings.
- Activate the Media Configuration by selecting the checkbox Use new Media Configuration.
1.1 Overview of features
The media configuration allows your users to edit multiple Campaign Items at a time. You can display or hide fields, tabs or action buttons and customize those to specific needs so that different users see exactly the information they need to see. Alternatively the standard salesforce page layout for Campaign Items can also be used.
The Media Configuration comes with the following features:
- Tabs can be renamed, removed, and the order be changed.
- Tab Setup: All tabs and their fields are configured in the object Tab Setup as well as the the sort order. The system administrator is also able to select different tabs and their fields for different features: It is possible to show different fields for the Media Configuration and the Commercial Optimizer. Moreover, it is possible to show other fields for the "Add Items" button as for the "Edit Items" button. It is important to setup all relevant fields and tabs at this point, because restrictions are made at Tab Rules.
- Tab Rules: Tab Rules defines, under which conditions fields are editable (input fields), read-only fields or fields, that are hidden for a specific user or user group. It is also possible to define, under which conditions action buttons are enabled or disabled and for which feature this rule should work. Tabs and their fields are configured in the object Tab Setup.
- Fields can be displayed in tabs as input field, read-only field or hidden field. It is also possible to display a field in every tab (static fields). But don't use fields multiple times in more than one tab setup.
- Action buttons can be enabled or disabled by using Tab Rules. Furthermore, those action buttons can be enabled or disabled for different features.. Moreover, all action buttons are redesigned and coming with new functionality: Copy Item, Delete Item, Copy Value and Split Item.
- Products are displayed with product icon.
- Packages are displayed with package icon and component icons. Packages and Campaign Items can be combined as AdHoc Bundles, Publication Dates can only be selected for components.
- Linear Package: All information should be entered at package header level and automatically written down to the components.
- Prorated Package: All information should be entered at package header level and automatically written down to the components.
- Individual Package: All information should be entered at component level and automatically written up to the package header.
1.2 Tab Setup
The ADvendio Package comes with predefined tabs and fields. These tabs and their fields as well as the sort order can be customized by you. Here a standard list:
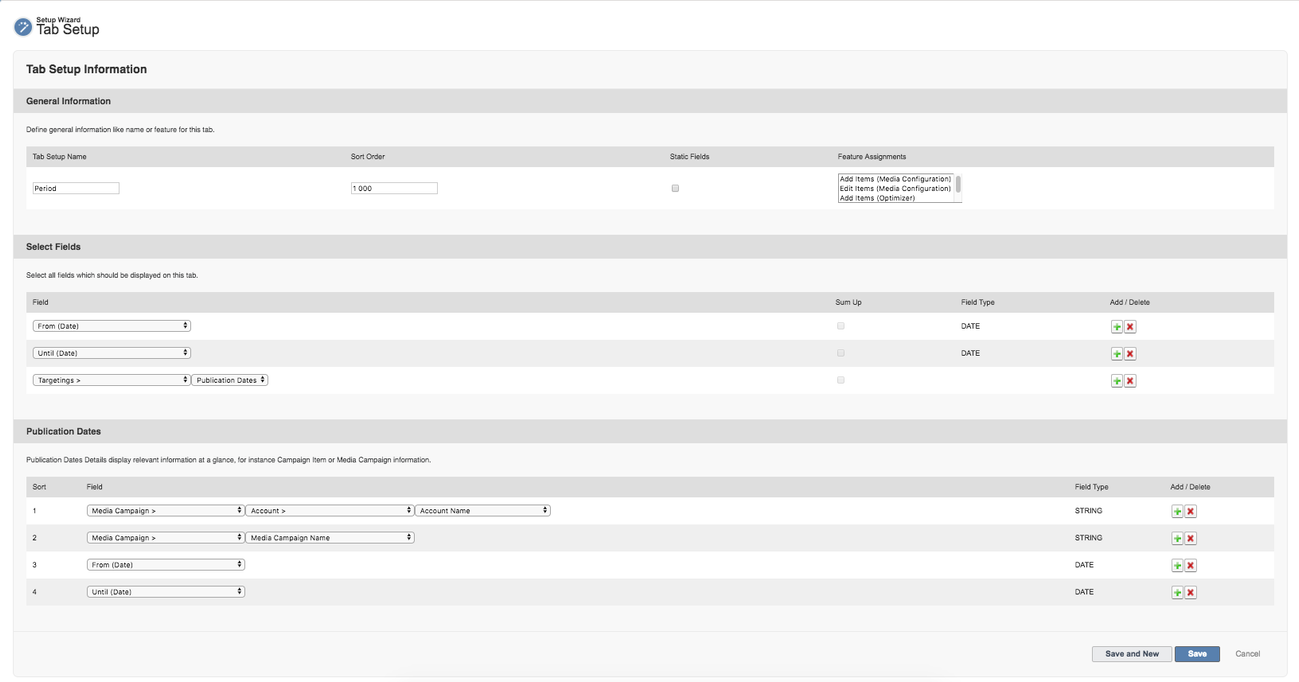
Click on new or edit to open the Visual Force Page and modify the data:
Please customize the Media Configuration:
- Enter the Tab Setup Name. This will be displayed as the label of the tab.
- Edit the Sort Order. Defines the order of the tabs.
- Select the checkbox Static Fields, if these fields should be visible for every tab (Warning: Only check in first setup tab record, which will not have its own tab and no label).
- Select all Feature Assignments, for that this tab should be used. If you make no selection, this tab is used in every feature.
- Select all fields in the Select Fields section, that should be displayed at this tab.
- Click the "plus" icon at any position to add a new field below this position.
- Click the "delete" icon at any position to delete this position.
Note: It is only useful to select Campaign Item fields here.
Standard tabs and fields:
- Period: From Date, Until Date, Line Description and Publication Dates
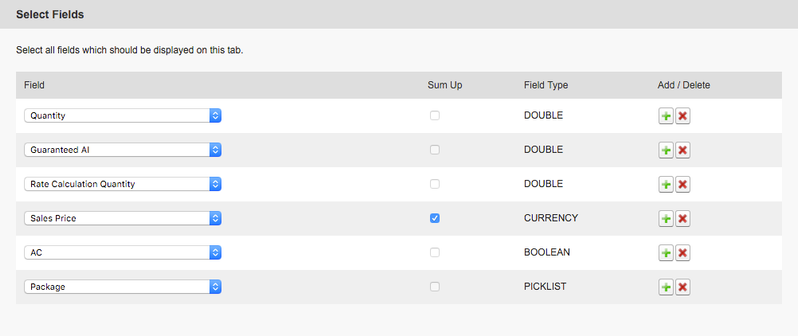
- Pricing: Quantity, Guaranteed AI, Rate Calculation Quantity, Sales Price, AC and Package
- Frequency Capping: FC Quantity, FC Ad served every and FC Period - or alternatively use the multi-targeting option.
- Time: Day Time Targeting
- Browser: Device and Connection
- Geo: Geography
- Key Values: ADvendio Key Lines
- Content: Selected Content
In the Standard the "Static Tab" displays the Billing Category next to the Action Buttons in every tab.
Warning
Make sure that you don't use fields twice in any of the tabs. This could lead to a malfunction of the system.
1.2.1 Sum up Currency/Number Fields
Currency and Number fields can be accumulated in order display a total at the bottom of the tab.
1.3 Tab Rules
Tab Rules define under which conditions fields are either
- editable (input fields),
- read-only fields or fields, that are
- hidden
for a specific user, user group or profile. It is also possible to define, under which conditions action buttons are enabled or disabled and for which feature this rule should work.
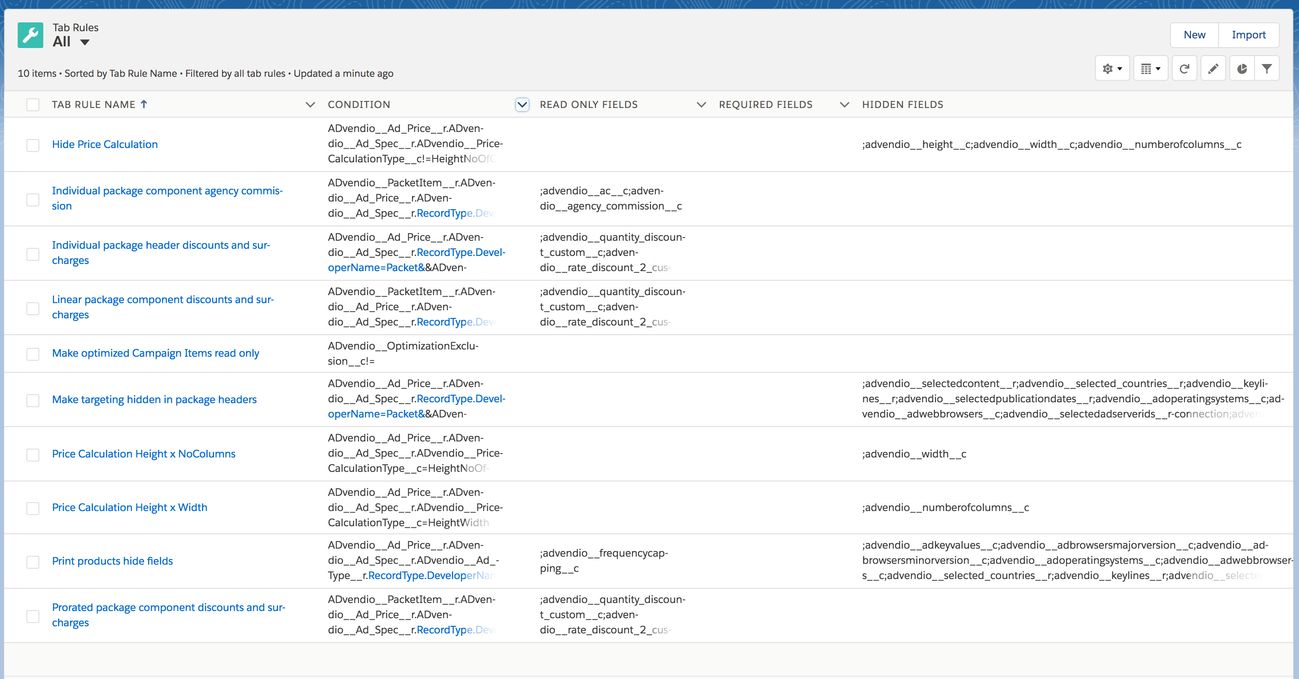
Navigate to App Launcher > Tab Rules and click New Tab Rule to create a new rule using conditions or click Edit at an existing Tab Rule to edit this rule. You can also delete not necessary rules by clicking Del at those rules.
Please create Tab Rules for the Media Configuration:
- Enter Tab Rule Name. This is just for you, will not be displayed anywhere. And select all Feature Assignments, for which this rule should be used. If you make no selection, this rule is used in every feature if the condition is true.
- Select a Condition, the Operator and the Value to create an input criteria. As Source, you should use already existing fields in objects like Ad Specs or Ad Price, because Campaign Item fields does not exist at this moment (exception could be the "Edit Item" button). You can also select Profile or Role using the pick list value "Current User". Click the "plus" icon to create a second condition (AND connection). Click the "delete" icon to delete the condition.
- Decide which Actions, that should be enabled or disabled.
- Select all Required Fields.
- Select all Read-Only Fields. You can also select the Checkbox All fields read-only to have only read-only fields in the Media Configuration.
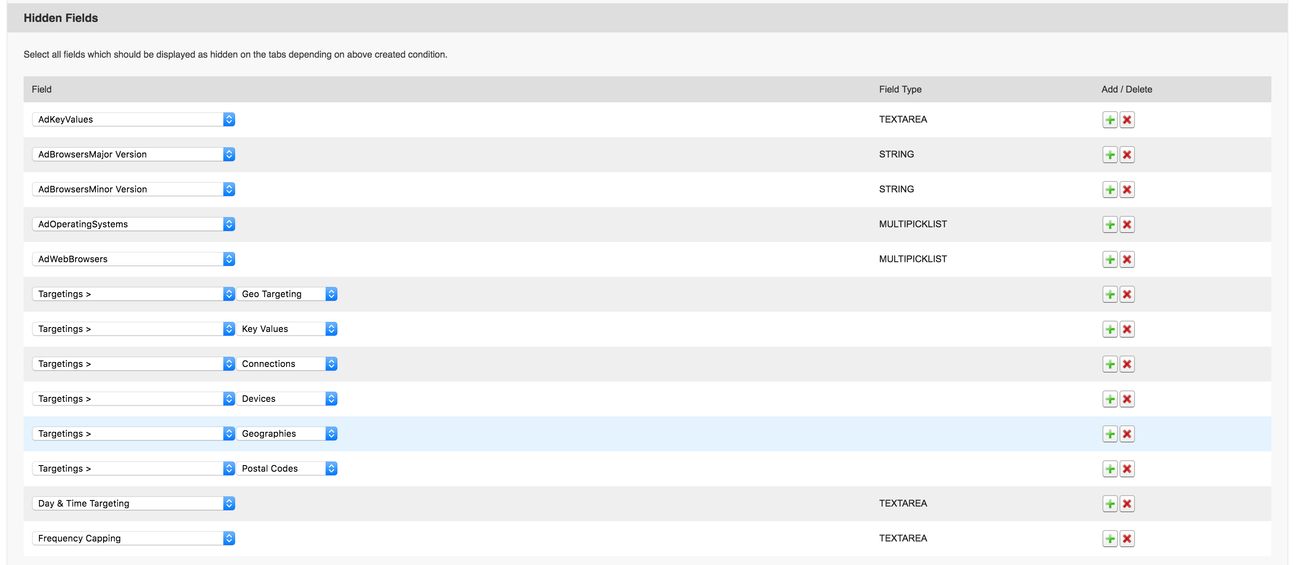
- Select all Hidden Fields.
Note
Examples:
- Name: Make optimized Campaign Items read only
- Condition Source: Campaign Item Field > Optimization Exclusion
- Condition Operator: not equal to
- Condition Value: empty
- Read-Only Fields: All fields read-only (TRUE)
- Name: Agency Commission
- Condition Source: Campaign Item Field > Ad Price > Ad Spec > No Agency Comission
- Condition Operator: equals
- Condition Value: TRUE
- Read-Only Fields: AC
2. Set up the Net Calculator
To add this function to your media configuration you need to either modify your pricing tab or create a new tab with the following information:
Columns:
|
Sum up any you like: i.e. ADvendio__BudgetN2__c
2.1 Configure the Media Campaign Budget
The budget can be entered by the user on the media campaign. It will then compare the spend amount within the media campaign with the set budget to allow better selling:
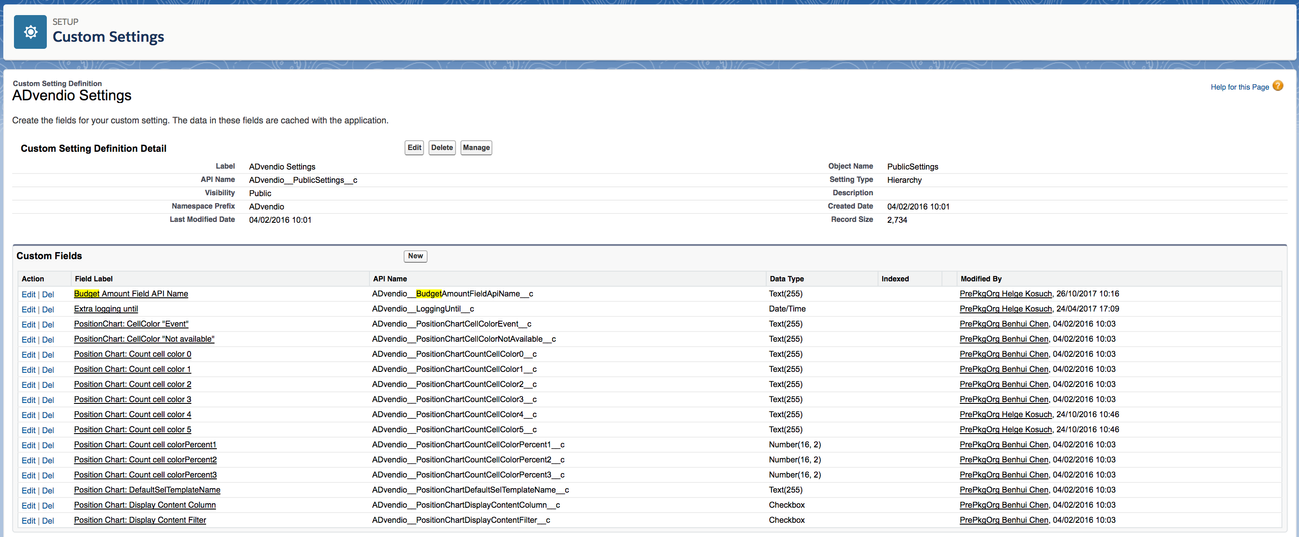
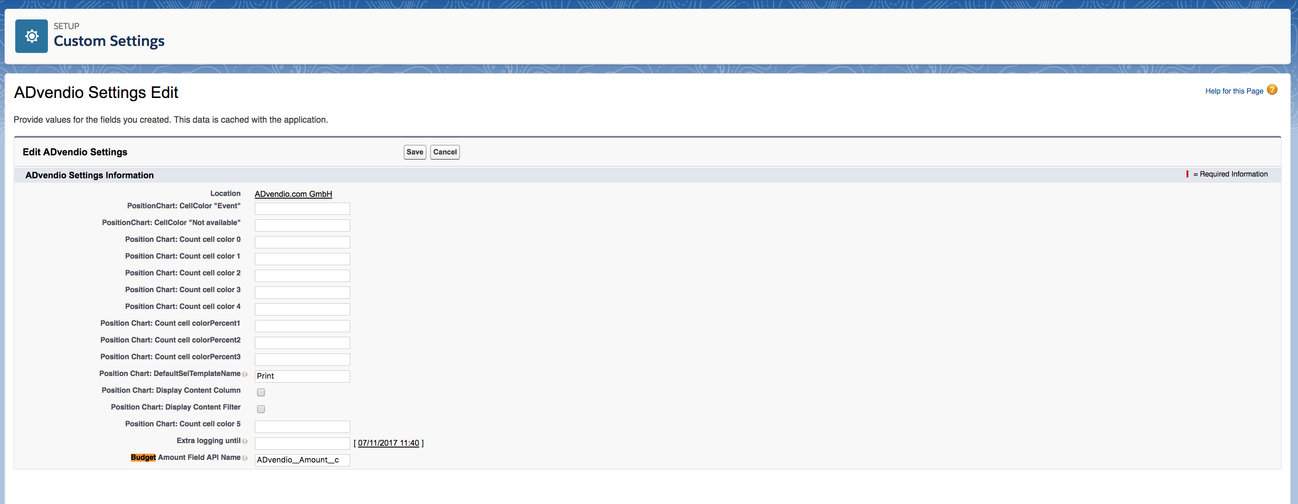
In order to tell ADvendio which amount net or gross value to choose you have to modify the ADvendio Custom setting:
Click on Manage and then Edit and set the Campaign Item field API for the Budget Amount Field API Name:
