Version 2.83 and up
Publisher Payouts (PP) helps you to
- manage your contracts with third party publishers (explained on this page) and to
- generate credit notes based upon delivery numbers and sold inventory.
To use this have your administrator 8.4.2 Setup Publisher Payout feature.
With version 2.128 Publisher Payout via Guaranteed Revenue has been disabled. If you wish to use it, please contact us at support@advendio.com.
Overview
Manage Contracts and Conditions
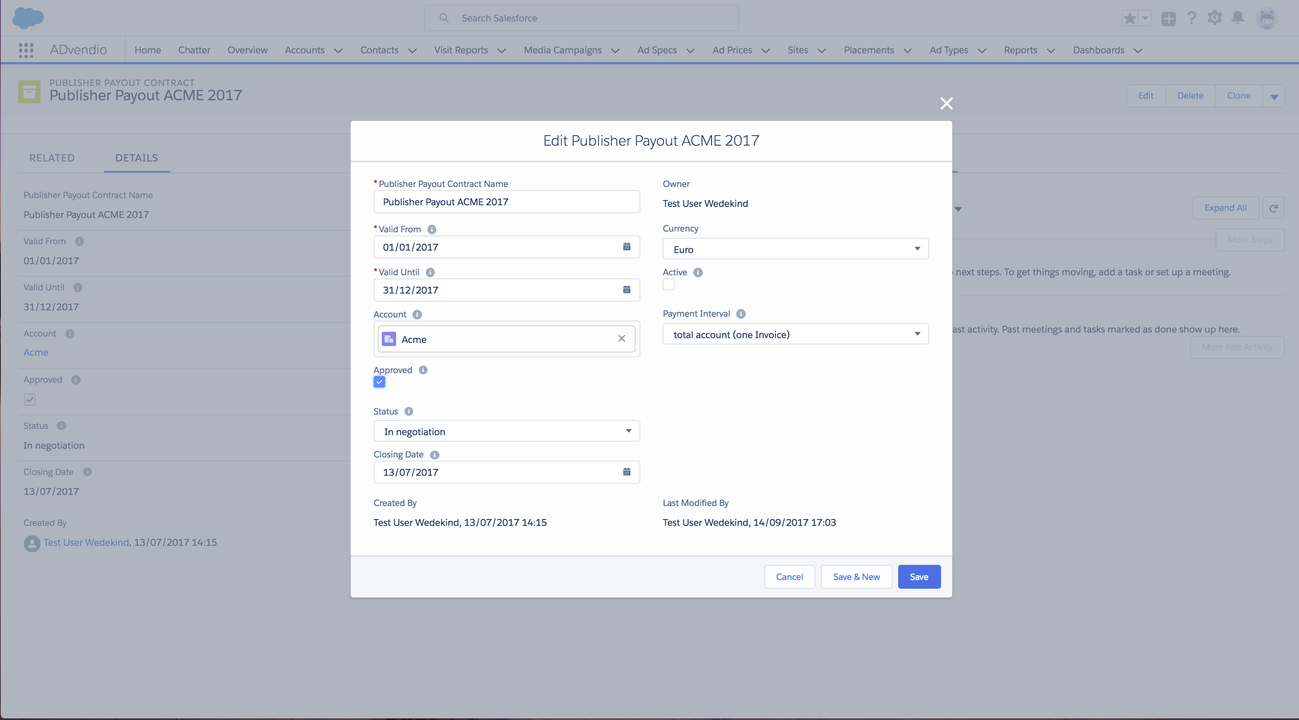
1 Create a Publisher Payout Contract
To create and manage Publisher Payout Contracts you go to the Publisher Payout Contracts object (App Launcher - Publisher Payout Contracts or use the older Overview Tab). Before adding one or many contracts you need to have created an account record for your publisher.
- Enter your contract name
- Define a validity period
- Select the account
- Select the payment interval.
- Pick the stage: Draft/In negotiations/ Closed Won/Closed Lost
- Add the Business Type if needed. This will match the business type on your Media Campaign.
At a later stage you can:
- Check Approved Checkbox - or add an approval workflow to this.
Don't activate immediately, add the conditions first!
Important:
- Please Activate the record only after all conditions and AdServer IDs are assigned.
- Version 2.104 and earlier: Only one contract for the same account in the same time frame is allowed! Upgrade if you need to set up more than one contract!
Click the save button.
The system restricts you to only allow the following changes:
- When your Publisher Payout Contract is Approved don't change the contract or any related Conditions - Only a view fields are allowed:
- Active__c
- Approved__c
- ClosingDate__c
- Status__c
- When your Publisher Payout Contract is Active
- No changes allowed.
2 Create Conditions for your Contract
Conditions describe for which sold inventory and under which "conditions" you will have to pay the third party publisher. Each contract you can creation as many conditions as you like.
A condition contains three things.
- Matching Criteria for you inventory to determine which Campaign Items will be applicable for the condition.
- For conditions based on Delivery Data / Enhanced Delivery Data (version 2.89 and up) from your AdServer, which Ad-Units/Sites will be counted.
- The remuneration type for your third party publisher. Options:
- a revenue share
- or a payment based on the number of units sold
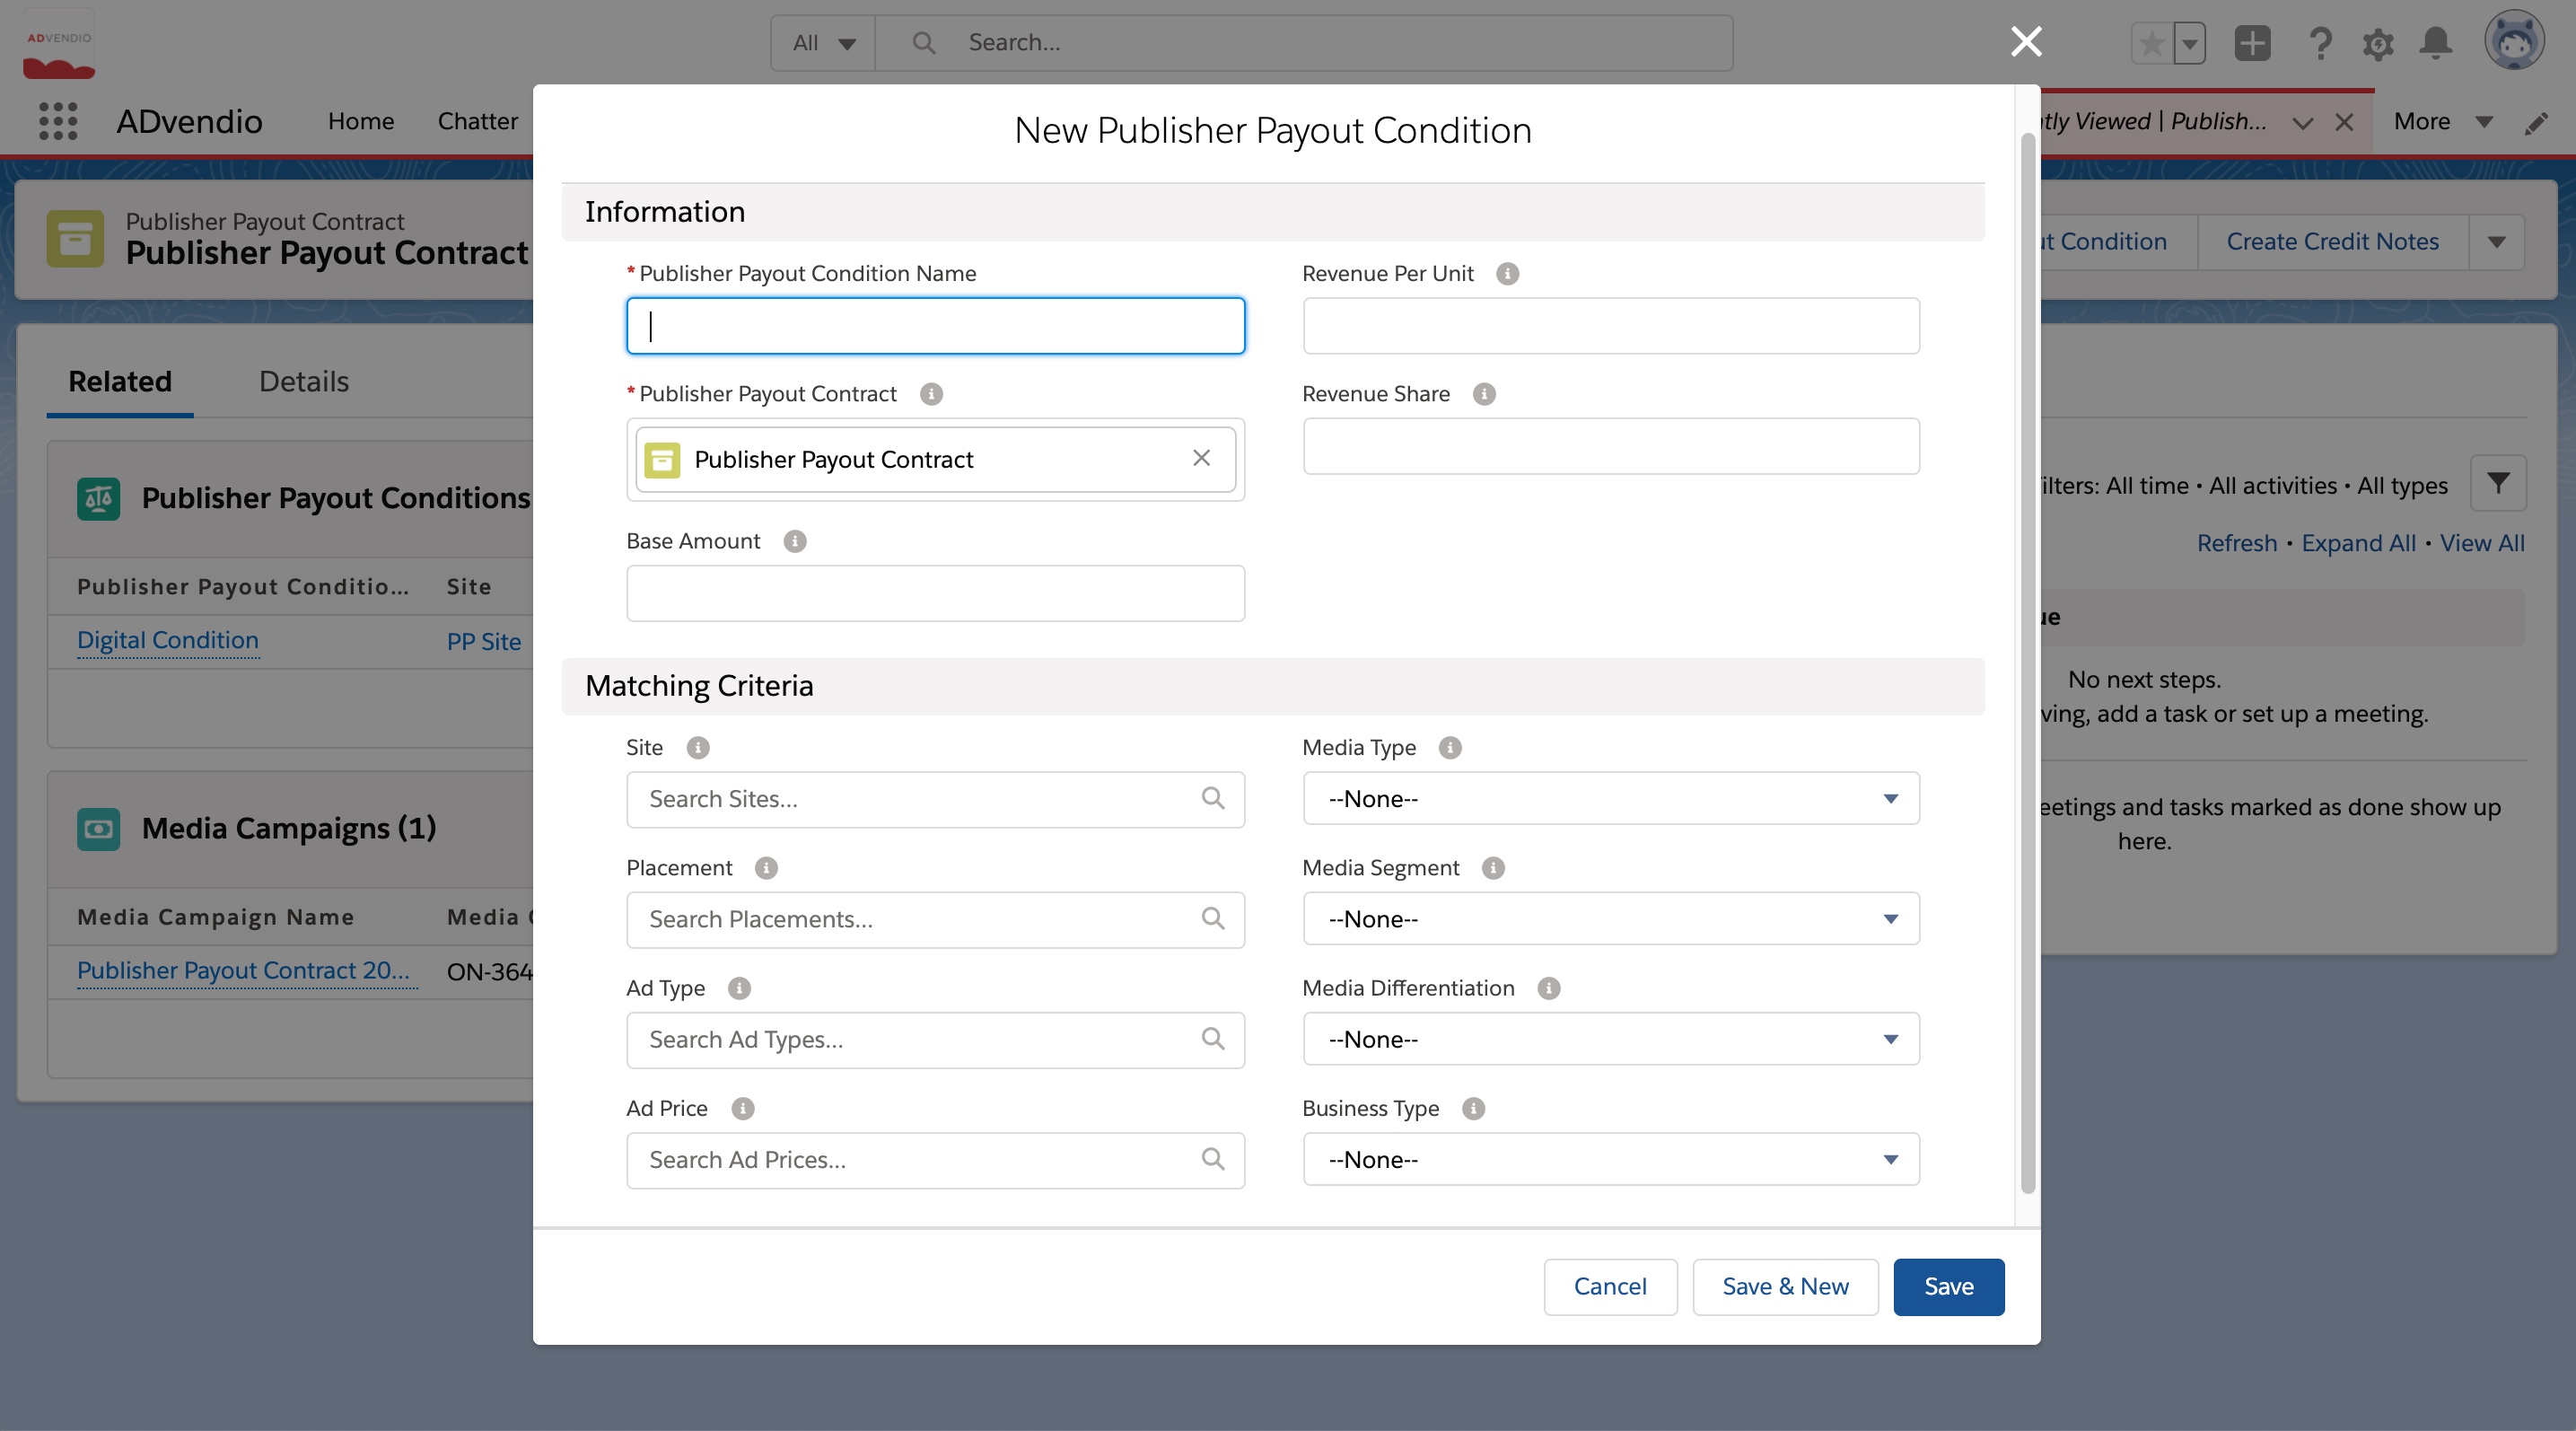
Steps:
- To create a condition click on the new button on the Publisher Payout Condition related list
- A condition is always connected to a Publisher Payout Contract
- As matching Criteria you can set a specific Site, Placement, Ad Type or Ad Price or use a global Picklists Media Type, Media Segment and Media Differentiation for a more broader classification of your inventory.
- Select the revenue settings.
Click the save button.
3 Assign AdServer Ids to Conditions
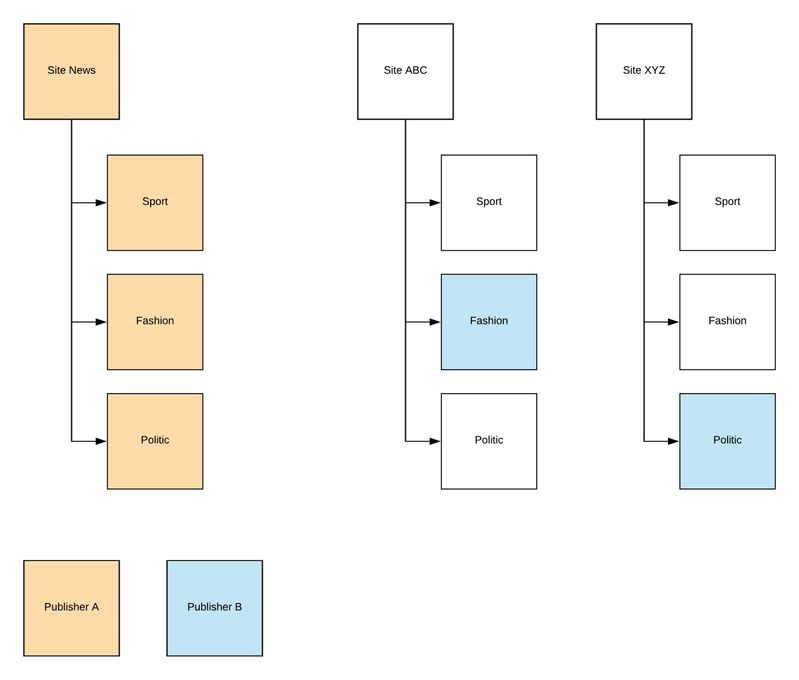
Conditions will later automatically matched to
- Delivery Data (default - example on the left) or
- Enhanced Delivery Data (example on the right) if your business requirements are not met using the standard Delivery Data.
Your Administrator has to check the Enhanced Delivery Checkbox when 5.3.2 Scheduling Delivery Data Reports and additionally turn on Use Enhanced Delivery Data for Publisher Payout (PP) first in the 7.2.1.1 Administration Settings.
Turning on Enhanced Delivery Data will greatly increase your data volume. You might have to think about 8.3 Salesforce Archiving Options or buy more Salesforce storage.
To assess the revenue of your third party publishers based upon Delivery Data from your AdServer you need to connect the condition to all applicable AdServer IDs. Then only the delivered quantities are counted. The system also automatically calculates the right share on the invoiced amount in case of for example over delivery. You have two options.
- Do this manually or
- use the "Assign AdServer" - IDs Button.
Attention:
Once an AdServer ID is connected to a Publisher Payout Condition, only Campaign Items with Delivery Data from these defined AdServer IDs will be counted towards the condition.
You can configure your condition to either
- count delivered quantities (from the AdServer) or
- use the invoiced quantities and amounts.
It's however not possible to track delivery based digital items and invoice based print items in the same condition. Please use two separate conditions for this case.
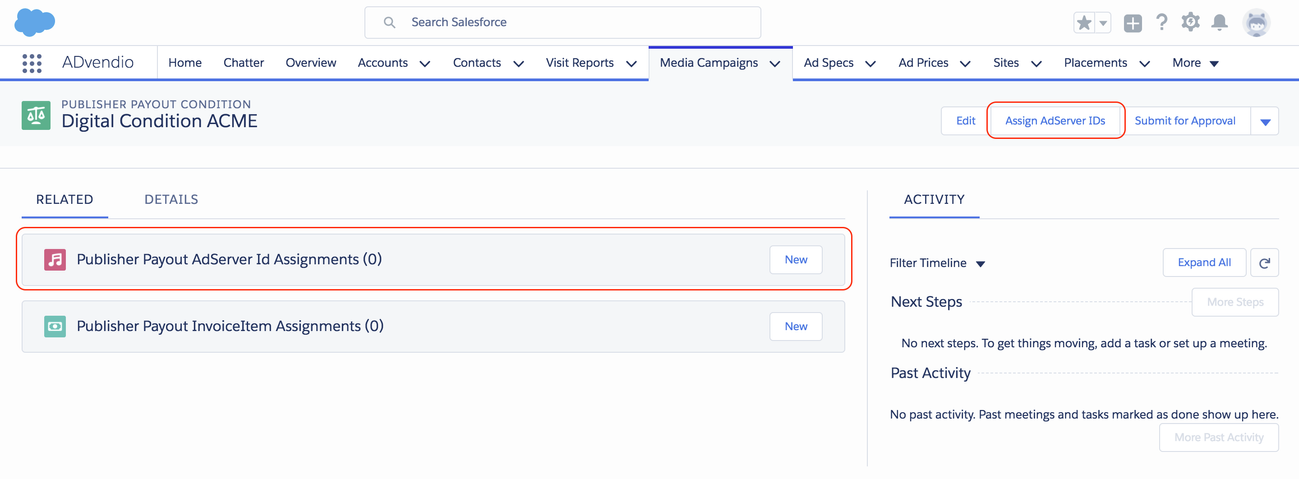
3.1 Manual Steps
- Click on the new button on the Publisher Payout AdServer ID Assignment related list in your condition.
- Select an AdServer ID from your Inventory (e.g. an Ad-Unit) and click on save.
You can assign all types of AdServer IDs manually to your Publisher Payout Condition. Also Key Values!
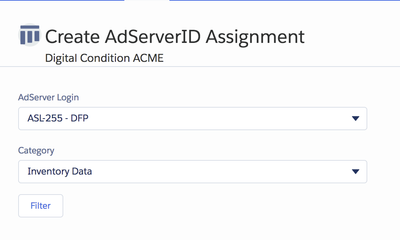
3.2 Assign AdServer ID Wizard
Click on the button in your Condition record. After selecting your AdServer Login and Category click the filter button
- Only AdServer Ids of Category Geography and Type Country are visible
- Only AdServer Ids of Category Devices and Type Device are visible
- Only AdSever Ids of Category Inventory Data and Type; Ad Unit, Website, Site Section, Publisher, Zone, Page and Page Group
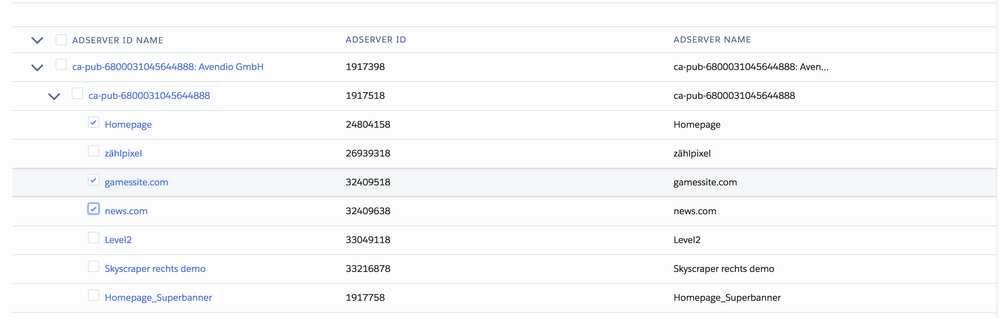
Select your inventory items and hit save. You will receive the green status bar which tells you how many records have been created.
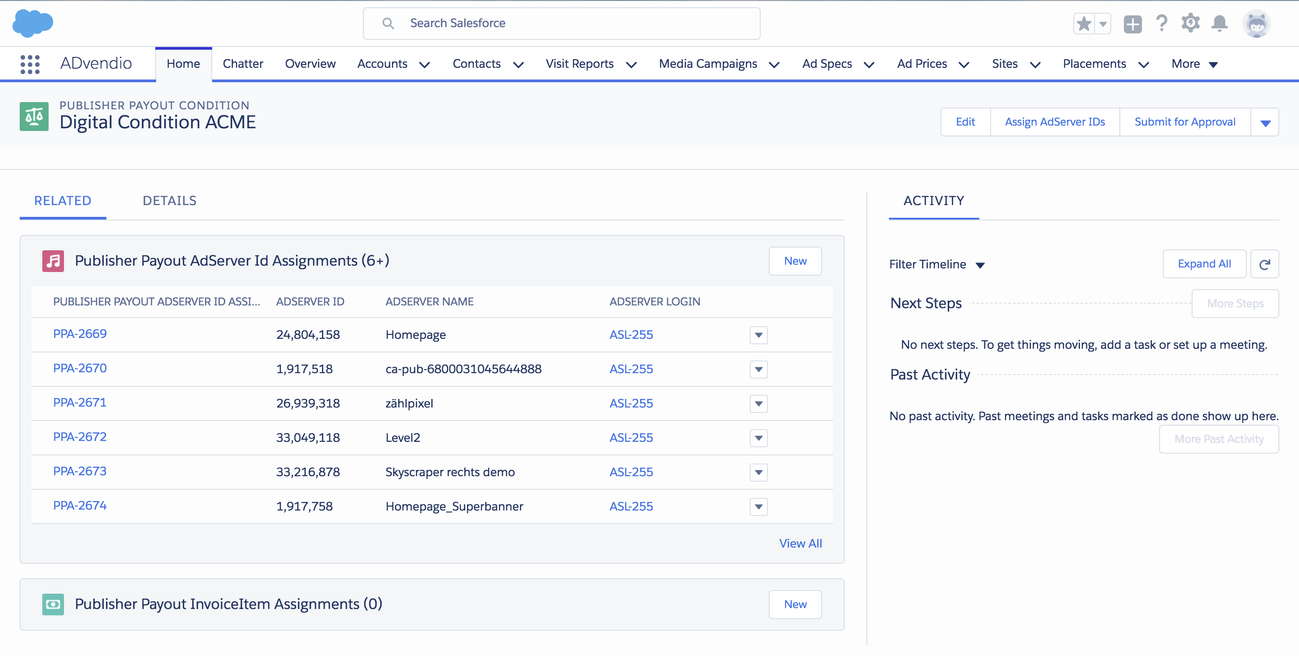
Result

The automatically created new record will be shown in the related list of "Publisher Payout AdServer Id Assignments":
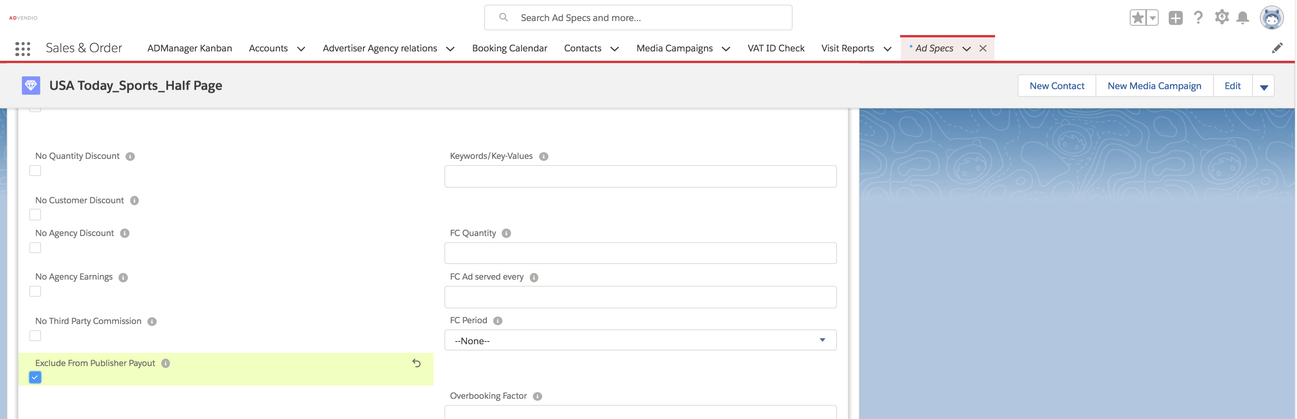
4 Exclude AdSpecs
If you have exceptions to the above set up conditions you have the option to exclude individual AdSpecs by setting the "Exclude from Publisher Payout" checkbox in the record:
5 Activation
Now you can activate your Publisher Payout Contract and move on to 6.8.1 Calculate and Issue Credit Notes.