Challenge:
You are planning to use ADvendio Connect features and our integrations to Third Party Systems, in order to automate your business flows and be more efficient.
Now you're learning how to set up and use ADvendio features.
Or the configuration is already done and now you want to start using our features, but instead receive a message like this:
Please click the following link to authorize ADvendio and securely delegate access to manage your data using OAuth.
authorize ADvendio
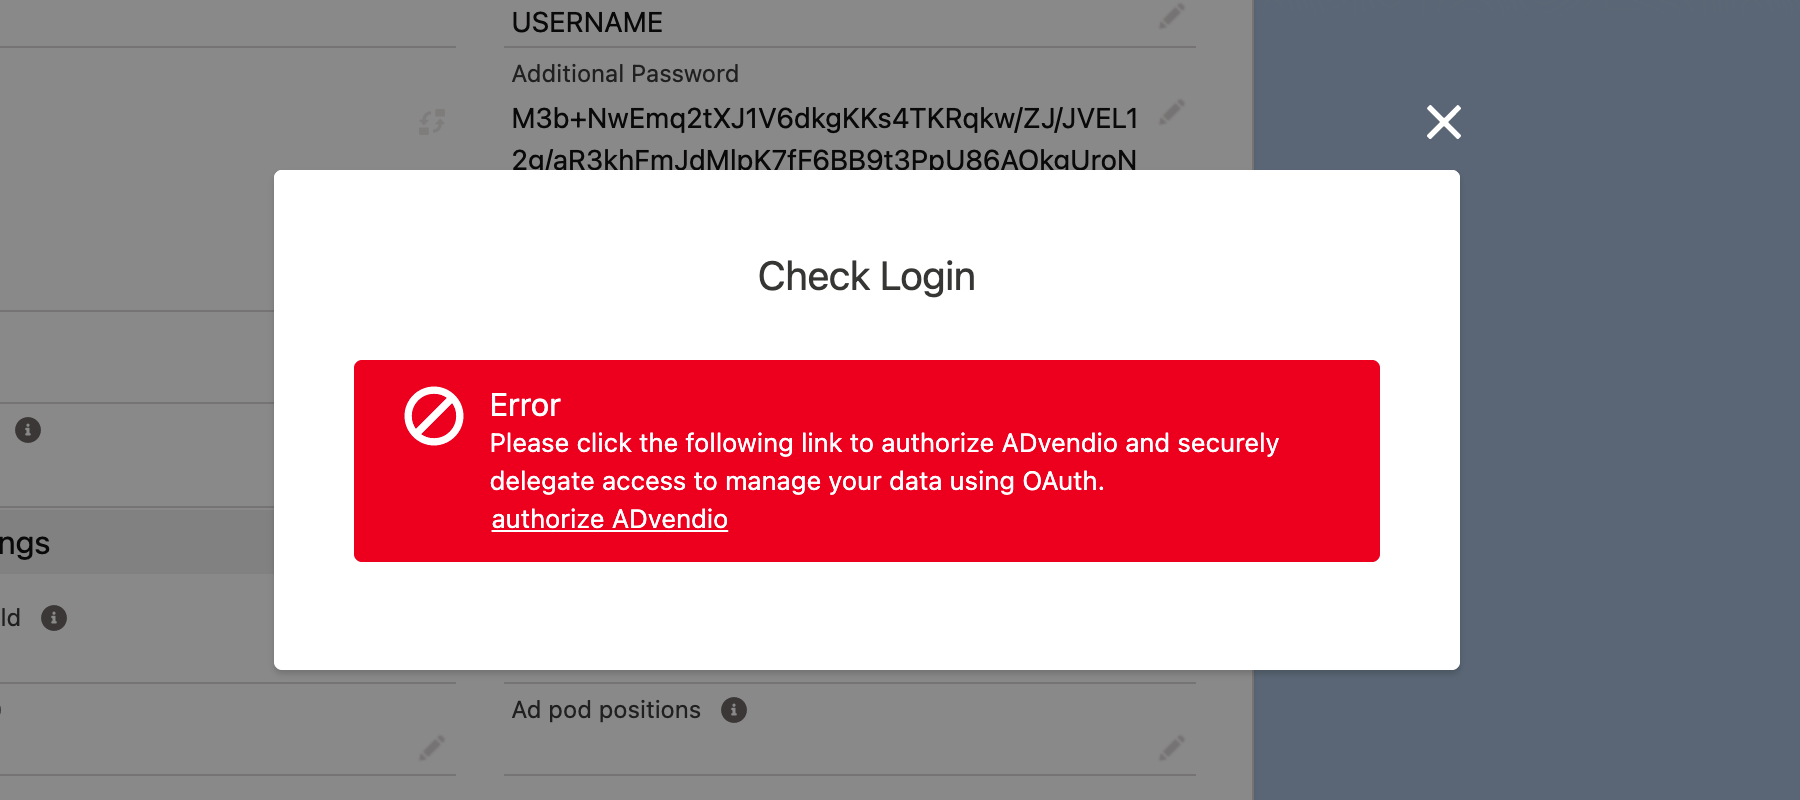
What does this mean? And which steps do you have to undertake in order to use ADvendios integration features?
Solution:
This message does not indicate a problem.
As a Salesforce user, you need to grant access to ADvendio Gateway to access your data and our integration features to work.
Why is this required?
The ADvendio Connect features, such as our AdServer, SSP and DSP integrations will allow you to push information like the Media Campaigns and Campaign Items from ADvendio into the connected systems, but also to receive information like delivery information automatically into ADvendio.
To support this our Gateway needs the possibility to access and modify your Salesforce data on behalf of your user, even if you are not logged in, like when we automatically sync delivery and status information.
However this will only access data required for ADvendio features and the processes all have to be activated either by you or your system administrator, so ADvendio will not automatically modify all your data once you activated authorization.
Which data is accessed?
The ADvendio Gateway will only access Salesforce data that is required for its features. This mainly covers ADvendio objects such as Media Campaigns, Campaign Items or External Account IDs.
We will not access any personal user information such as address, email or date of birth. For certain external systems, ADvendio can access which Salesforce User started the process and send the Name of that user to the External System, but other than that no personal data is used.
How to authorize ADvendio?
To authorize ADvendio is simple. In the message shown to you, there is a link: ‘authorize ADvendio’
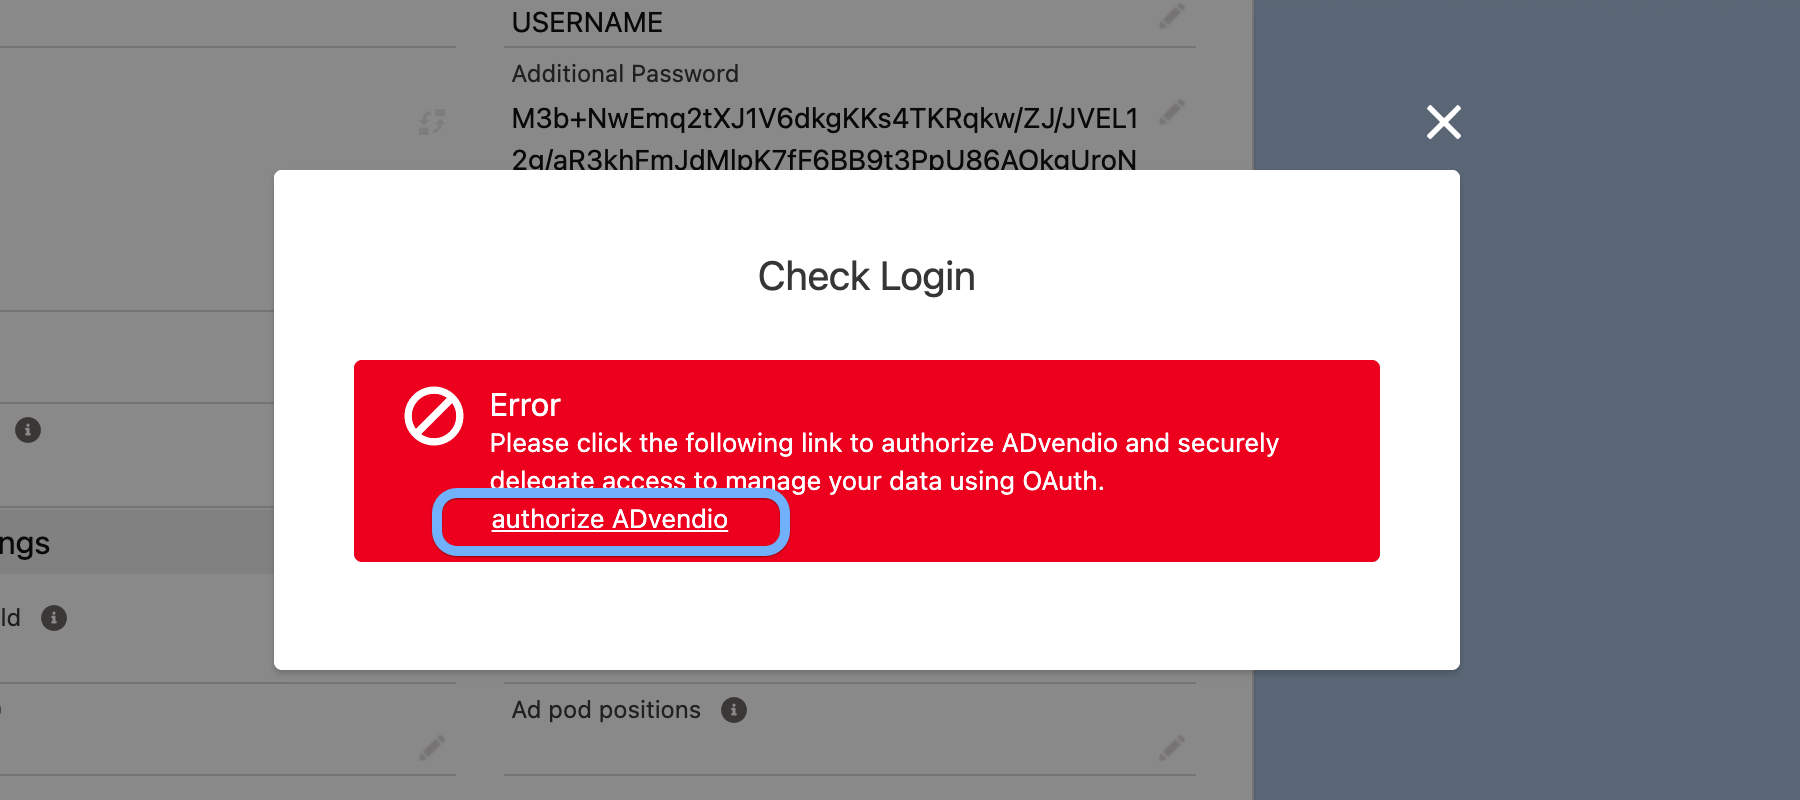
Once you click that, a new window opens.
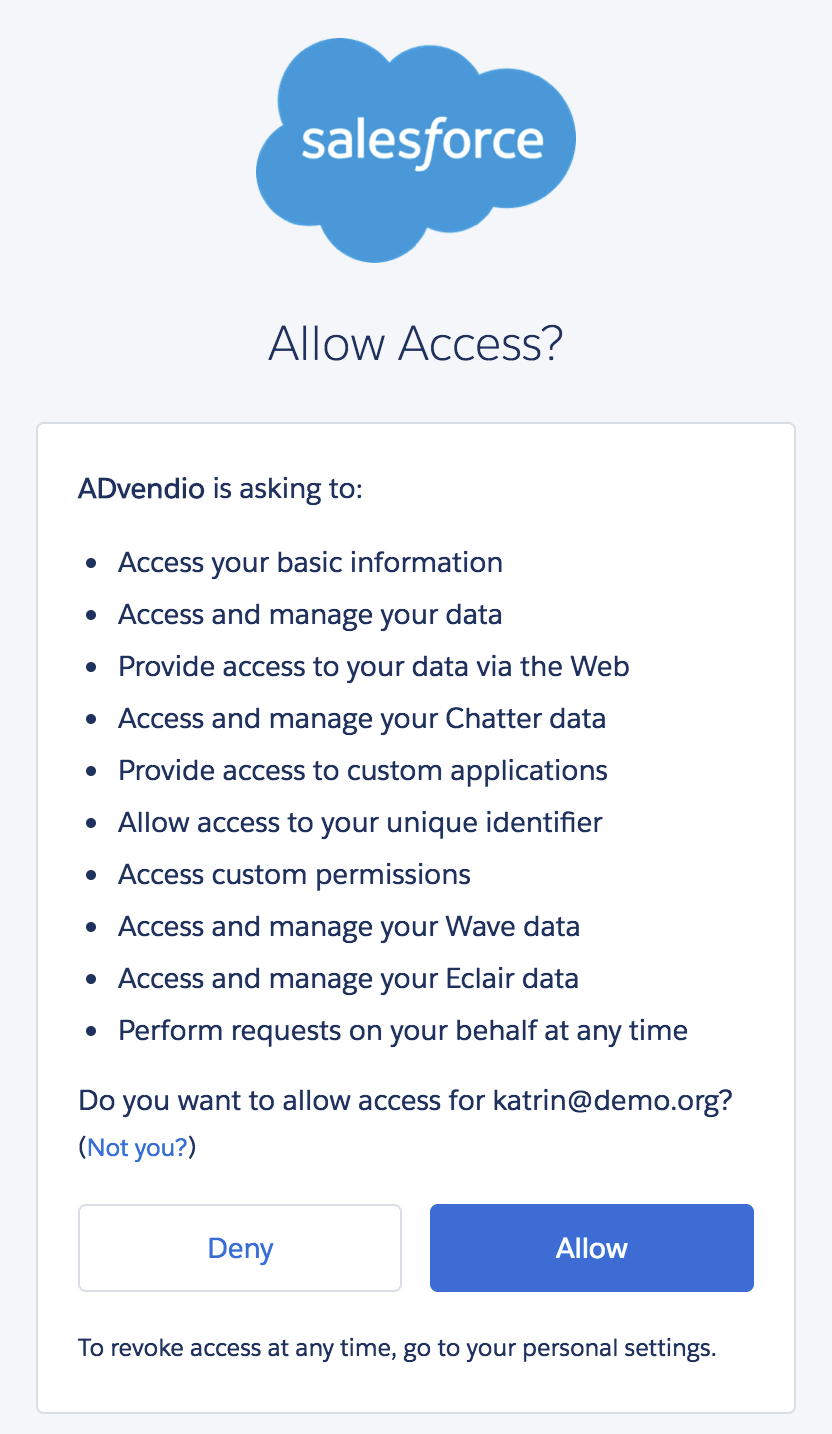
Click the blue allow button to finalize the process.
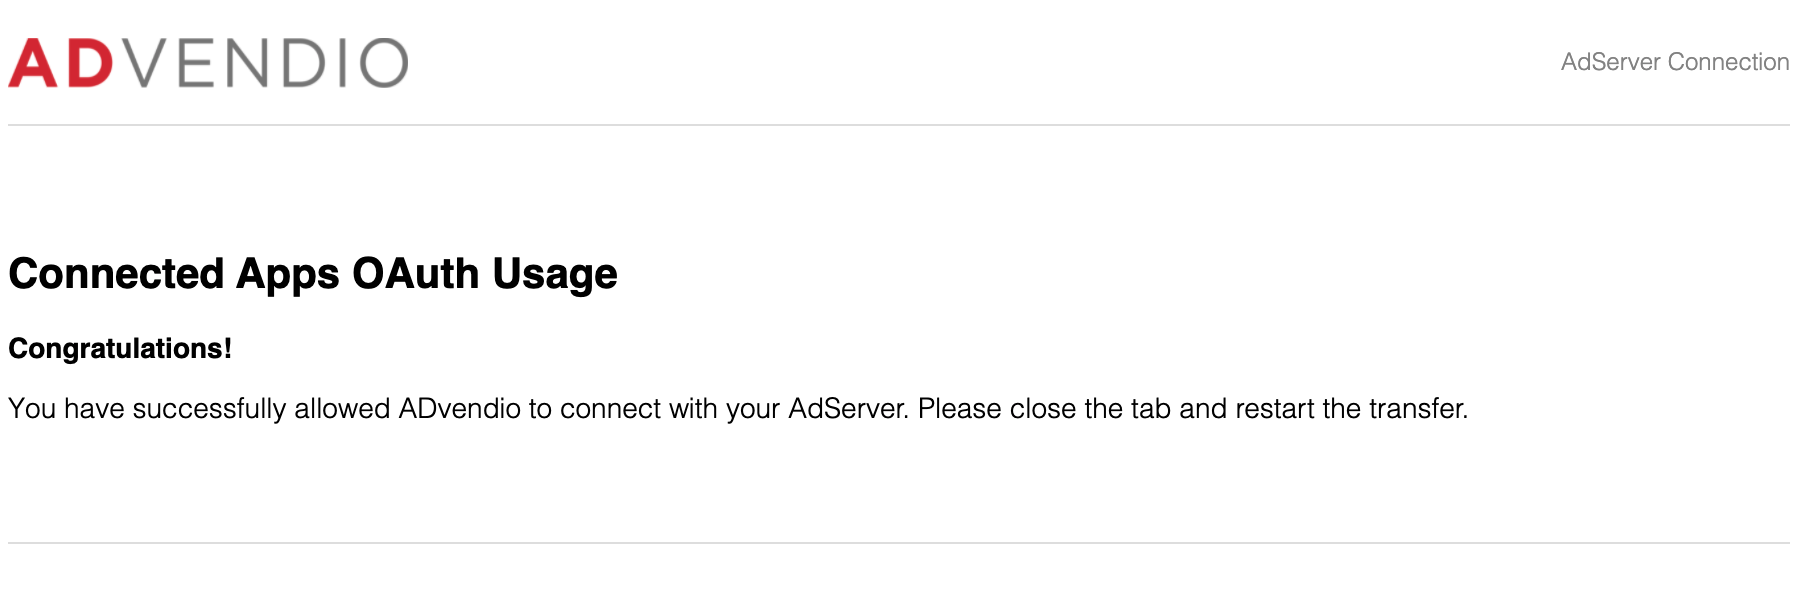
You have completed all the necessary steps and you can start to use our integration features!
In some cases the authorization process might need to log in again with your Salesforce Credentials, please do this in order to finish.
How to remove the authorization of ADvendio?
You can remove the authorization of ADvendio at any time, but this might require the support of a System Administrator, as access to the Salesforce Setup is needed.
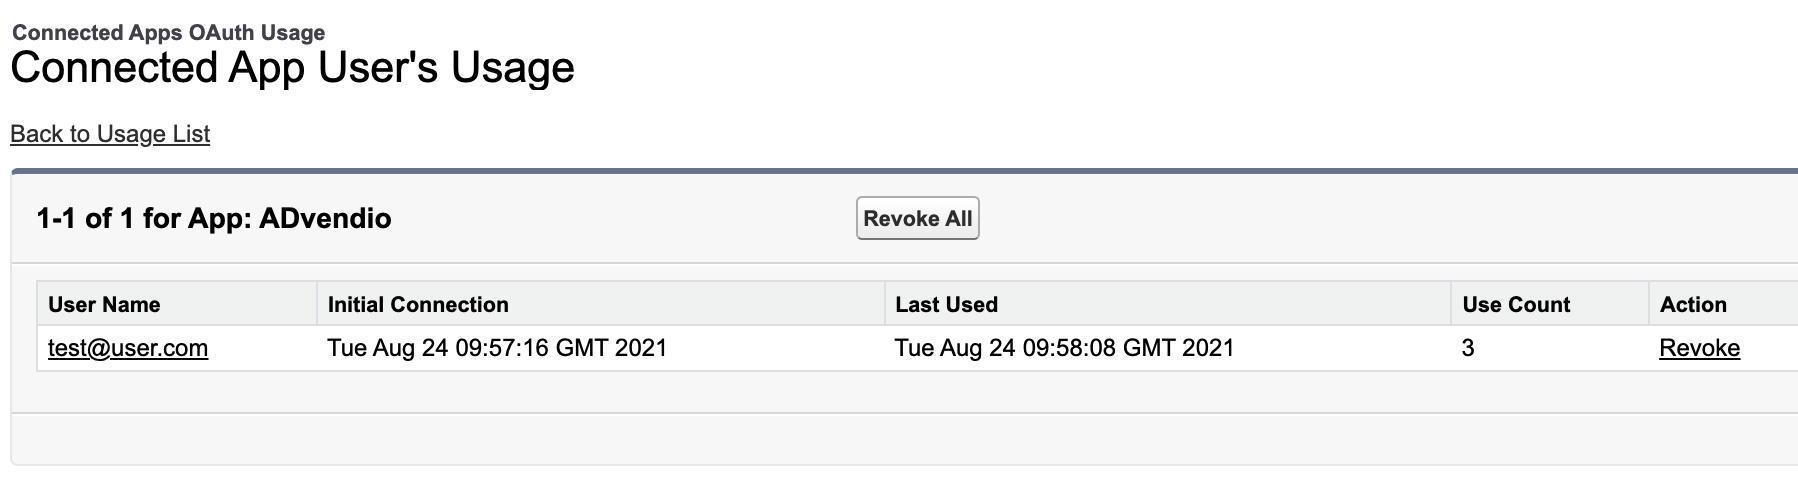
To do this, go to Salesforce Setup and look for ‘Connected Apps OAuth Usage’
In the list of connected apps, look for the ADvendio app and click on the number in the User Count column:

On the following page, you see all Users that are currently using the ADvendio connections. Simply click the revoke button on the right, to remove a user from the list. This user then can not use the ADvendio Connect features anymore and needs to authorize ADvendio again.
Use Custom Permission instead of letting Users self-authorize
Please keep in mind, you can only have one way for users to authenticate ADvendio. Either self-authorization or assigning via permissions.
Instead of letting users handle the authentication themselves, you can predefine permissions, for who has access and who has no access to the Connected App and all related features. This can be done as part of the Profiles & Permission Sets.
Change the ADvendio connected app settings
Go to the Salesforce Setup and look for the ‘Manage Connected Apps’ section.

Click the ‘Edit’ button next to the connected app called: ADvendio Connector.

You will be directed to a setup page where you can see a list of permitted users. Select the option ‘Admin approved users are pre-authorized
This now changed the ADvendio connection, so that users won’t authorize themselves, but the Admin chooses which users are authorized.
Assign ADvendio Connected App permissions
The next step is to grant access permissions to the required users for the ADvendio-connected app. This can be achieved through Permission Sets or User Profiles.
As an example, we demonstrate here how to perform the process for Permission Sets:
When editing your permission set, open ‘Assigned Connected Apps’
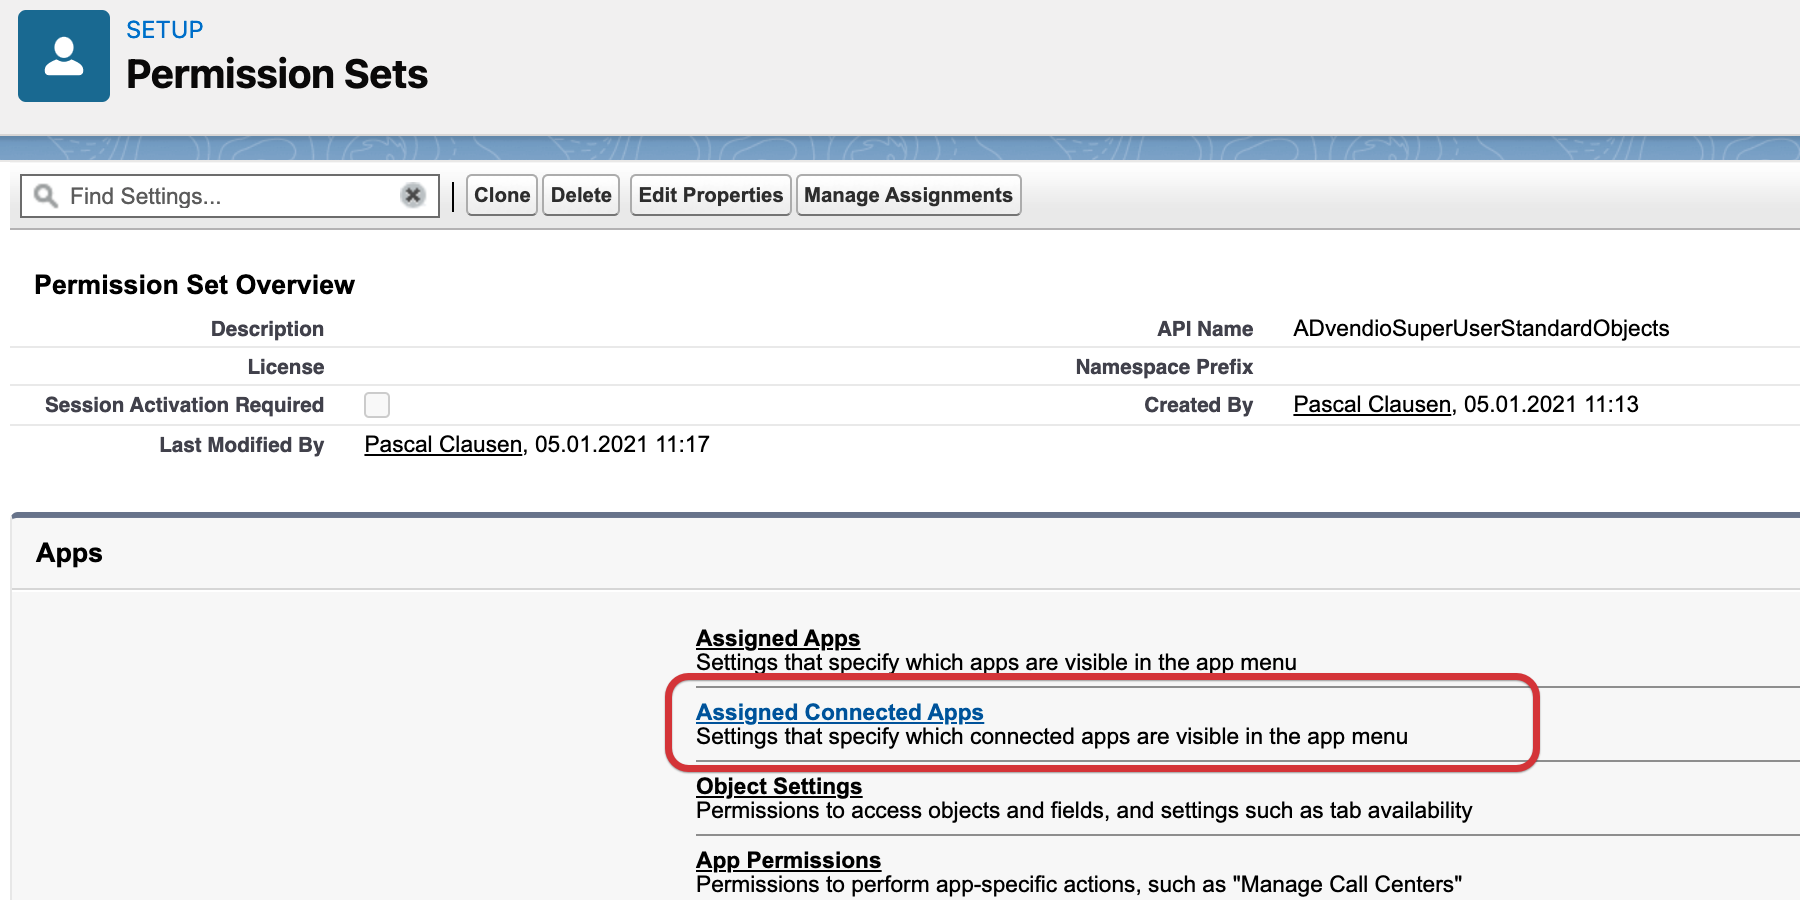
Now you see a list of all Connected Apps. Select ADvendio and Move ADvendio from the left list to the right list to enable it for the permission set.

Continue to save the permission set and assign it to the users, who need to access ADvendio connect.
App_ACCESS_DENIED Error
If you activate the Admin authorization as described above, some users might receive the following error message:

Connected Apps OAuth Usage
Something went wrong!
Error: OAUTH_APP_ACCESS_DENIED user is not admin approved to access this app. Please get in touch with your System Administrator for further support.
This means, that the user does not have the required permission to use the connected app ADvendio. Please check your Profile and Permission Set settings.
ADvendio Connected Apps
When reviewing the setup, you might see there are two connected apps:
ADvendio
ADvendio Connector
Starting Version 2.169, ADvendio Connector will be the app to use. The legacy ADvendio Connected App will be deprecated and not relevant anymore. You can proceed to click Uninstall, to remove it from your Org.
