Installing ADvendio is a very simple process and takes only a couple of minutes to complete. If you need assistance, our team is pleased to help you installing ADvendio. However, if you wish to install ADvendio by yourself, the following guide will help you.
There are two ways you may choose to start ADvendio in your system. This depends on your use of Salesforce.
Either you are already using Salesforce and would like to install ADvendio within your existing Salesforce environment (then please read chapter 1) or you do not have a Salesforce environment and want to test ADvendio. Then you can open a free 30 days trial on our website, which already includes the ADvendio package.
If you only want to update ADvendio to the latest version please have a look at this Wiki page: 7.1.1.2 Update ADvendio.
1. Prepare to install ADvendio within an existing Salesforce Environment
Please read the instructions from this chapter to ensure the correct installation of ADvendio in your existing Salesforce instance.
- First of all we ask you to check the fulfilment of the requirements. These settings are binding for the correct installation of ADvendio. Please read the requirements here: 7.1.1.1 ADvendio Requirements.
Please also check the following warning:
Package and Custom Objects and Fields
We highly recommend avoiding the usage of custom objects or fields that use the same API name as the ADvendio Package. So please make sure to rename any object you already have custom made.
Example to avoid:
- Advendio Package Object: ADvendio__Ad_Type__c vs.
- Your Custom Object: Ad_type__c
Applications and components are installed as packages.
- Click Setup to navigate to your installed packages.
- Click Installed Packages to see all packages.
- Check, if any package of ADvendio is already installed.
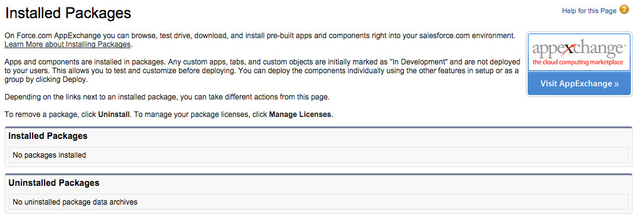
If ADvendio is already installed, you only need to update your version to the latest one. Therefore have a look at this article: 7.1.1.2 Update ADvendio.
- After this check you may finally start the installation as explained in the next chapter.
Note
2. Install ADvendio into an existing Salesforce environment
2.1 Login to Salesforce
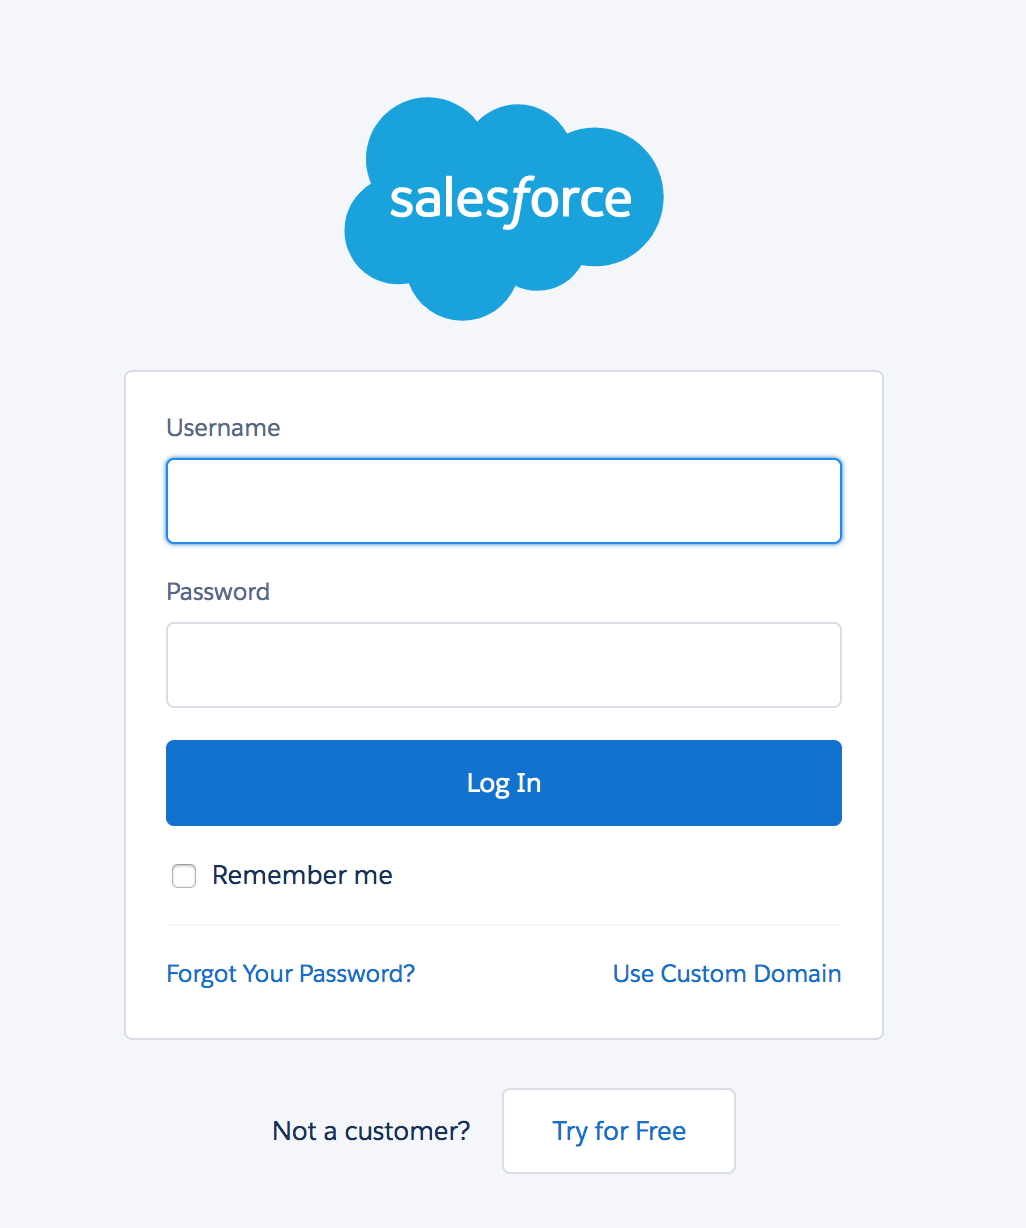
Enter your Salesforce User Name.
Enter your Password.
- Log in to Salesforce to proceed with the installation.
2.2 Release link
You find the installation links in our Release Notes. Make sure to always use the latest version. Then open the link in your browser and proceed directly with the installation as explained.
An alternative for you is the installation with the help of the Salesforce AppExchange.
2.3 Install the new Package
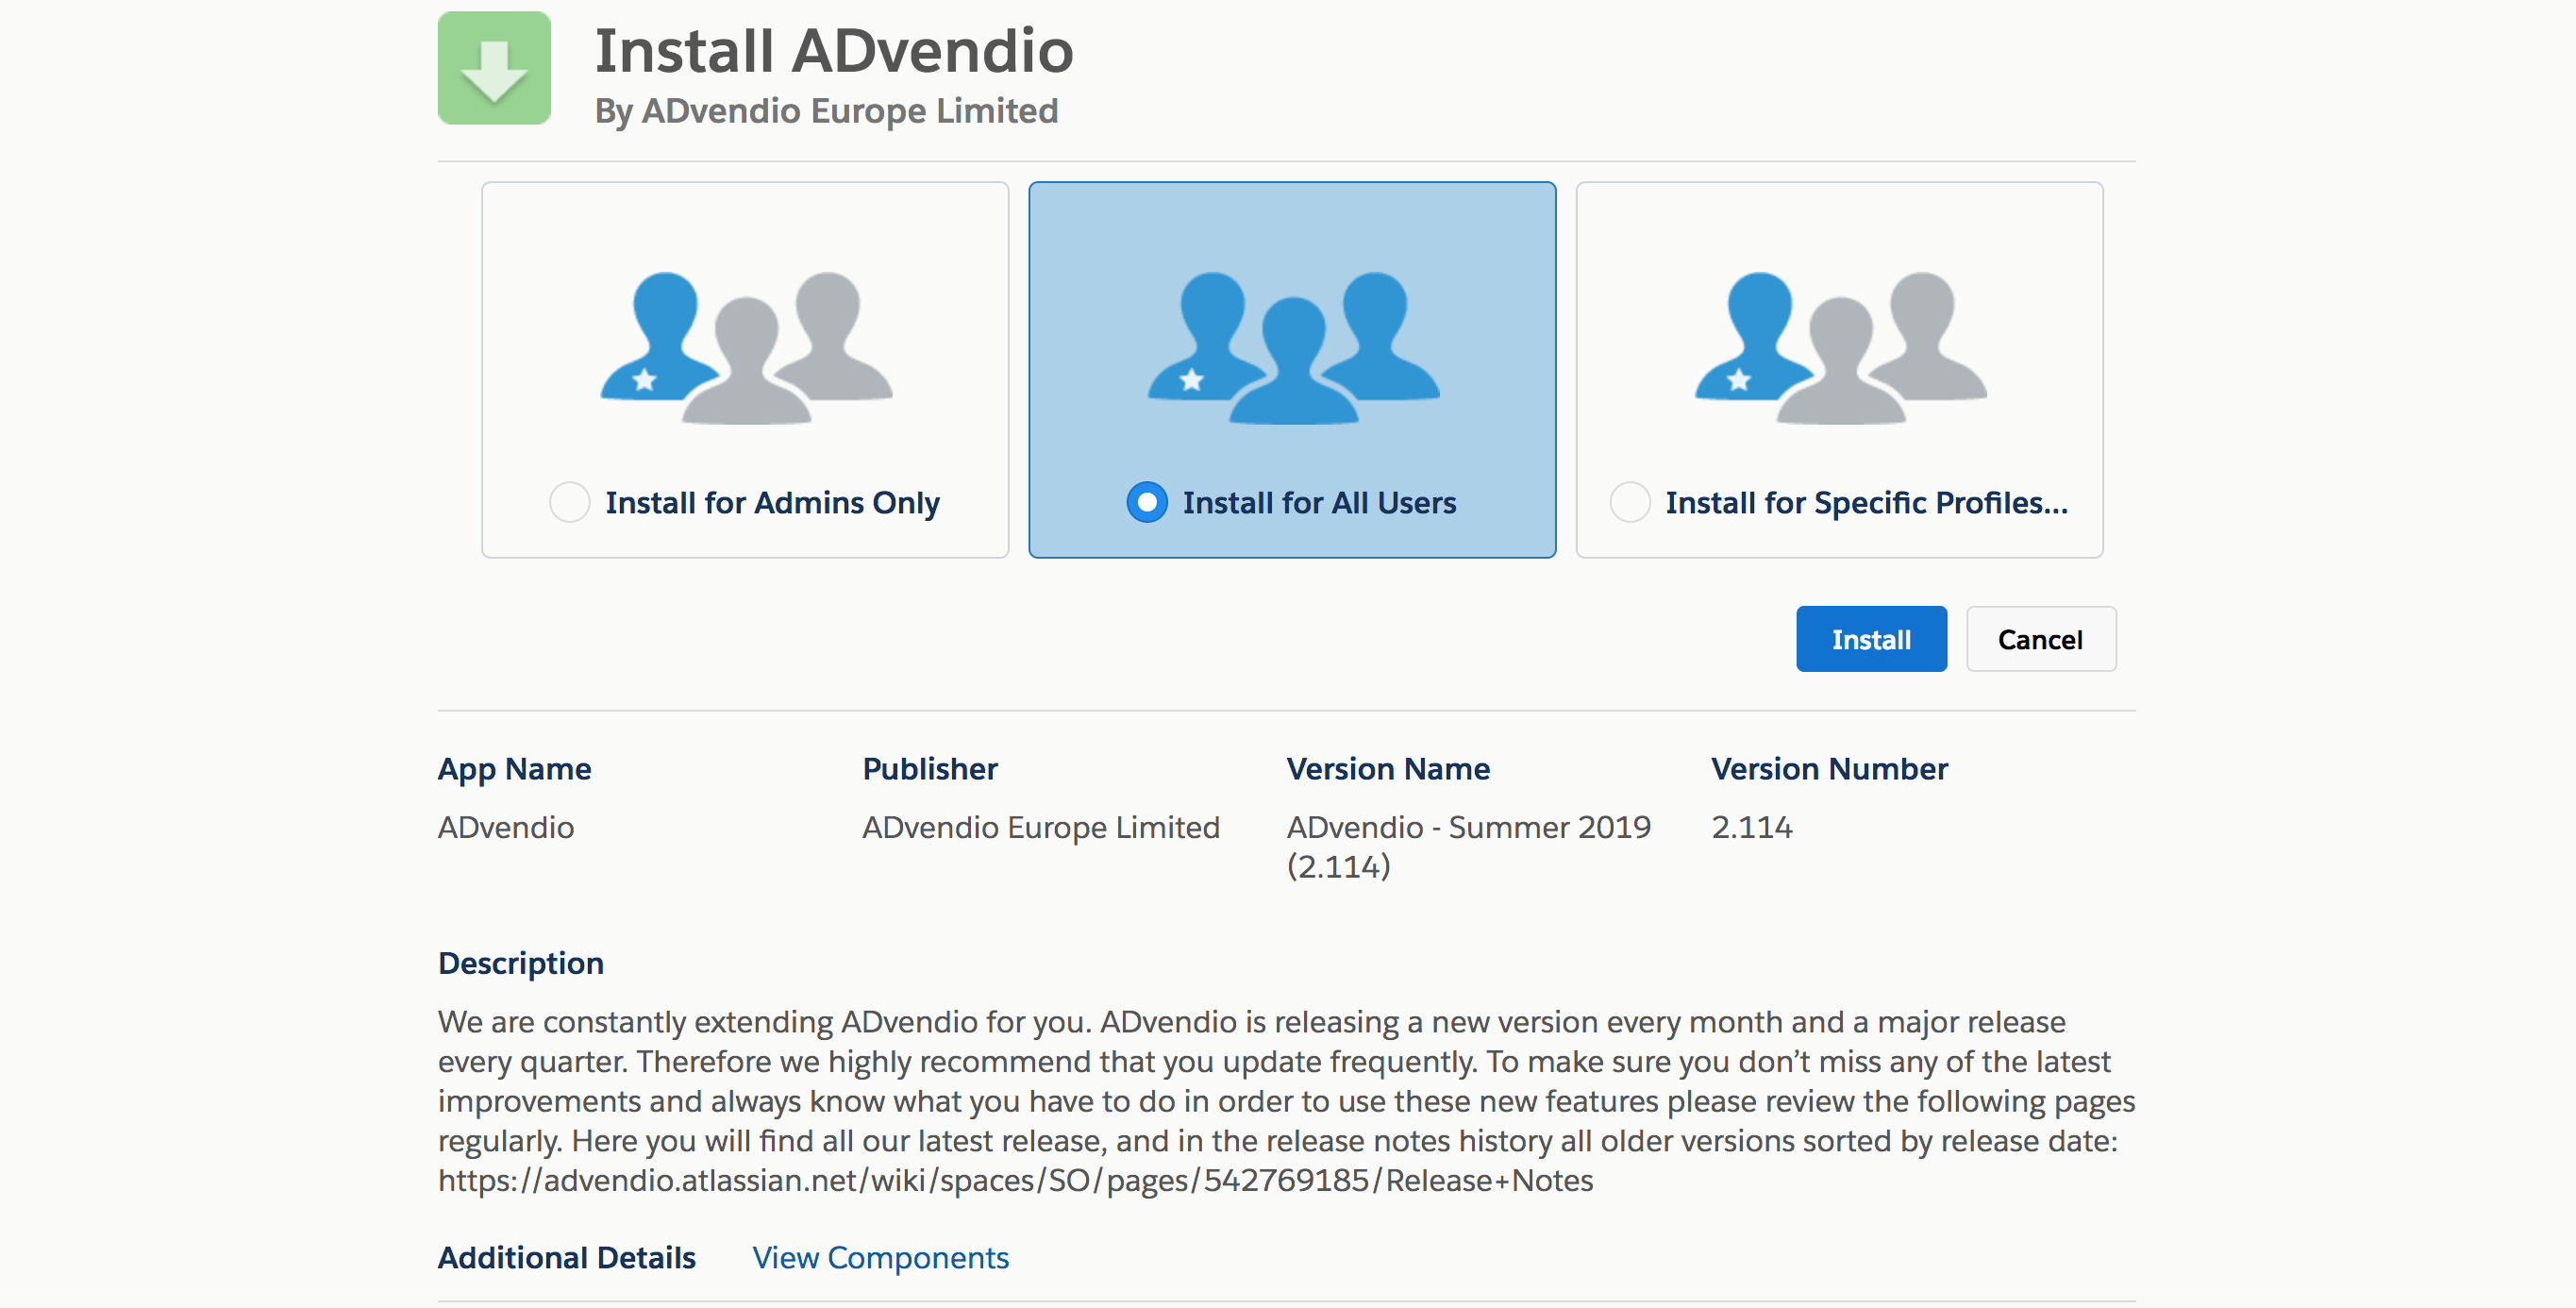
This step shows the package details like app name, publisher, version name and version number. You can also see all package components like pages, tabs, objects or fields below the description.
Please ensure, that Install for All Users is selected.
Click the button Install.
Please be careful at this step! Install for All Users ensures that all ADvendio objects and permissions are available for your profiles. This is the ideal option for most customers. If you are already using ADvendio, want to update to a new version and are using very specific user profiles, check out the following article for more information about how profiles and permissions are set during updates of ADvendio : 7.1.3.3 Profiles - Access and Object Permissions
Note: You might be asked to approve third-party access. Please mark the checkbox Yes, grant access to the third-party website and click the button Continue to proceed.
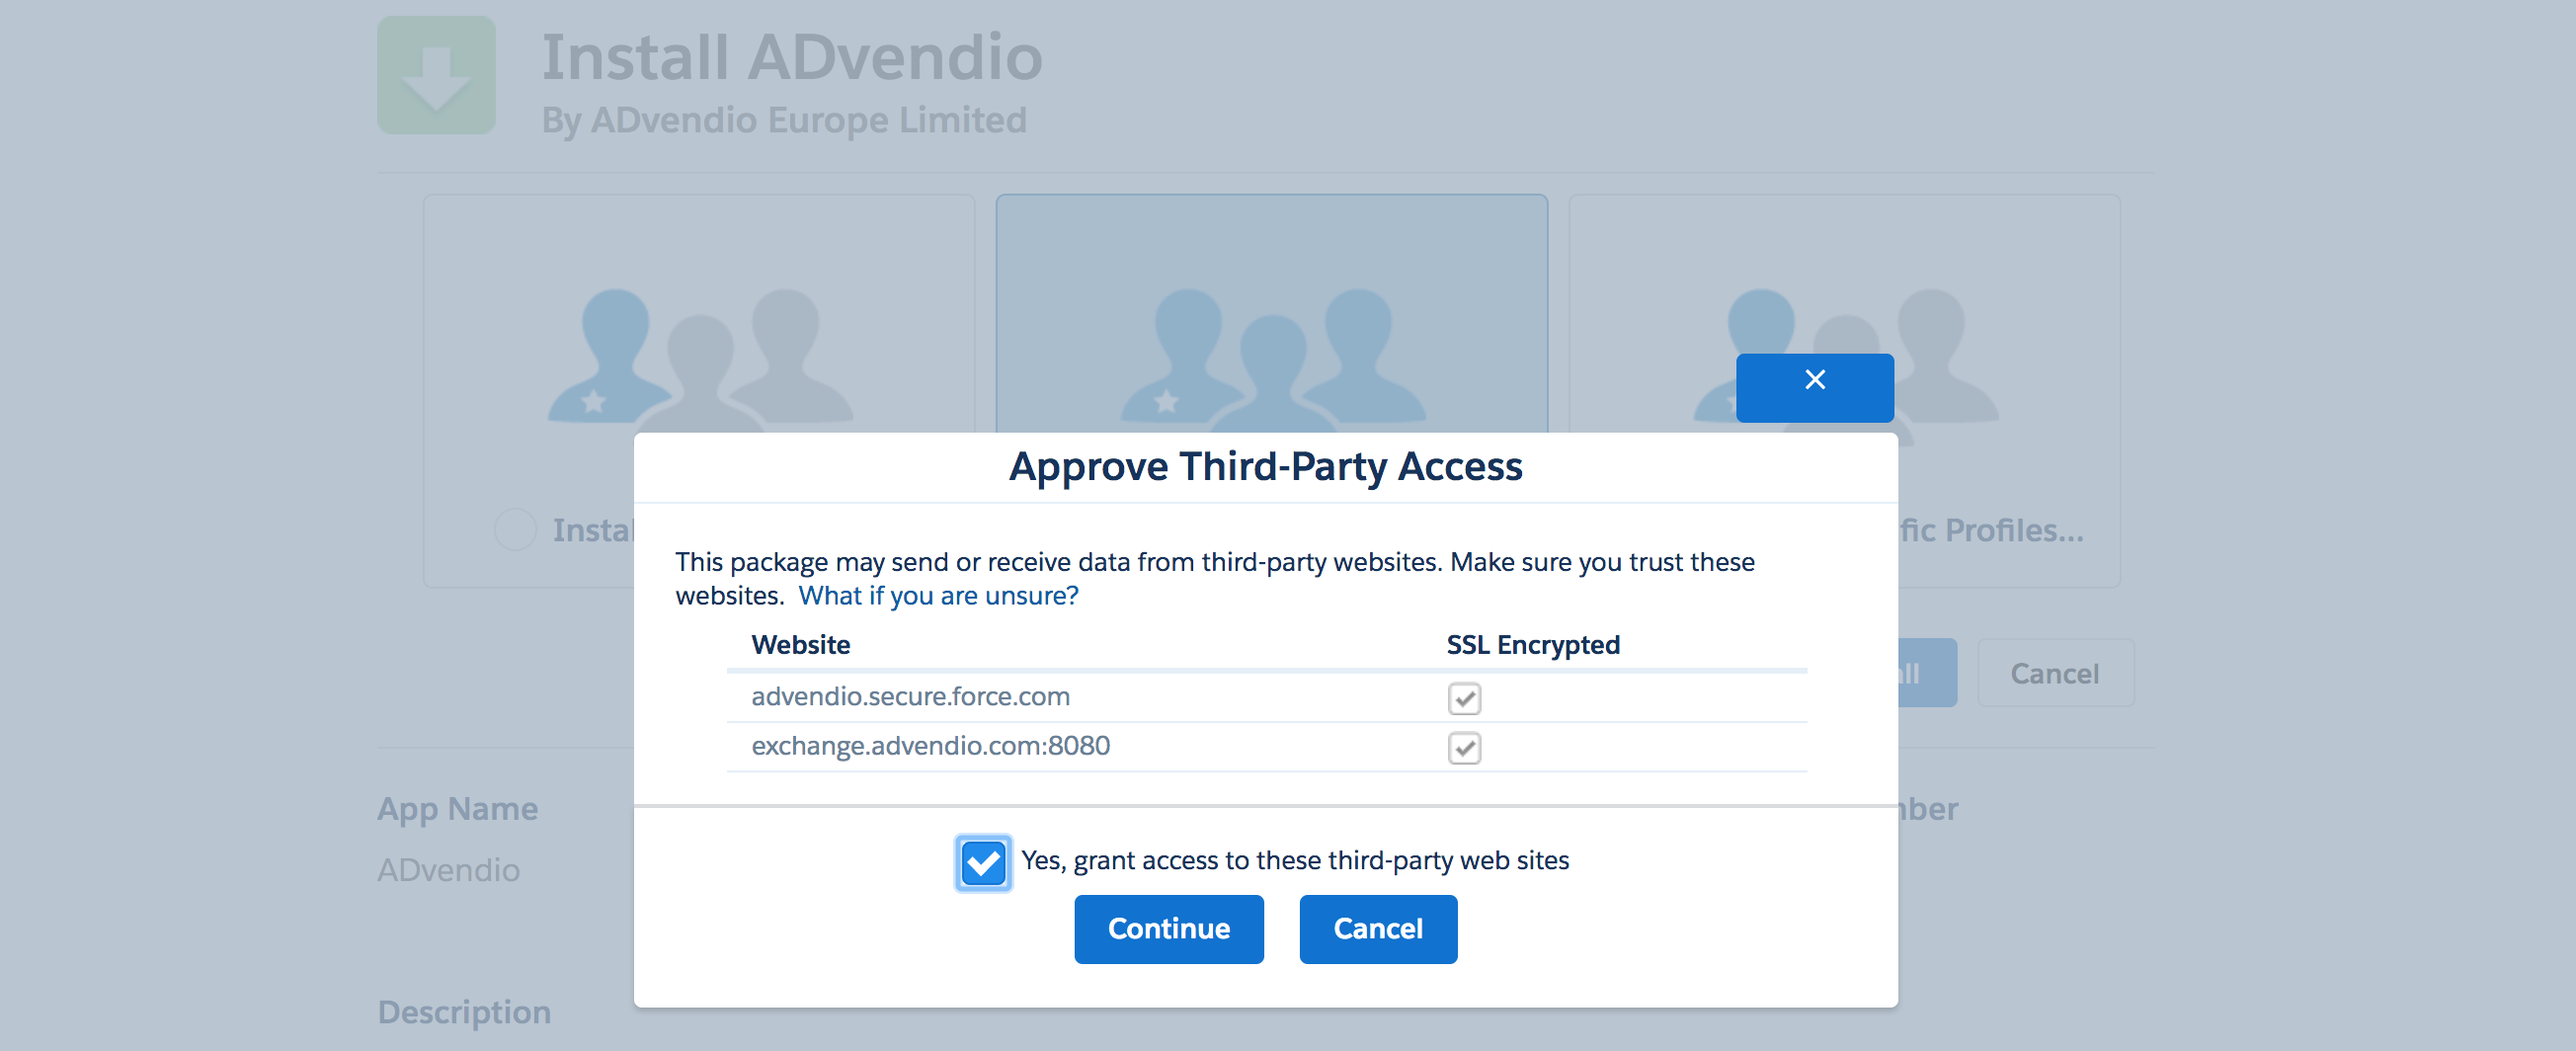
The package ADvendio requires third-party access to communicate via API with the ad server. That behavior is normal.
2.4 Grant Access Rights to Package
Learn more about 7.1.3.3 Profiles - Access and Object Permissions here.
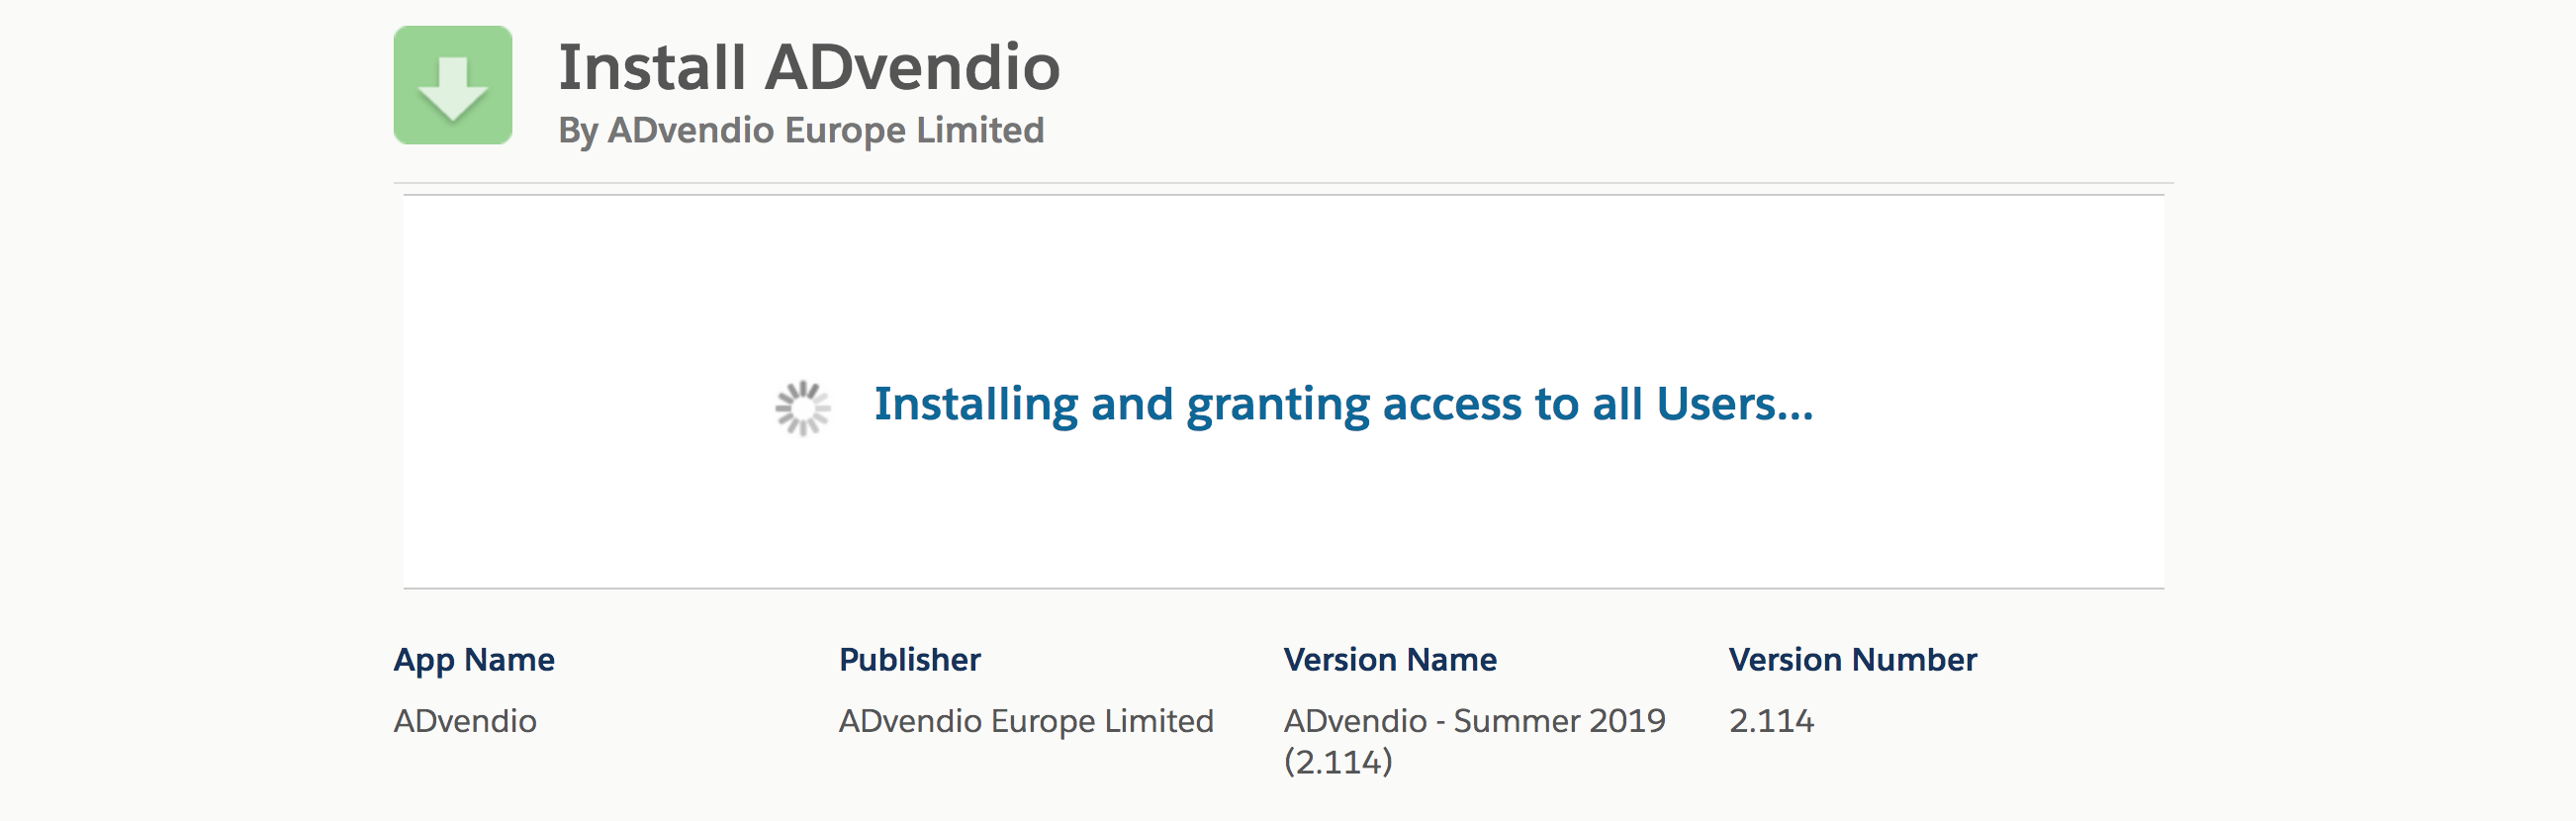
Please wait, until the installation process is completed.
2.5 Processing
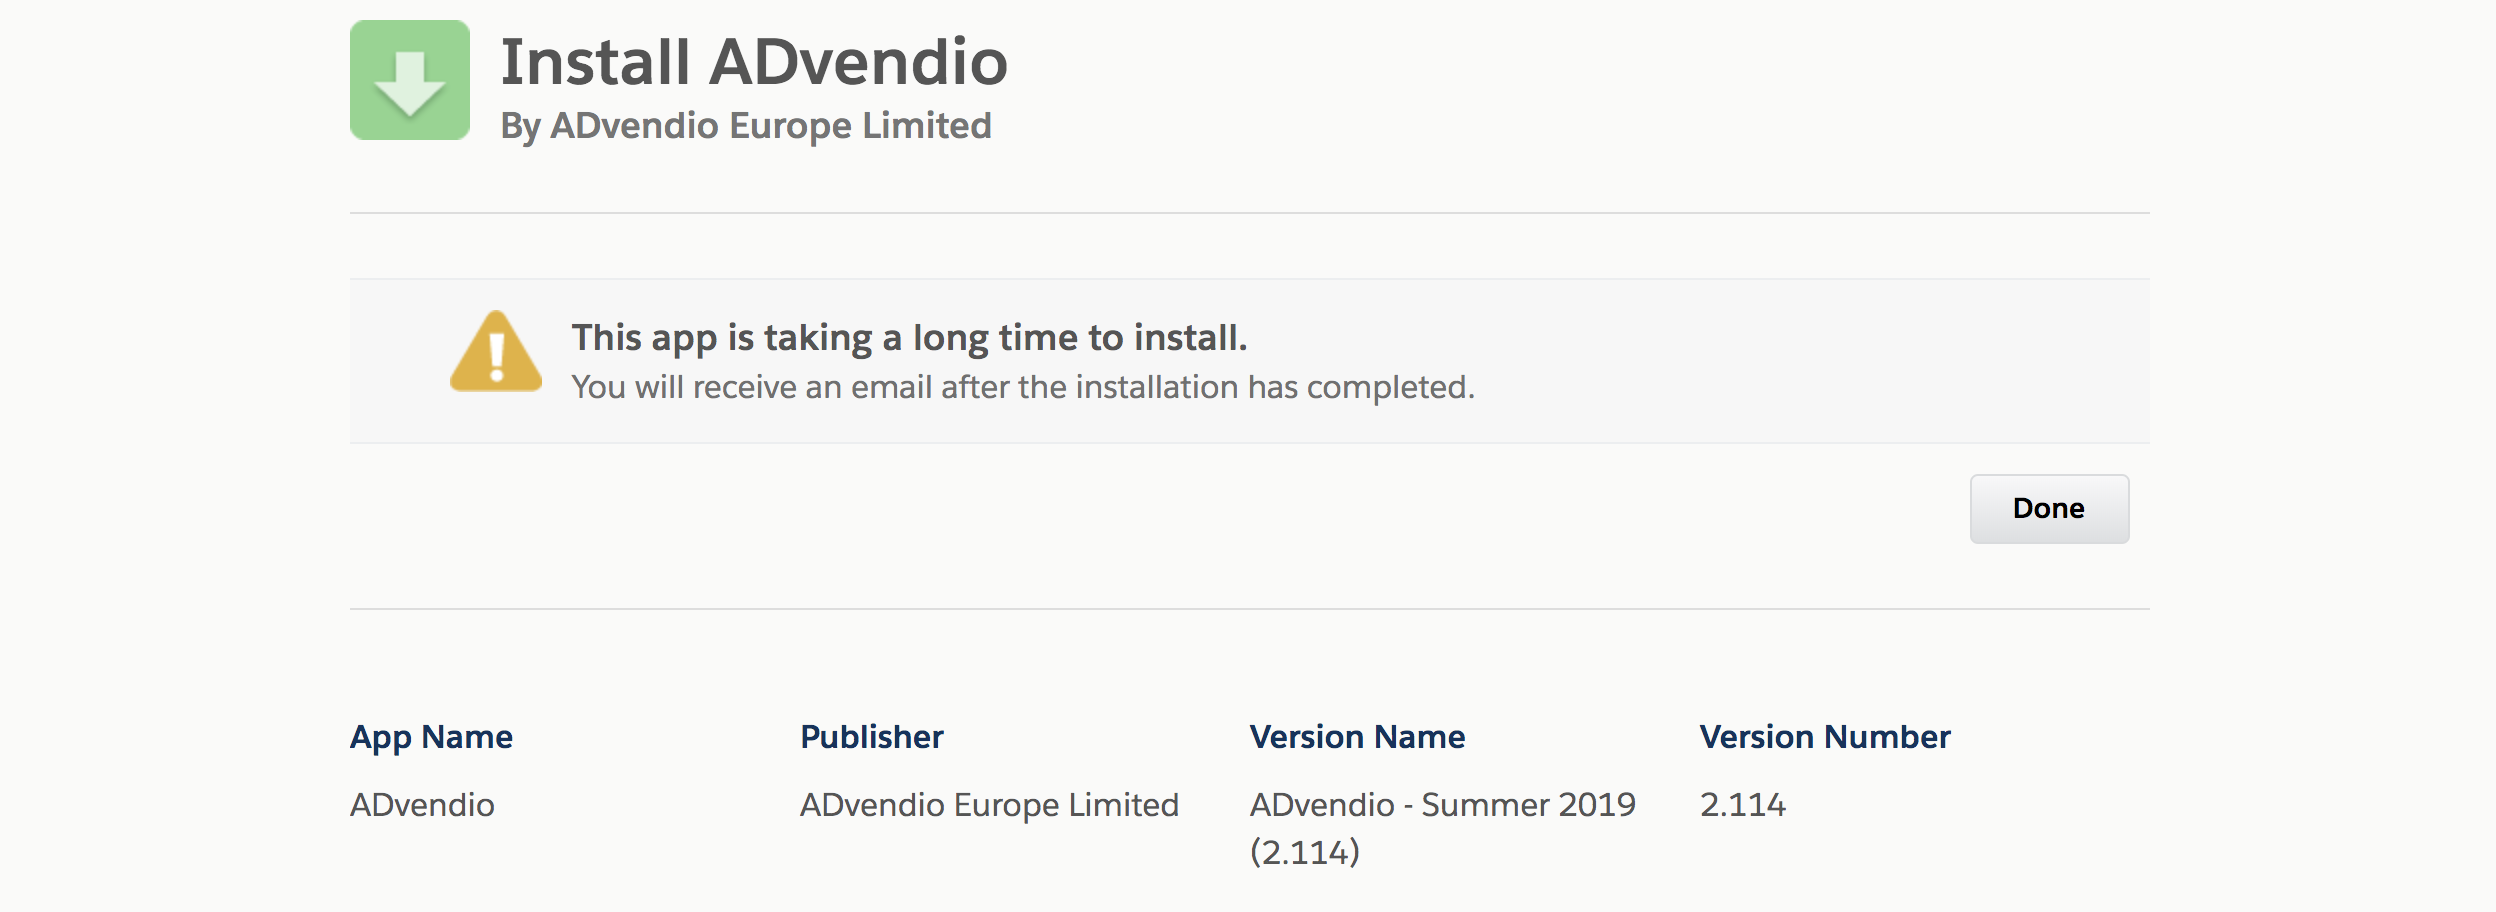
You will be notified by email when ADvendio is installed successfully. Please click the button Done.
2.6 Check your Installed Packages
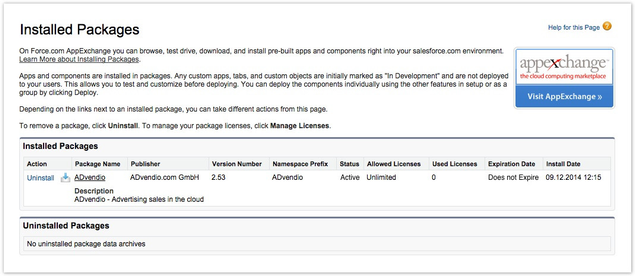
The installation process is complete! You can now start working with ADvendio.
Now that the installation is completed take a closer look at our knowledge base and our video section to customize ADvendio to your needs. The first steps help you with getting started. To be able to use ADvendio your media database needs to be structured as explained in the inventory management chapter. If you want to connect ADvendio with your ad server, find out how to enter your ad server login.
If you need any assistance in adjusting ADvendio and your existing Salesforce environment, don't hesitate to contact our support team.