1.4.2 Salesforce Lightning
Starting with ADvendio Version 2.82 ADvendio is Lightning Ready. This means you can completely use ADvendio with the new Lightning Experience activated. If you are already a customer of ADvendio looking to activate Lightning Experience in your Salesforce Org see also 8.8 Activate Lightning for detailed information about steps you need to undertake and the most important difference compared to using ADvendio in Salesforce Classic.
My migrating to to Lightning, you get access to the following LEX only features from ADvendio:
App Launcher
Administration is not done using the Overview Tab anymore but can be handled directly using apps and the App Launcher. You can use the
- ADvendio - Setup and Settings
- ADvendio - Inventory Management
- ADvendio - AdServer Interface
Apps to help you access the needed functions.
Activate Connected Apps OAuth Usage
When using ADvendio in Lightning, every user need to activate OAuth for ADvendio connected App in order to use functions (listed below) which communicate with ADvendio Servers outside of Salesforce.
This concerns the following functions:
- AdServer Interface functions (Check Login, Transfer Inventory, Forecast, Push, Delivery Data, Contending Line Items, Sell through report)
- Invoice Wizard (create PDF + send Emails)
- Email-Status / send failed mails
- Submitting of Emails
- PDF-Status / Create missing PDFs
- Merge PDFs in Billing Run
The process is fairly easy and done in two steps. Every user has to do this one and only has to repeat this if the administrator revokes access.
Step 1
Try to use one of the listed functions above:
Click on the link in the red bar: Authorize ADvendio.
Step 2
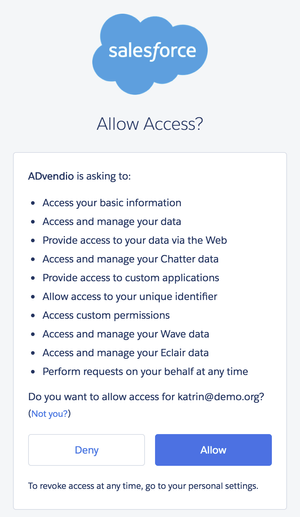
Click on the blue button "Allow". Then you can go back and click on the button again. This time the function should execute.
Additional Info
If you've allowed access and still receive the red "authorize ADvendio" message, try to log out of Salesforce and log in again. If you're still having problems, feel free to contact support@advendio.com


